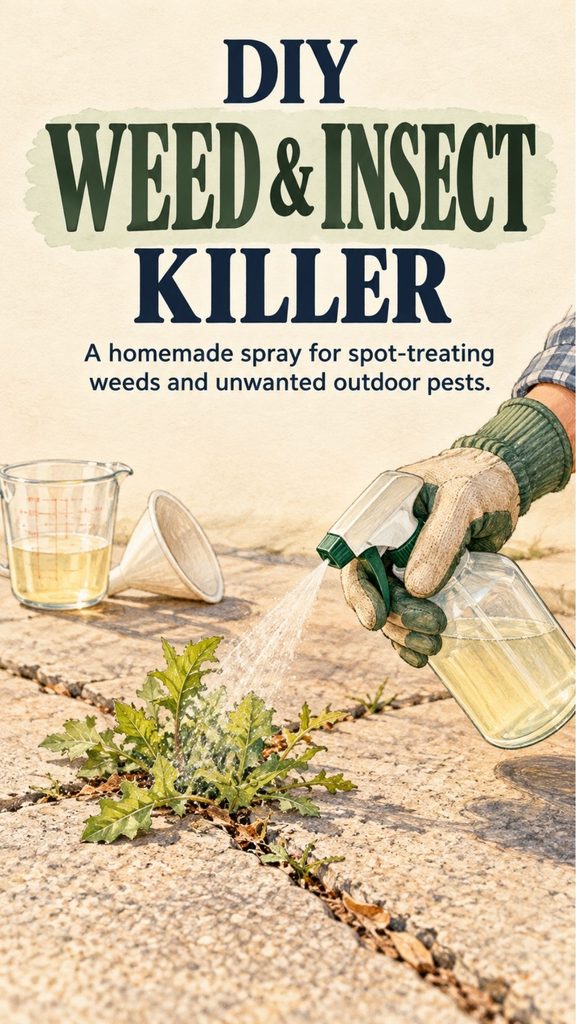
Weeds that push through driveway cracks, gravel paths, patios, and other hardscape areas can become frustrating surprisingly quickly. A few small seedlings are easy to pull, but once growth spreads across an area, many homeowners start looking for a faster way to control it.
One common homemade approach combines household vinegar, salt, dish soap, and rubbing alcohol. These ingredients can damage exposed plant tissue, which is why the mixture may cause young weeds to wilt after direct contact. The original formula uses 5% vinegar along with salt, dish soap, and rubbing alcohol. Pasted text
However, homemade does not automatically mean harmless. This type of spray is non-selective, meaning it may damage almost any plant it touches. Salt can also accumulate in soil, so the mixture is better reserved for cracks, gravel, and other places where you do not intend to grow desirable plants.
You Might Also Like:
- Loading posts...
A Simple Homemade Weed-Killing Spray
For a small batch, you will need:
- 1 cup white vinegar, 5% acidity
- 2 tablespoons salt
- 2 tablespoons dish soap
- 2 tablespoons rubbing alcohol
- A clean spray bottle
- A funnel, if available
Add the vinegar to the spray bottle first. Stir or dissolve the salt thoroughly before adding the remaining ingredients. Add the dish soap and rubbing alcohol, close the bottle securely, and mix gently.
Make sure the salt has dissolved as completely as possible. Undissolved crystals can settle at the bottom or interfere with the spray mechanism.
A funnel makes pouring easier and reduces spills.
What Each Ingredient Does
Each ingredient serves a different purpose.
Household vinegar contains acetic acid. When sprayed directly on foliage, it can damage plant tissue and cause the leaves to dry out. Household-strength vinegar generally acts as a contact treatment rather than reliably killing established roots.
Salt also draws moisture from plant tissue, but it comes with an important drawback: it can remain in the soil and make it difficult for plants to grow there later. That is why repeated salt applications are a poor choice for vegetable beds, lawns, flower borders, or other planted areas.
Dish soap acts mainly as a surfactant. It helps the liquid spread across the leaf surface instead of immediately beading up and rolling away.
Rubbing alcohol can also damage plant tissue by drying it, but stronger is not necessarily better. Increasing the concentration may increase the risk of damaging surrounding vegetation or surfaces without solving the underlying problem of deep-rooted weeds.
Where This Spray Makes the Most Sense
The safest place for a non-selective homemade weed spray is an area where desirable vegetation is not growing nearby.
Possible locations include:
- Cracks in concrete
- Paver joints
- Gravel driveways
- Along some hardscape edges
- Weeds emerging from unused paved areas
Avoid spraying it across lawns or garden beds.
Even a small amount of drift can injure nearby flowers, vegetables, shrubs, or turf. On windy days, droplets can travel farther than expected.
It is also wise to avoid repeatedly saturating the soil with salty mixtures. Killing one weed is useful; making the surrounding ground difficult to plant later is usually not.
How to Apply It
Choose a dry, calm day.
Spray the foliage of the unwanted weed rather than flooding the surrounding ground. Young weeds with tender leaves are generally easier to damage than mature plants with established root systems.
The goal is to wet the leaves without creating unnecessary runoff.
Avoid applying just before rainfall or irrigation, since the mixture may wash away before it has had much contact time.
Check the area later rather than immediately assuming the treatment worked completely. Foliage may brown while the roots remain alive.
Deep-rooted perennial weeds can regrow and may still need to be dug out.
Why Homemade Weed Sprays Sometimes Disappoint
One of the biggest misunderstandings about vinegar-based weed control is the difference between burning the foliage and killing the entire plant.
Contact sprays can make a weed look dead very quickly because the leaves collapse or turn brown. But that does not guarantee that the root system has died.
Established perennial weeds often store enough energy underground to produce new growth.
This is why the same weed may appear again days or weeks later.
Instead of repeatedly spraying a large established weed, digging it out with as much of the root as possible can be more effective.
A weed puller, hand trowel, garden fork, or hoe may solve the problem with no spray at all.
Try Boiling Water for Pavement Weeds
Boiling water is one of the simplest options for isolated weeds growing in pavement cracks.
Carefully pour the hot water directly over the weed. The heat damages the plant tissue quickly.
This works particularly well on young weeds and eliminates the need to leave salt behind in the soil.
The obvious hazard is the boiling water itself. Carry the container carefully, keep children and pets away, and avoid splashing yourself or nearby desirable plants.
This method is best for small areas rather than an entire yard.
Pull Weeds When the Soil Is Moist
Manual removal is still one of the most useful weed-control methods.
For weeds growing in soil, try pulling after rain or watering. Moist soil usually releases roots more easily than hard, dry ground.
Grip the weed close to the base and pull steadily.
For tap-rooted weeds, loosen the soil first with a narrow weeding tool or hand fork. Removing more of the root reduces the chance of regrowth.
This method takes more effort initially, but it avoids adding anything to the soil and gives immediate results.
Smother Larger Areas With Cardboard
If an entire bed is overgrown, spraying every plant individually may not be the most practical solution.
Cardboard can suppress vegetation by blocking light.
Cut tall weeds down first, then place plain cardboard over the ground. Overlap the pieces so light cannot easily reach the vegetation underneath. Wet the cardboard enough to help it settle into place, then cover it with an appropriate layer of mulch.
Check the area periodically for exposed gaps.
This method takes patience, but it can be useful when preparing a bed or reducing a large patch of unwanted growth without repeatedly spraying it. The source material also describes cardboard as a light-blocking weed-control method. Pasted text
Use Mulch to Prevent the Next Flush of Weeds
Removing existing weeds is only half of the job.
Bare soil provides another opportunity for weed seeds to germinate.
A suitable mulch layer can reduce the amount of light reaching the soil surface while helping conserve moisture around desirable plants.
Wood chips, shredded leaves, bark, straw, and other mulches can work depending on the setting.
Keep mulch away from direct contact with tree trunks and plant stems, and choose clean material appropriate for the plants you are growing.
Mulching will not permanently eliminate every weed, but it can greatly reduce the number that need to be removed later.
Be Cautious With Flame Weeding
Flame weeders are sometimes used on gravel or paved areas. They work by briefly heating plant tissue rather than necessarily burning weeds to ash.
They also introduce an obvious fire hazard.
Do not use flame equipment near dry leaves, dry grass, wooden structures, mulch, fences, fuel, or other combustible material. Local fire restrictions may also prohibit their use during dry periods.
If fire risk is elevated, choose another method.
For most small residential weed problems, pulling, boiling water, mulching, or carefully targeted treatments are easier options.
Store-Bought Herbicides Are Another Option
Persistent weeds sometimes require a registered herbicide, especially when a specific species continually regrows.
If using one, choose a product labeled for the weed and location you are treating rather than assuming all weed killers work the same way.
Some products are non-selective and can injure almost any vegetation they contact. Others are designed for particular types of weeds or certain lawn settings.
Read the current product label before mixing or applying anything. Follow the stated protective-equipment requirements, application rate, weather restrictions, and instructions concerning children and pets.
Using more than the label recommends does not make a product better.
Never Assume a Homemade Mixture Is Pet-Safe
A household ingredient can still cause irritation or other problems when used incorrectly.
Do not apply homemade weed mixtures directly to dogs, cats, or other animals, and do not use them as substitutes for veterinary flea or parasite products.
Similarly, avoid storing a weed solution in an unlabeled bottle where someone could mistake it for an ordinary household cleaner.
Clearly label the container and keep it away from children and animals.
A Better Long-Term Weed Strategy
The most effective weed control rarely depends on one miracle mixture.
Use the method that best matches the location.
Pull individual weeds from garden beds. Use mulch to limit new seedlings. Consider boiling water for isolated pavement cracks. Reserve non-selective homemade sprays for carefully targeted hardscape applications, and use registered products according to their labels when they are genuinely needed.
Most importantly, address weeds while they are still small.
A few minutes spent removing young growth regularly is usually easier than trying to eliminate a mature infestation later.
Homemade weed killer can be one useful tool, but it works best as part of a broader approach that combines removal, prevention, careful application, and realistic expectations.