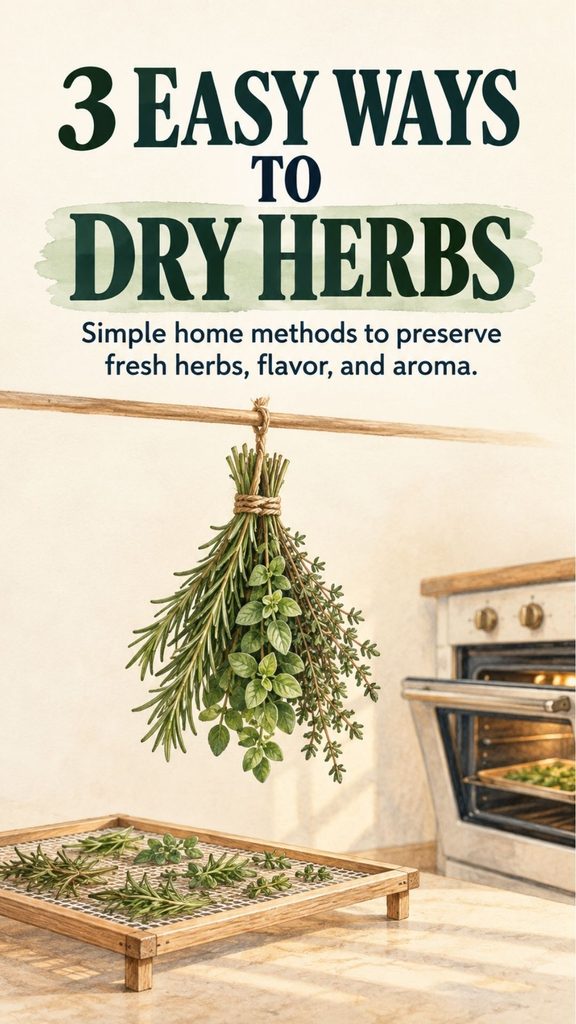
Fresh herbs are wonderful in the kitchen, but they rarely stay fresh for long after harvesting. Drying is one of the simplest ways to preserve an abundant harvest and keep homegrown herbs available well beyond the growing season.
You do not need complicated equipment to get good results. Many herbs can be dried by hanging them in small bundles, spreading them on a rack, or using an oven at very low heat. The best method depends on the herb, the humidity in your home, and how quickly you want the drying process to finish.
The most important goals are simple: remove moisture thoroughly, avoid excessive heat, provide enough airflow, and store the finished herbs away from light and humidity.
You Might Also Like:
- Loading posts...
Why Dry Herbs?
Fresh herbs contain a significant amount of water. Once harvested, that moisture makes them highly perishable.
Drying removes enough moisture to greatly slow the growth of microorganisms and the chemical reactions that cause herbs to deteriorate. Properly dried herbs are also lighter, take up less storage space, and are convenient for cooking.
Drying can be particularly useful when:
- Your garden produces more herbs than you can use fresh.
- Cold weather is approaching.
- You want to reduce food waste.
- You prefer making your own dried herb blends.
- You want to preserve herbs without freezing them.
Dried herbs will not taste exactly like fresh herbs. Some flavors become more concentrated, while delicate fresh aromas may fade. Still, properly dried herbs can remain highly useful for soups, sauces, roasted vegetables, marinades, teas made from suitable culinary herbs, and countless other recipes.
Choose the Right Time to Harvest
Good dried herbs begin with good fresh herbs.
For leafy culinary herbs, harvest healthy leaves before they become old, damaged, or discolored. Many herbs have excellent flavor shortly before or around the beginning of flowering, although the ideal timing varies by species.
If possible, harvest after morning dew has dried but before the hottest part of the day.
Avoid collecting wet herbs immediately after heavy rain unless you can dry them thoroughly before beginning the preservation process. Excess surface moisture slows drying and can encourage mold.
Inspect everything you harvest and discard:
- Yellow or diseased leaves
- Damaged stems
- Moldy material
- Decaying leaves
- Unwanted debris
Only preserve plant material that looks healthy and fresh.
Should You Wash Herbs Before Drying?
If your herbs are clean and were grown away from obvious contamination, brushing or shaking away loose debris may be sufficient.
If they need washing, rinse them gently under cool water.
The important step comes afterward: remove as much surface water as possible before drying.
Shake off excess moisture and spread the herbs over clean towels. You can also gently pat them dry.
Do not bundle wet herbs together. Moisture trapped inside a bundle makes drying slower and can encourage spoilage.
Prepare the Herbs for Drying
Remove damaged leaves and inspect the stems carefully.
For hanging, leave enough stem to tie the herbs into small bundles.
For rack or oven drying, you can remove individual leaves or leave short stems attached, depending on the herb.
Avoid crushing the leaves unnecessarily before drying. Keeping herbs relatively intact helps protect their aromatic compounds until you are ready to use them.
Now choose one of these three drying methods.
Method 1: Hang Herbs in Small Bundles
Air-drying by hanging is the traditional method and requires almost no equipment.
It works particularly well for relatively sturdy, lower-moisture herbs such as:
- Rosemary
- Thyme
- Oregano
- Sage
- Marjoram
How to Hang-Dry Herbs
Gather a few stems together.
Tie them near the cut ends with string, kitchen twine, or an elastic band. Keep the bundles fairly small. Large, dense bundles trap moisture in the center and dry less evenly.
Hang each bundle upside down in a location that is:
- Dry
- Well ventilated
- Protected from direct sunlight
- Away from cooking steam
- Away from excessive dust
Good airflow is more important than high temperature.
Direct sun may cause fading and can reduce the quality of delicate aromas, so a shaded indoor location is usually preferable.
You can loosely place a clean paper bag around a bundle if dust is a concern. Make several openings in the bag so air can circulate freely. Do not use an airtight plastic bag.
How Long Does Hanging Take?
There is no universal drying time.
Temperature, humidity, leaf thickness, bundle size, and airflow all affect the process. In a warm, dry environment, some herbs may dry within several days. In humid conditions, the process can take considerably longer.
Rather than relying on the calendar, check the herbs themselves.
Leaves should feel dry and crisp rather than soft or flexible.
Method 2: Dry Herbs on a Rack or Screen
Rack drying is an excellent alternative when herbs are too delicate to bundle or when you want greater airflow around individual leaves.
A mesh drying screen is ideal, but a cooling rack or another clean, food-safe surface that permits airflow can also work.
How to Rack-Dry Herbs
Arrange the leaves or small sprigs in a single loose layer.
Do not pile them on top of one another.
Leave enough space for air to circulate around the plant material.
Place the rack somewhere dry, shaded, and well ventilated.
If insects, dust, or pet hair are a concern, cover the herbs loosely with a clean breathable material without blocking airflow.
Turn the herbs occasionally if the underside is drying noticeably more slowly than the top.
Rack drying is especially useful for herbs with leaves that might fall from stems while hanging.
Watch the Humidity
Air drying becomes more difficult in very humid climates.
If herbs remain limp for a long time or begin developing an unpleasant smell, discontinue the batch rather than attempting to save questionable material.
A dehydrator or carefully controlled low-temperature oven may be a better choice when indoor humidity is consistently high.
Method 3: Dry Herbs in the Oven
Oven drying is faster, but it also requires the most attention.
Too much heat can brown the leaves and drive off aromatic oils, reducing flavor.
Use the lowest temperature your oven can reliably maintain.
Many household ovens do not operate at extremely low temperatures, so check your appliance before choosing this method. If the lowest setting is relatively hot, a food dehydrator may provide better control.
How to Oven-Dry Herbs
Spread clean, dry herbs in a single layer on a baking sheet.
Place them in an oven set to its lowest practical temperature.
Check them frequently.
The goal is to dry the herbs, not roast them.
Turn or rearrange the leaves if necessary so they dry evenly.
Remove individual pieces as soon as they become completely crisp.
Drying times vary considerably according to leaf thickness, moisture content, oven temperature, and the amount of material being dried.
Thin leaves can dry much faster than woody herbs.
Never leave the process unattended for long periods.
How to Know When Herbs Are Fully Dry
This is one of the most important parts of the entire process.
Herbs placed into storage while still damp can spoil.
For leafy herbs, look for these signs:
- Leaves feel crisp.
- They crumble when rubbed between the fingers.
- Stems snap rather than bend.
- There are no cool, soft, or damp areas.
Thicker stems may take longer than leaves.
If you are uncertain, allow the herbs more drying time.
Slight overdrying is generally preferable to sealing residual moisture inside a storage container.
Let Herbs Cool Before Packing Them
Herbs dried with heat should cool completely before being sealed.
Putting warm herbs directly into an airtight container can cause condensation, introducing moisture back into something you just worked to dry.
Spread them out briefly at room temperature until completely cool.
Then inspect the batch once more and remove anything that still feels soft or looks damaged.
Store Dried Herbs Properly
Storage conditions have a major effect on quality.
Place dried herbs in clean, completely dry, airtight containers.
Glass jars with tight-fitting lids are convenient because they allow you to inspect the contents easily. Food-safe airtight containers can also work.
Store the containers somewhere:
- Cool
- Dry
- Dark
- Away from the stove
- Away from direct sunlight
Heat, moisture, air, and light gradually reduce the flavor and aroma of dried herbs.
A pantry or cupboard is usually a better location than an open shelf beside the stove.
Keep Leaves Whole Until You Need Them
Whenever practical, store dried leaves whole or only lightly broken.
Crushing them immediately creates more exposed surface area, allowing aroma to fade faster.
Instead, crumble the leaves between your fingers just before adding them to a dish.
Remove tough stems before use when appropriate.
Label Every Container
It is surprisingly easy to forget what is inside a jar several months later, especially when dried herbs begin to resemble one another.
Label each container with at least:
- Herb name
- Drying or packing date
If you make a blend, list the ingredients as well.
Dating your jars also makes it easier to use older herbs first and periodically replace herbs that have lost much of their aroma.
How Long Do Home-Dried Herbs Last?
Properly dried and stored herbs can remain usable for a long time, but their flavor gradually weakens.
Instead of relying only on a fixed expiration date, inspect them before use.
Open the container and smell the herbs.
If the characteristic aroma is still strong, they can usually continue contributing useful flavor. If the scent has become faint and the herbs taste dull, replacing them will give better cooking results.
Discard the entire batch if you notice moisture, mold, unusual discoloration, or an unpleasant odor.
Herbs That Are Especially Easy to Dry
Some herbs retain their character particularly well after drying.
Good candidates include:
- Oregano
- Thyme
- Rosemary
- Sage
- Marjoram
- Bay leaves
More tender herbs such as basil, parsley, cilantro, mint, and chives can also be preserved, but their results and drying requirements differ. Some delicate herbs lose more of their fresh character when dried and may be better frozen depending on how you plan to use them.
Make Your Own Herb Blends
Once the herbs are completely dry, you can store them individually or combine them into seasoning blends.
A simple Italian-style mixture might contain:
- Oregano
- Basil
- Rosemary
- Thyme
A poultry seasoning blend might combine:
- Sage
- Thyme
- Rosemary
- Marjoram
Keep blends dry and airtight just as you would individual herbs.
Making small batches is usually better than preparing a year’s supply at once because the herbs remain more aromatic.
Common Herb-Drying Mistakes
Most unsuccessful batches can be traced to a few avoidable problems.
Making Bundles Too Large
Thick bundles restrict airflow and can remain damp in the center.
Use several small bundles instead.
Drying in Direct Sun
Strong sunlight can fade leaves and reduce aroma.
Choose shade with good airflow.
Using Too Much Heat
Higher temperatures may speed up drying but can also reduce quality.
Dry gently whenever possible.
Packing Herbs Before They Are Completely Dry
This is the most serious mistake.
Residual moisture inside an airtight jar can lead to spoilage.
Storing Herbs Beside the Stove
Heat and cooking steam are poor storage companions.
Use a cool cupboard instead.
Grinding Everything Immediately
Whole dried leaves generally protect their aroma better than finely crushed herbs.
Crush only what you need.
Which Drying Method Should You Choose?
For sturdy herbs in a dry climate, hanging is simple and effective.
For individual leaves and small quantities, rack drying provides excellent airflow and makes inspection easy.
For humid conditions or when you need faster results, carefully controlled low-temperature drying can be more practical.
There is no single best technique for every herb or every home. The best method is the one that removes moisture thoroughly without scorching the plant material.
Preserve the Harvest Instead of Wasting It
Drying herbs is one of the easiest preservation skills to learn.
Harvest healthy plants, remove surface moisture, dry them with plenty of airflow and minimal heat, and do not put them into storage until they are genuinely crisp. Keep the finished herbs sealed away from light, warmth, and humidity.
Once you get into the habit, even a small herb garden can provide jars of oregano, rosemary, thyme, sage, and other seasonings long after the fresh growing season has ended.