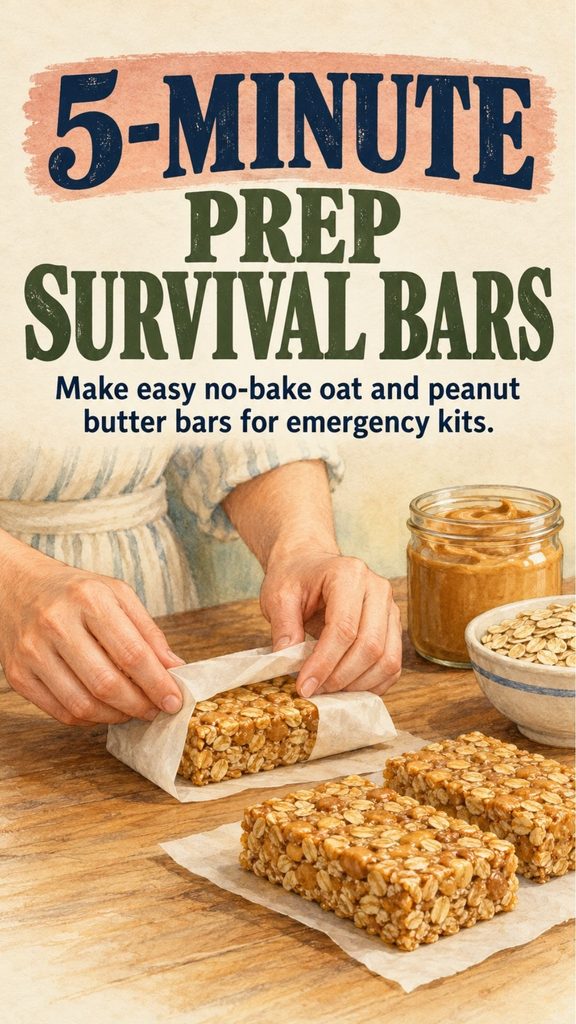
Having a few dependable food options ready for an emergency can make a difficult situation easier to manage. A sudden power outage, an unexpected evacuation, or a long day without access to a kitchen can leave you searching for something filling that doesn’t require cooking.
That’s where homemade pantry survival bars can come in handy.
Made with rolled oats, peanut butter, honey, and a few optional additions, these simple bars are easy to prepare using ingredients many households already keep in their cupboards. They provide carbohydrates, fats, and some protein in a compact snack that can be prepared ahead of time.
You Might Also Like:
- Loading posts...
The best part is that mixing everything takes approximately five minutes. There’s no baking, no complicated equipment, and no special emergency-food ingredients required.
There is one important distinction, though: homemade no-bake bars should not automatically be considered shelf-stable survival rations. Unlike commercially manufactured emergency bars, this homemade recipe hasn’t undergone testing to establish a safe unrefrigerated shelf life. It’s best treated as a refrigerated or frozen make-ahead snack rather than something to leave in a hot vehicle or emergency backpack for months.
With that in mind, these pantry bars are a practical addition to everyday meal preparation, short outings with appropriate storage, and an emergency food plan that also includes genuinely shelf-stable supplies.
Why Homemade Survival Bars Are Worth Making
Emergency food should be convenient, familiar, and reasonably easy to eat when normal routines are interrupted.
Homemade oat bars offer several benefits.
Minimal preparation: You can combine the ingredients in one bowl without using an oven or stovetop.
Simple ingredients: Oats, nut butter, and honey are common pantry staples.
Concentrated energy: Peanut butter and honey contribute substantial energy without adding much volume.
Customizable flavor: Nuts, seeds, dried fruit, and spices can change the taste and texture.
Individual portions: Once firm, the mixture can be divided into bars and wrapped for convenience.
Everyday usefulness: These bars can serve as snacks for workdays, hikes, road trips, and other activities when stored appropriately.
Homemade bars also help you become more familiar with preparing simple food from pantry supplies.
However, they aren’t a complete emergency meal replacement. They provide useful energy but lack the full range of nutrients, fluids, and dietary variety needed for long-term survival.
Homemade Pantry Survival Bars Recipe
<text preserveWhitespace={true}>Prep time: Approximately 5 minutes
Chilling time: 30–60 minutes
Total time: Approximately 35–65 minutes
Yield: 8 large or 12 smaller bars
Method: No-bake</text>
Ingredients
- 2 cups rolled oats, old-fashioned or quick-cooking
- 1 cup creamy peanut butter
- 1/2 cup honey
- 1/2 teaspoon salt, or less if using salted peanut butter
Optional Additions
- 1/2 cup raisins or dried cranberries
- 1/2 cup chopped nuts or seeds
- 1/4 cup mini chocolate chips
- 1/2 teaspoon ground cinnamon
- 1 tablespoon unsweetened cocoa powder
- 1–2 tablespoons ground flaxseed
You don’t need to add everything.
Choose one or two additions that complement the basic mixture. Too many dry ingredients can make the bars difficult to press together.
If you use maple syrup instead of honey, expect a somewhat different texture. Honey is particularly useful in this recipe because its thick consistency helps bind the oats.
Step-by-Step Instructions
Step 1: Mix the peanut butter and honey
Add the peanut butter and honey to a large mixing bowl.
Stir until smooth and evenly combined.
If the peanut butter has separated in its jar, stir it thoroughly before measuring.
The mixture should be thick but easy enough to spread.
Step 2: Add the dry ingredients
Pour in the rolled oats and salt.
Add any optional ingredients, such as dried fruit, cinnamon, or chocolate chips.
Stir thoroughly until the oats are evenly coated.
The mixture should feel thick and sticky rather than loose and crumbly.
If it’s too dry to hold together, add a small spoonful of peanut butter or honey. If it’s excessively sticky, add a little more oats.
Step 3: Prepare the pan
Line an 8-inch square pan with parchment paper, leaving enough paper extending over the edges to lift out the finished mixture.
Transfer the oat mixture into the pan.
Spread it evenly with a spatula or the back of a spoon.
Step 4: Press everything firmly
Press the mixture down firmly to create a compact, even layer.
This is one of the most important steps.
A loosely packed mixture tends to crumble when sliced, while firm compression helps the ingredients stay together.
Place another piece of parchment paper over the surface and press with the bottom of a flat measuring cup if necessary.
Step 5: Refrigerate until firm
Place the pan in the refrigerator for approximately 30–60 minutes.
The mixture will become firmer as it chills.
Avoid cutting the bars immediately after mixing because they may be too soft to hold their shape.
Step 6: Slice into individual bars
Lift the chilled mixture from the pan using the parchment paper.
Place it on a cutting board and use a sharp knife to divide it into eight large bars or twelve smaller portions.
Wrap them individually or arrange them in an airtight food-storage container.
Refrigerate promptly.
Your homemade oat bars are now ready to enjoy.
How Much Energy Do These Bars Provide?
The ingredients in these bars supply energy from several sources.
Rolled oats contain carbohydrates, fiber, and some protein.
Peanut butter supplies fats, protein, and additional calories.
Honey contributes carbohydrates in the form of sugars.
The resulting bars are relatively energy-dense compared with many lightweight snacks.
Depending on ingredient brands, portion sizes, and optional additions, a large bar may provide roughly 300 calories or more.
That’s an estimate, not a verified nutritional analysis of the finished recipe.
If you need precise nutrition information for dietary or medical reasons, calculate it using the actual ingredient labels and final number of servings.
These bars can provide useful energy during physical activity or a busy day, but they should not be described as nutritionally complete.
They’re best eaten alongside a varied diet that provides adequate protein, vegetables, fruit, fluids, and other essential nutrients.
How to Store Homemade Survival Bars Safely
Proper storage is particularly important because this recipe is intended for emergency preparedness.
The fact that the individual ingredients can be kept in a pantry doesn’t prove that their combined, homemade form will remain safe indefinitely at room temperature.
Manufactured emergency rations undergo formulation, packaging, and shelf-life testing that homemade bars do not.
Refrigerator Storage
Keep finished bars in a clean, airtight container in the refrigerator at 40°F (4°C) or below.
For a conservative quality and storage target, plan to use them within approximately one week.
A comparable no-bake oat bar recipe published by Health Canada also recommends refrigeration and use within one week.
If you notice mold, unusual odors, or another sign of spoilage, discard the bars.
Remember that harmful microorganisms do not always produce obvious changes in smell or appearance.
Freezer Storage
Freezing is a convenient option if you want to prepare several batches ahead of time.
Wrap the bars individually and place them in a freezer-safe container or bag.
Label the packaging with the preparation date.
For best quality, aim to use frozen bars within approximately two to three months.
Thaw them in the refrigerator or keep them appropriately chilled until needed.
Can You Keep Them in an Emergency Backpack?
These homemade bars are not a dependable long-term, room-temperature emergency food.
For a planned outing, pack refrigerated bars in an insulated container with suitable cold packs.
Do not leave them in a hot car, glove compartment, or backpack for extended periods.
For foods requiring refrigeration, general food-safety guidance limits unrefrigerated exposure to two hours, or one hour when temperatures exceed 90°F (32°C).
For an emergency bag that may remain untouched for weeks or months, commercially packaged shelf-stable foods with clearly labeled storage instructions and expiration or best-by dates are more appropriate.
How to Make the Bars Hold Together Better
One common problem with homemade oat bars is a crumbly texture.
Usually, the solution involves adjusting the ingredients or pressing technique.
Use the Right Oats
Old-fashioned rolled oats create a chewier texture.
Quick-cooking oats have smaller pieces and often produce a more compact bar.
Both can work, although you may notice differences in how much moisture the mixture absorbs.
Avoid substituting uncooked steel-cut oats because their much firmer texture is not suitable for this particular no-bake method.
Mix the Binder Thoroughly
Peanut butter and honey serve as the main binding ingredients.
Combine them completely before adding the oats.
This helps distribute the sticky mixture more evenly.
Don’t Overload the Mixture
Nuts, seeds, and dried fruit add flavor, but too many additions can weaken the structure.
Start with a small amount and adjust after trying the basic recipe.
Give the Bars Enough Time to Chill
Refrigeration helps firm the peanut butter mixture and makes clean slicing easier.
If the bars are still very soft after 30 minutes, leave them in the refrigerator a little longer.
Natural peanut butter varieties can produce different textures because their oil content and consistency vary.
Easy Flavor Variations
Once you understand the basic recipe, you can change the flavor without making the process complicated.
Chocolate Peanut Butter Bars
Add unsweetened cocoa powder and a small handful of mini chocolate chips.
Mix thoroughly so the cocoa doesn’t form dry pockets.
Cinnamon Raisin Bars
Stir in ground cinnamon and raisins.
This combination creates a familiar oatmeal-cookie flavor without baking.
Crunchy Nut and Seed Bars
Add chopped almonds, sunflower seeds, or pumpkin seeds for extra texture.
Make sure the additional ingredients don’t overwhelm the binder.
Sunflower Butter Bars
For households avoiding peanuts, sunflower seed butter may be an alternative, provided it is suitable for the person’s dietary needs.
Check all labels for allergens and possible cross-contact.
The texture may require small adjustments because different seed butters have different consistencies.
Maple and Cinnamon Bars
Replace the honey with maple syrup and add cinnamon.
Because maple syrup is thinner than honey, these bars may be softer. Adjust the oats or nut butter as necessary and keep them refrigerated.
How to Build a Better Emergency Food Supply
Homemade bars are useful, but a well-planned emergency pantry needs more than one type of food.
During an extended power outage, access to refrigeration and cooking equipment may be limited.
That’s why shelf-stable, ready-to-eat foods deserve priority.
Practical emergency foods include:
- Commercially packaged emergency food bars
- Peanut butter in unopened jars or single-serving packages
- Canned beans and vegetables
- Canned fish or meat
- Ready-to-eat soups and meals
- Dried fruit
- Nuts and trail mix
- Crackers and crispbread
- Shelf-stable milk in appropriate packaging
- Packaged cereals and other ready-to-eat foods
Check product labels for storage requirements and use-by dates.
Choose items that your family already enjoys eating, and remember dietary restrictions, food allergies, and special medical needs.
A manual can opener is useful if your emergency supplies include canned food.
Don’t Forget Drinking Water
Food is only one part of emergency preparedness.
Safe drinking water is equally important.
A widely recommended starting point for household emergency storage is at least one gallon of water per person per day for drinking and basic sanitation.
Store enough for several days and expand your supply if your household has the space and resources.
People with specific medical needs, infants, and pets may require additional supplies.
A small bag of homemade energy bars cannot replace adequate drinking water.
Are Homemade Bars Cheaper Than Store-Bought Energy Bars?
Making bars at home may save money, particularly when you already purchase oats, peanut butter, and honey in larger quantities.
However, homemade food isn’t automatically cheaper.
The actual cost depends on local prices, ingredient brands, optional additions, and the number of servings produced.
To estimate the cost per bar, add the cost of the ingredients actually used and divide the total by the number of bars.
For example, if a batch costs $4.80 and produces eight bars, each bar costs $0.60.
That example is a calculation, not a claim about current grocery prices.
You should also consider refrigeration, packaging, and storage limitations.
Commercial emergency bars may cost more per serving, but their tested shelf life and purpose-designed packaging provide advantages that homemade refrigerated snacks cannot duplicate.
Use each product for the situation it suits best.
Common Mistakes to Avoid
Homemade pantry bars are simple, but a few mistakes can reduce their usefulness.
Assuming they last for months at room temperature: This recipe has no validated ambient shelf life. Keep the finished bars refrigerated or frozen.
Skipping the chilling step: The mixture needs time to firm up before cutting.
Adding too many dry ingredients: Extra oats, seeds, and powders can cause the bars to crumble.
Leaving them in a hot vehicle: Heat can soften the mixture, and prolonged unsuitable storage creates food-quality and potentially safety concerns.
Ignoring allergies: Peanut butter and optional nuts make this recipe unsuitable for people with certain allergies.
Relying on them as complete meals: Energy bars are convenient snacks, not substitutes for balanced nutrition.
Preparing more than you can store properly: Make batches according to your available refrigerator or freezer space.
A Practical Way to Use These Bars in Your Preparedness Routine
Rather than preparing a batch and forgetting about it in an emergency kit, make these bars part of your regular food routine.
Prepare a small batch when you have extra oats or peanut butter.
Refrigerate enough for the coming days and freeze additional portions for later use.
Take appropriately chilled bars on planned outings, pack them for a busy workday, or serve them as a convenient homemade snack.
Meanwhile, maintain a separate emergency food kit filled with properly packaged nonperishable items.
That gives you two useful systems: homemade snacks for ordinary life and suitable shelf-stable supplies for emergencies when refrigeration is unavailable.
Final Thoughts: Simple Pantry Ingredients, Practical Emergency Planning
Homemade pantry survival bars show how a few ordinary ingredients can become a filling and convenient snack with very little preparation.
Rolled oats, peanut butter, honey, and optional additions come together in about five minutes of active work. After chilling, the mixture can be divided into individual bars for easy serving.
The recipe is affordable for many households, simple to customize, and useful for make-ahead snacks.
Just remember that homemade no-bake bars and commercially produced emergency rations serve different purposes.
These bars are best kept refrigerated or frozen, while a long-term emergency bag should contain foods specifically designed and labeled for shelf-stable storage.
Make a batch for the week, keep your emergency pantry stocked with appropriate nonperishable food, and build preparedness around practical habits you can maintain.