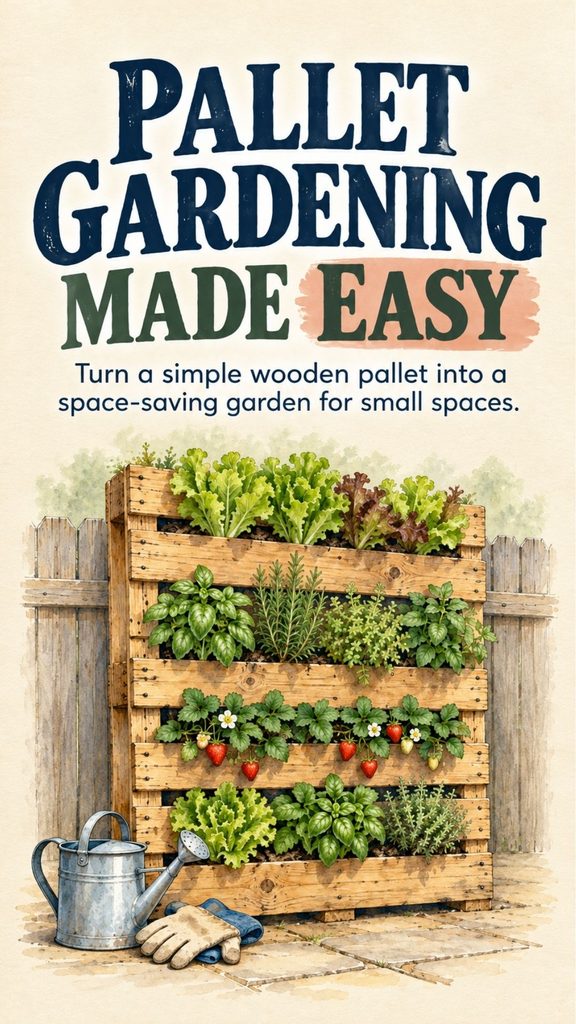
A lack of gardening space doesn’t have to stop you from growing fresh herbs, leafy vegetables, strawberries, or colorful flowers. Sometimes, an unused wooden shipping pallet is all you need to turn an empty corner of your yard into a productive little garden.
Pallet gardening is especially appealing for small backyards, patios, and rental properties where digging traditional garden beds isn’t practical. Instead of spreading plants across the ground, you can arrange them in the spaces between wooden slats or create a vertical growing wall.
It’s an affordable way to reuse materials, but there are a few things you need to get right. Not every pallet is suitable for growing food, and a poorly constructed vertical planter can lose soil, dry out quickly, or become unstable.
You Might Also Like:
- Loading posts...
With the right pallet, proper drainage, suitable plants, and a secure support system, you can create a practical garden without taking up much ground space.
Here’s how to choose safe materials, build your own pallet garden, select plants that will thrive, and keep everything healthy throughout the growing season.
What Is a Pallet Garden?
A pallet garden is a planting system made from a wooden shipping pallet that has been adapted to hold growing medium and plants.
The wooden slats provide a ready-made framework, creating separate planting openings without requiring you to build an elaborate planter from scratch.
There are two main ways to use a pallet for gardening.
Horizontal pallet gardens lie flat on the ground or on a suitable supporting surface. Plants grow upward through the spaces between the boards, creating neat rows of greenery.
Vertical pallet gardens stand upright against a secure support or are attached to a properly constructed frame. Plants grow from pockets or openings along the front, making use of vertical space.
Both designs have advantages. Horizontal pallets are generally simpler to set up, while vertical versions are particularly useful when ground space is limited.
Why Pallet Gardening Works Well for Small Spaces
A well-designed pallet garden can fit into places where an ordinary garden bed would be difficult to accommodate.
A sunny patio, narrow side yard, small courtyard, or sheltered balcony may have enough room for one, provided the surface and supporting structure can safely handle the weight.
Pallet gardens also offer several practical benefits.
- Space efficiency: Vertical arrangements allow multiple planting levels within a small footprint.
- Budget-friendly construction: Reused pallets may be inexpensive or free when obtained from a suitable source.
- Organized planting: The wooden slats naturally divide the growing area into sections.
- Versatility: Many herbs, leafy greens, strawberries, and compact flowers can grow successfully.
- Less permanent landscaping: Some designs can be disassembled at the end of the season.
- Creative appearance: A planted pallet can add greenery and texture to an otherwise plain outdoor space.
However, pallet gardening isn’t maintenance-free. Because the growing spaces are relatively shallow, plants may need more frequent watering than they would in ordinary garden soil.
The limited root space also makes plant selection particularly important.
1. Choose a Safe Wooden Pallet Before Planting
Selecting the right pallet is the most important step, particularly if you intend to grow vegetables or herbs for eating.
Shipping pallets are manufactured and reused for many different purposes. Some undergo heat treatment, others may have been chemically treated, and used pallets can also become contaminated by substances spilled during transportation or storage.
An attractive-looking pallet isn’t necessarily suitable for a food garden.
Look for the HT Marking
A common marking to look for is HT, which stands for heat-treated.
Heat treatment uses controlled temperatures to meet pest-control requirements without using a chemical fumigant for that treatment.
For growing edible plants, a clean, undamaged pallet with a verifiable heat-treatment marking and a known, safe history is a sensible choice.
You may also see other markings, including:
- HT: Heat-treated for pest control.
- MB: Treated with methyl bromide, a toxic fumigant. Avoid these pallets.
- KD: Kiln-dried to reduce wood moisture; this is not the same designation as HT.
- DB: Debarked; this describes bark removal rather than proving that the wood is safe for growing food.
These markings are often found on the sides or wooden blocks of pallets used in international shipping.
An HT Stamp Doesn’t Tell the Whole Story
Although an HT marking is useful, it doesn’t guarantee that a used pallet has never been contaminated.
A pallet may have transported industrial chemicals, leaking containers, oils, or other substances after treatment.
Avoid pallets with:
- Oil stains or unexplained discoloration
- Strong chemical odors
- Moldy or rotting boards
- Flaking paint or suspicious coatings
- Broken sections or exposed rusty nails
- Unknown treatment or shipping history
For edible gardening, pass on pallets when you cannot establish that the materials are appropriate.
Pallets from a reliable supplier with a known history are preferable to unidentified wood found beside dumpsters or industrial storage areas.
Also make sure the pallet isn’t property belonging to a rental or pooling company before taking it.
2. Decide Between a Horizontal and Vertical Garden
Before gathering your supplies, consider where the finished pallet will go.
The location determines how you should construct the planter and which plants will grow best.
Horizontal Pallet Garden
A horizontal pallet is a good starting project for someone who has a little ground space and wants a simple planting arrangement.
You can use the boards to divide planting rows, but the roots still need adequate room beneath them.
If you’re placing the pallet over soil, loosen and prepare the growing area first. Do not assume a thin layer of soil trapped within the wooden slats will provide sufficient root space for every crop.
A horizontal pallet can also form the top framework of a deeper, properly built planter.
This design works well for small salad greens, herbs, and flowers.
Vertical Pallet Garden
A vertical pallet garden is ideal for creating a green display along a sturdy fence or freestanding structural frame.
The main challenge is holding the growing medium in place while allowing excess water to escape.
Vertical gardens also need secure anchoring because a pallet becomes considerably heavier after filling it with moist potting mix and mature plants.
Simply leaning a heavy pallet against a wall without securing it can create a tipping hazard.
If you live in a rental property, check your lease and obtain approval before attaching anything to a fence, wall, or building.
For balconies and elevated decks, verify the structure’s load capacity and consider where irrigation water will drain.
3. Gather the Materials for Your Pallet Garden
A basic vertical pallet garden doesn’t require complicated equipment.
You’ll need:
- One clean, suitable wooden pallet
- Durable landscape fabric or burlap
- Outdoor-rated staples or another suitable fastening method
- A staple gun
- Scissors or a utility knife
- A drill and exterior screws for necessary repairs
- Good-quality container potting mix
- Small plants or seeds
- A watering can or hose
- Suitable hardware and structural support for securely mounting the planter
Wear sturdy gloves when handling pallet wood to protect your hands from splinters and nails.
You may also want sandpaper for smoothing rough surfaces.
Choose a breathable, durable lining material that retains growing medium while allowing water to drain.
Avoid turning the entire planter into a watertight container. Without drainage, the roots can become waterlogged.
4. Prepare and Reinforce the Pallet
Start by laying the pallet on a stable, flat surface.
Inspect every board for cracks, loose nails, damaged corners, and areas where the wood is beginning to soften.
Repair loose boards with suitable exterior fasteners. Pre-drilling holes can help prevent old wood from splitting.
If the pallet is badly damaged or has extensive rot, replace it rather than attempting to make it support a heavy planting system.
Lightly sand rough edges where you’ll be handling the planter.
Brush away dirt and debris, and let the pallet dry before installation.
Decide which side will face outward.
For most simple vertical designs, the front boards form the visible planting openings, while the back and bottom require extra material to support the potting mix.
Take a few minutes to visualize how the soil will be held in place before attaching anything.
5. Attach Landscape Fabric to Hold the Soil
For a vertical garden, the fabric acts as a supporting liner.
With the pallet lying flat, measure enough material to cover the back, bottom, and sides, allowing extra fabric for overlapping and fastening.
Secure the landscape fabric around the frame using outdoor-rated staples.
Use enough fasteners to support the weight of the growing medium, particularly along the lower edges.
Where separate pieces of fabric meet, overlap them generously so potting mix cannot escape through the gaps.
Some pallet designs also require additional fabric pockets or wooden supports between the slats to keep individual planting sections from emptying when the pallet is raised.
Leave the planting openings accessible.
Don’t Forget Drainage
The finished liner must allow excess water to leave the planter.
If you add a waterproof barrier to protect a nearby surface, arrange it so water is directed away without sealing the growing medium inside.
It’s generally preferable to leave an air gap between a damp wooden planter and house siding rather than pressing the planter directly against the building.
A freestanding support frame can be a useful option where attaching a wet planter to a building is undesirable.
6. Fill the Pallet With Quality Potting Mix
Regular backyard soil is usually not the best choice for a narrow pallet planter.
Garden soil can become compacted inside containers, reducing drainage and the air available to plant roots.
Instead, use a good-quality potting mix intended for outdoor containers.
A suitable mix should hold enough moisture to support the plants while allowing excess water to drain.
How to Fill the Planter
- Keep the pallet lying flat on a stable surface.
- Slightly moisten the potting mix before adding it.
- Fill the planting compartments gradually.
- Work the mix into corners and gaps using your hands or a small garden tool.
- Settle the material gently without compressing it excessively.
- Add more mix wherever large empty spaces remain.
The goal is to create an even growing area that supports the roots without becoming hard and compacted.
Water the filled sections carefully and check for leaks.
If soil falls out of the back or bottom, reinforce the fabric before proceeding.
Important: Move or assemble the pallet near its intended final location before filling it. A pallet containing wet potting mix can be surprisingly heavy and difficult to lift safely.
7. Plant the Pallet While It Is Lying Flat
If you’re creating a vertical pallet garden, starting the plants while the structure is horizontal can make installation easier.
Position small transplants within the planting openings, leaving enough space for their mature growth.
Remove each plant gently from its nursery container and loosen tightly circling roots when appropriate.
Place the root ball into the potting mix and firm the surrounding material lightly to eliminate large air pockets.
For plants that will eventually grow from the front of a vertical pallet, arrange their crowns and stems so they won’t be trapped beneath the boards when the planter is raised.
Avoid burying stems or crowns deeper than recommended for the plant.
Water gently after planting.
Allow the Roots to Establish
Keeping the pallet horizontal temporarily can help new transplants settle into the growing medium.
The time required varies with the plant, its initial root system, the weather, and the planter’s construction.
Some sturdy transplants may stabilize within several days, while others benefit from a longer establishment period.
Check that the soil is secure and plants are stable before lifting the pallet.
If you plant from seed, wait until the seedlings are sufficiently established to tolerate repositioning, or use a design that can be planted after it is already upright.
Never raise a heavy, filled planter without enough help or appropriate lifting equipment.
8. Secure the Pallet in Its Final Position
A vertical pallet garden must be safely supported.
Use an appropriate mounting system, a strong independent frame, or another support designed to resist tipping.
Choose fasteners that are suitable for the supporting material and expected load.
A wooden fence that’s already leaning or deteriorating may not be strong enough.
Check that the pallet cannot fall forward, slide sideways, or shift in strong winds.
This is especially important in areas used by children or pets.
Once the planter is secure, inspect the growing medium and replace any soil displaced during installation.
You can then finish planting accessible upper sections if needed.
Water carefully and make sure the drainage system behaves as expected.
9. Choose Plants That Grow Well in Pallet Gardens
The best pallet garden plants have relatively modest root systems and don’t become excessively heavy.
Compact crops are usually easier to manage than plants that need deep, extensive roots.
Best Vegetables for Pallet Gardens
Leafy greens are among the most practical choices.
Try:
- Loose-leaf lettuce
- Arugula
- Baby spinach
- Compact Asian greens
- Small varieties of Swiss chard
These plants can provide useful harvests without the space requirements of larger vegetables.
Lettuce and spinach generally prefer cooler growing conditions. In hot climates, provide appropriate afternoon shade and choose planting seasons carefully.
Best Herbs for Pallet Gardens
Herbs can turn a small pallet into a convenient kitchen garden.
Good candidates include parsley, chives, thyme, oregano, basil, and cilantro.
Choose plants according to their preferred light and temperature conditions.
Mediterranean herbs such as thyme and oregano often prefer good drainage, while basil requires warmer temperatures and protection from frost.
Mint can also grow in containers, although its vigorous roots may eventually overwhelm a small shared planting pocket.
Keep aggressive growers separate when possible.
Can You Grow Strawberries in Pallets?
Yes. Strawberries are a popular choice for pallet planters when the planting compartments offer sufficient root volume and drainage.
Use healthy strawberry plants and keep their crowns at the correct planting depth.
Vertical placement can keep some fruit away from the ground, but it does not eliminate pest or disease problems.
Strawberries still need adequate sunlight, watering, nutrients, and room for their roots.
Flowers That Work Beautifully
For a decorative garden, consider compact annuals such as alyssum, petunias, violas, and other varieties suited to your local climate.
Trailing flowers can soften the rectangular shape of a pallet.
Choose plants with similar water and sunlight needs when sharing a growing space.
Plants That Usually Need More Room
Large tomatoes, pumpkins, squash, potatoes, and full-size root crops are generally poor choices for shallow vertical pallet pockets.
Many require more growing medium than a standard pallet can hold.
You can still use the pallet as a trellis or background feature for a larger container, but don’t confuse structural support with adequate root space.
10. Water Your Pallet Garden the Right Way
Watering is one of the biggest challenges in pallet gardening.
Vertical planters often dry out faster than traditional garden beds because the root zones are smaller and more exposed to wind and warmth.
Different sections of the same pallet may also hold moisture differently.
The upper rows can become dry while lower sections remain moist.
Check Moisture Regularly
Insert a finger into the growing medium near the plants.
If the upper layer feels dry, check slightly deeper before watering.
Water thoroughly enough to moisten the root zone and allow surplus water to drain.
Avoid watering only the top row and assuming the lower sections received enough.
During hot, dry, or windy weather, you may need to inspect the planter daily.
In cooler conditions, watering may be less frequent.
Consider Drip Irrigation
A small drip irrigation system can help distribute water more consistently.
Install the tubing before filling the planter when possible.
Drip irrigation delivers water near the roots rather than repeatedly wetting the foliage, and it can reduce some unnecessary water loss.
Even with automatic irrigation, inspect the moisture levels regularly to avoid both drought stress and overwatering.
11. Fertilize Carefully Throughout the Growing Season
Most container plants depend on the nutrients supplied by their growing medium and fertilizer.
Because pallet pockets contain relatively little potting mix, available nutrients can become depleted over the growing season.
Use a fertilizer suitable for your plants and follow the product’s label instructions.
A diluted liquid fertilizer may be convenient for leafy vegetables and herbs, particularly when the original potting mix contains little added nutrition.
However, if you use a potting mix that already includes slow-release fertilizer, additional feeding may not be immediately necessary.
Avoid adding extra fertilizer simply because you want faster growth.
Too much fertilizer can damage roots and cause salts to accumulate in the planting medium.
Watch for changes in leaf color, growth, and general plant condition, but remember that yellowing leaves can also result from watering problems, pests, and other causes.
12. Prevent Common Pallet Garden Problems
A little regular attention can prevent many issues before they become serious.
Soil Falling Out
If potting mix escapes from between the boards, inspect the liner and pocket supports.
Reinforce weak points with additional fabric or structural supports.
Do not simply add more soil without fixing the source of the problem.
Wilting Plants
Wilting may indicate dry roots, but it can also occur when roots are waterlogged or damaged.
Check the growing medium before adding water.
Poor Growth
Plants may struggle because the growing pockets are too shallow, light is insufficient, or several plants are competing for the same limited root space.
Reduce overcrowding and move suitable plants into larger containers when necessary.
Rotting Wood
Constant contact with moisture gradually wears down untreated wood.
Inspect the pallet for soft areas, loose fasteners, and structural deterioration.
Replace damaged components promptly, especially on vertical structures.
Pests and Disease
Examine leaves regularly for insect damage, unusual spots, mildew, and other symptoms.
Remove badly affected foliage when appropriate, improve air circulation, and use suitable pest-management practices.
Choose treatments carefully if you’re growing edible crops.
13. Maintain Your Pallet Garden Between Seasons
Pallet gardens need occasional maintenance, particularly after a full growing season.
Remove exhausted annual plants and old roots.
Inspect the condition of the liner, wooden boards, fasteners, and supporting frame.
Replace damaged landscape fabric and repair any structural problems before replanting.
Refreshing or replacing depleted potting mix can help restore suitable growing conditions.
For plants you want to keep through winter, remember that roots in shallow containers are more exposed to freezing temperatures than roots growing in the ground.
Some perennial herbs and strawberries may need additional protection or a different overwintering arrangement depending on the local climate.
An empty pallet planter can sometimes be stored in a sheltered, dry location until the next growing season.
Disassemble it if necessary, but take care around old nails and splintering boards.
Is Pallet Gardening Really Cheaper Than Buying Planters?
Pallet gardens can be inexpensive, but the pallet itself is only one part of the cost.
You’ll still need potting mix, a liner, hardware, plants, irrigation supplies, and possibly a supporting frame.
If you already own basic tools and can obtain a suitable pallet inexpensively, the project may cost less than purchasing a decorative vertical planter.
However, a low-cost pallet with unknown contamination or significant structural damage is not a worthwhile bargain.
For food growing, purpose-built containers made from known, appropriate materials may sometimes be the better choice.
The most economical option is the one that provides safe growing conditions and lasts long enough to justify the materials and effort.
Final Thoughts: Turn a Simple Pallet Into a Productive Garden
Pallet gardening is a creative way to grow plants when space is limited, especially if you enjoy simple DIY projects and reusing suitable materials.
The key is to plan the project around the plants rather than expecting every crop to thrive in a shallow wooden frame.
Choose a clean pallet with a known history, provide enough growing medium, allow proper drainage, and secure vertical structures carefully.
Start with easy-growing herbs, lettuce, or compact flowers before experimenting with more demanding crops.
A single pallet garden won’t replace a large vegetable plot, but it can provide fresh herbs for cooking, handfuls of homegrown greens, beautiful seasonal flowers, and an enjoyable introduction to small-space gardening.
With safe materials, thoughtful planting, and regular care, even a modest outdoor corner can become a charming and useful little garden.