Have you ever looked at a pile of fallen leaves, grass clippings, or vegetable scraps and wondered whether you could turn them into something useful for your garden?
Instead of throwing all that organic material into the rubbish, you can transform much of it into dark, crumbly compost that helps improve your soil.
And the best part? You don’t need expensive equipment, complicated ingredients, or years of gardening experience to get started.
You Might Also Like:
- Loading posts...
A basic compost heap can be made using everyday garden materials such as dried leaves, grass clippings, small plant trimmings, and suitable kitchen scraps.
With the right combination of ingredients, moisture, oxygen, and patience, microorganisms gradually break the materials down into a valuable soil amendment.
Composting is one of those old-fashioned gardening skills that remains just as useful today.
It can help reduce household waste, improve garden soil, and make better use of materials you already have.
But there’s a little more to successful composting than piling everything into one corner of the backyard.
If your heap becomes too wet, it may develop unpleasant odors. If it’s too dry, decomposition can slow almost to a stop. And if you add the wrong materials, you may attract rodents or introduce unwanted plants into your garden.
Fortunately, these problems are usually preventable.
Here’s everything you need to know about starting a compost heap, choosing the right materials, maintaining it properly, and using the finished compost in your garden.
What Is a Compost Heap?
A compost heap is a pile of organic materials that gradually decompose through natural biological activity.
The process involves microorganisms such as bacteria and fungi, along with other decomposers that help break down plant matter.
Over time, recognizable materials such as leaves, grass clippings, and vegetable scraps become darker, softer, and less distinct.
Eventually, the mixture develops into a crumbly material known as compost.
What Does Finished Compost Look Like?
Well-made compost is usually:
- Dark brown to nearly black
- Loose and crumbly
- Earthy-smelling
- Relatively uniform in appearance
- Free from obvious fresh food scraps
- Similar in appearance to rich forest soil
You may still notice small pieces of wood or other slow-decomposing material.
These can be screened out or returned to a new compost pile.
What Is Compost Used For?
Finished compost is primarily used as a soil amendment.
It can help:
- Improve soil structure
- Increase water retention in some soils
- Improve drainage and aeration in heavy soils
- Supply some plant nutrients
- Support soil organisms
- Add organic matter
- Improve overall garden soil quality
Compost isn’t necessarily a complete fertilizer.
Its nutrient content varies depending on the ingredients and decomposition process.
However, it can be an excellent addition to garden beds, vegetable plots, and other suitable growing areas.
1. Choose the Right Location for Your Compost Heap
Before collecting materials, decide where your compost heap will go.
Choosing a practical location makes composting easier to maintain.
You want somewhere that’s convenient to access but doesn’t interfere with the rest of your garden.
What Makes a Good Composting Location?
Look for a place that is:
- Relatively level
- Well-drained
- Accessible with a wheelbarrow
- Close enough to reach regularly
- Away from areas where runoff could enter waterways
- Easy to water when necessary
- Large enough for turning or removing compost
Partial shade can be useful in hot climates because it may help prevent the pile from drying out too quickly.
In cooler climates, a sunnier location can also work.
Should the Compost Heap Sit Directly on the Ground?
For a traditional open compost heap, placing it on suitable soil is often practical.
This allows drainage and provides access for decomposer organisms.
You can also use a purpose-built compost bin, tumbler, or other system designed for the location.
If you compost on a paved surface, pay closer attention to drainage and moisture.
Avoid These Locations
Don’t place a compost heap:
- Directly against wooden buildings
- Where runoff can enter a drain or stream
- In a poorly drained depression
- Where it blocks access or pathways
- On an unstable platform
- In a location prohibited by local regulations
Some older gardening instructions suggest composting on shed roofs.
That’s not a good general recommendation.
Wet compost is heavy, creates moisture and structural concerns, and should not be placed on a roof unless the structure has been specifically engineered for that use.
A ground-level heap or properly designed compost container is much safer.
2. Decide What Type of Compost Heap You Want
There isn’t just one way to make compost.
The best method depends on your available space, the materials you produce, and how much maintenance you’re willing to do.
Option A: Open Compost Heap
This is the simplest method.
Organic materials are placed directly into a pile, usually in a designated garden area.
Advantages:
- Inexpensive
- Easy to expand
- Suitable for larger gardens
- Accommodates leaves and garden trimmings
- Requires little equipment
Disadvantages:
- Can look untidy
- May attract animals if food scraps are exposed
- Can dry out or become waterlogged
- Needs enough space for turning and access
Option B: Wire Mesh Compost Bin
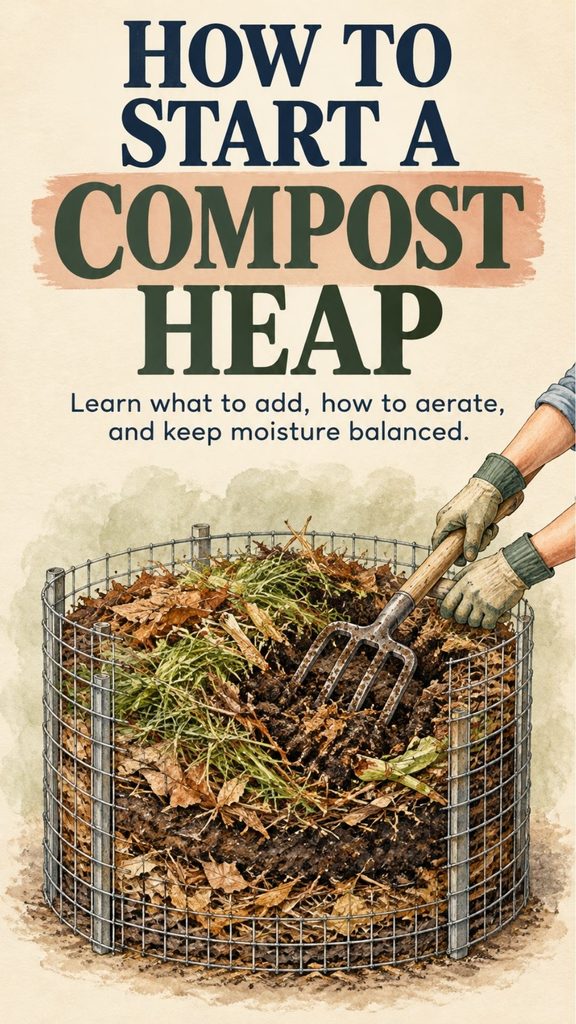
A wire mesh cylinder or square enclosure helps keep the materials together.
It also allows air to move through the sides.
Advantages:
- Affordable
- Easy to construct
- Good ventilation
- Works well for leaves and garden materials
Disadvantages:
- May require regular watering
- Not rodent-proof
- Smaller materials can fall through wide mesh
Option C: Wooden Compost Bin
A simple wooden bin creates a more organized composting area.
Some gardeners prefer a two-bin or three-bin system.
One compartment holds new materials, another contains actively decomposing compost, and a third can hold finished or maturing compost.
Advantages:
- Organized appearance
- Convenient for larger volumes
- Helps separate composting stages
- Can be built from suitable reclaimed materials
Disadvantages:
- Requires more work to build
- Wood may eventually deteriorate
- Must allow suitable drainage and ventilation
Option D: Enclosed Compost Bin
A commercially manufactured compost bin may be useful for smaller gardens.
Lidded systems can help contain the pile and discourage some pests.
However, they still require an appropriate balance of materials and enough airflow.
Which Method Is Best for Beginners?
For a household with a backyard, a simple wire mesh enclosure or ventilated compost bin is often an excellent starting point.
You can learn the process without investing in a complicated system.
3. Understand the Difference Between Browns and Greens
The secret to successful composting is combining two broad categories of organic material.
Gardeners often refer to these as browns and greens.
These names describe the materials’ general role in composting, not necessarily their actual color.
Browns: Carbon-Rich Materials
Browns help provide carbon and create structure in the heap.
Common examples include:
- Dried autumn leaves
- Shredded plain cardboard
- Shredded non-glossy paper
- Small dry twigs
- Straw
- Dry plant stems
- Untreated wood shavings in moderation
Browns are especially useful for preventing a wet, compacted pile.
Greens: Nitrogen-Rich Materials
Greens help provide nitrogen that microorganisms need to grow and break down organic matter.
Examples include:
- Fresh grass clippings
- Vegetable scraps
- Fruit peels
- Coffee grounds
- Used loose tea leaves
- Fresh plant trimmings
- Soft green leaves
- Spent vegetable plants that are free of serious disease
Coffee grounds are often considered greens in composting, even though they look brown.
Why the Balance Matters
A pile containing too many wet greens may become compacted and develop unpleasant odors.
A pile containing mostly dry browns may break down very slowly.
Combining both categories helps support the decomposition process.
A Simple Starting Ratio
For a beginner’s compost heap, try:
2–3 parts browns to 1 part greens by loose volume.
For example:
- 2 buckets of dry leaves
- 1 bucket of fresh grass clippings
This is a practical starting point rather than an exact rule.
The ideal balance depends on the ingredients and how wet or dry they are.
If the heap becomes smelly, add more dry browns and improve airflow.
If it stays dry and decomposes very slowly, add suitable greens and moisture.
4. Know What You Can Put in a Compost Heap
Many everyday organic materials are suitable for home composting.
The easiest way to begin is to focus on uncomplicated plant-based waste.
Good Composting Materials
From the garden:
- Fallen leaves
- Grass clippings from untreated lawns
- Small twigs
- Soft plant stems
- Spent annual plants
- Suitable weeds without mature seeds
- Shredded plant trimmings
- Straw
From the kitchen:
- Vegetable peelings
- Fruit scraps
- Coffee grounds
- Loose tea leaves
- Crushed eggshells
- Small amounts of plain, uncoated paper towels
Other household materials:
- Plain shredded cardboard
- Non-glossy newspaper
- Untreated wood shavings
- Small amounts of natural plant fibers, when free of synthetic blends or chemicals
Why Small Pieces Work Better
Large branches and thick stems decompose much more slowly than finely chopped plant material.
You don’t need to grind everything into tiny particles.
But cutting bulky garden trimmings into shorter pieces can increase the surface area available to decomposer organisms.
For example:
A whole cabbage stalk may remain recognizable for a long time.
The same stalk cut into several smaller pieces may break down more quickly.
Similarly, a large quantity of whole leaves can become compacted.
Shredding leaves helps them mix more evenly with other materials.
5. Know What NOT to Add to Your Compost Heap
Not every biodegradable material belongs in a typical backyard compost heap.
Some items attract animals, create odors, carry pathogens, or fail to decompose properly under home composting conditions.
Avoid These Materials
- Meat and fish scraps
- Bones
- Dairy products
- Greasy or oily foods
- Large amounts of cooked leftovers
- Pet feces and used cat litter
- Plastics
- Glass
- Metal
- Glossy or plastic-coated paper
- Treated or painted wood
- Charcoal briquettes
- Coal ash
- Plants contaminated with pesticides
- Poisonous or invasive weeds that could spread
- Diseased plant material that may survive home composting
What About Weeds?
Young, seed-free weeds can sometimes be composted.
However, weeds with mature seeds may create problems later.
Some home compost piles don’t reach or maintain temperatures high enough to kill weed seeds reliably.
Persistent perennial weeds may also regrow from roots or other plant parts.
When uncertain, keep problematic weeds out of the heap.
What About Citrus Peels?
Small amounts of citrus peel are generally acceptable in ordinary compost.
Chop them into smaller pieces and mix them with other ingredients.
They may take longer to decompose than soft vegetable scraps.
What About Eggshells?
Crushed eggshells can be composted.
They may take a long time to disappear completely, but smaller pieces break down and mix into the compost more easily.
They shouldn’t be treated as a fast-acting calcium fertilizer.
6. Build Your First Compost Heap Step by Step
Once you’ve chosen your location and collected suitable materials, you’re ready to start.
A traditional heap doesn’t need a complicated structure.
Step 1: Create an Airy Base
Place a loose layer of small twigs, coarse stems, or other suitable bulky material at the bottom.
This can help create air spaces and support drainage.
Avoid making the layer so thick that you end up with a pile of large branches that take years to break down.
Step 2: Add a Layer of Browns
Spread dried leaves, shredded cardboard, or straw over the base.
Aim for a loose, even layer.
Step 3: Add Greens
Add a thinner layer of grass clippings, vegetable scraps, or other nitrogen-rich material.
Avoid placing thick mats of wet grass clippings in one spot.
These can become compacted and start smelling unpleasant.
Step 4: Mix the Materials
Rather than relying on perfectly separated layers, mix the materials enough that greens are distributed among the browns.
This gives microorganisms access to a more balanced mixture.
Step 5: Add Water if Needed
Lightly moisten the materials.
The compost should feel damp but not waterlogged.
Step 6: Continue Adding Material
Repeat the process as you collect more garden and kitchen waste.
Whenever you add food scraps, mix them into the center of the pile and cover them with a layer of browns.
This helps reduce odors and discourage pests.
Step 7: Monitor the Heap
Check it regularly.
Look for:
- Moisture
- Airflow
- Unpleasant odors
- Decomposition
- Signs of pests
Adjust as needed.
You have now started your compost heap.
7. Make the Compost Heap Large Enough to Work
Compost heaps can be made in different sizes, but size influences how quickly they decompose.
A small pile usually loses heat and moisture more easily.
A larger pile can retain heat better, although excessively large or compacted piles can develop airflow problems.
A Useful Beginner Size
A pile roughly 3 feet wide, 3 feet deep, and 3 feet tall is a common starting size for active backyard composting.
This size provides enough volume to retain some heat while remaining manageable for many gardeners.
You don’t need to build the entire pile in one day.
However, a small heap may break down more slowly, especially in cold weather.
Is a 6-Foot-Tall Heap Necessary?
No.
Some traditional composting instructions suggest building piles 4–6 feet tall.
That’s not necessary for most home gardens.
A pile that becomes too large may be difficult to turn and may develop compacted areas.
Start with something you can maintain comfortably.
What if You Have a Small Garden?
You can still compost.
A smaller enclosed bin or tumbler may be a better option.
The finished compost may take longer to develop, but that doesn’t mean the method has failed.
8. Keep Your Compost as Moist as a Wrung-Out Sponge
Moisture is one of the most important parts of composting.
Microorganisms need water to break down organic material.
However, too much water can push air out of the spaces between materials.
This creates conditions where decomposition may become slow and unpleasant-smelling.
The Squeeze Test
Take a small handful of material from the pile.
Wear gardening gloves.
Squeeze it gently.
Too dry: The material feels dusty and falls apart without much moisture.
About right: It feels damp, similar to a wrung-out sponge.
Too wet: Water drips or streams out when squeezed.
For a pile with very coarse material, the squeeze test may be less reliable, so assess moisture in several areas.
What to Do if the Pile Is Too Dry
- Add water gradually.
- Mix the pile.
- Incorporate suitable moist greens.
- Cover loosely during very hot or windy weather to limit drying.
What to Do if the Pile Is Too Wet
- Mix in dry leaves or shredded cardboard.
- Turn the pile to improve airflow.
- Protect it from excessive rain.
- Check that water can drain away.
The goal is dampness, not saturation.
9. Give Your Compost Enough Oxygen
A successful compost heap needs air.
Many of the microorganisms responsible for efficient composting use oxygen.
When a pile becomes tightly compacted or waterlogged, oxygen may become limited.
This can cause unpleasant smells and slower decomposition.
Why Turning Helps
Turning the heap helps:
- Break apart compacted material
- Redistribute moisture
- Mix greens and browns
- Move outer materials toward the center
- Introduce air into the pile
How Often Should You Turn Compost?
It depends on how actively you want to manage the process.
For faster composting, you might turn the pile every week or two when the materials and conditions make that practical.
For a slower, low-maintenance system, turning occasionally may be enough.
Some gardeners use composting methods that require little or no turning.
These generally take longer and still need suitable materials and moisture.
How to Turn a Compost Heap
- Use a garden fork or shovel.
- Move material from the outer edges toward the center.
- Break up compacted clumps.
- Check for dry or wet areas.
- Add moisture or browns if needed.
- Rebuild the pile loosely.
You don’t have to make the pile perfect.
A little regular attention is usually more helpful than trying to manage every detail precisely.
10. Understand Why Compost Heaps Get Warm
Have you ever reached into the center of an active compost pile and noticed that it feels warm?
That’s a sign that microorganisms are breaking down the organic material.
As they consume suitable materials, their activity generates heat.
Large, well-balanced piles may become surprisingly warm.
Hot Composting
In an actively managed pile, temperatures may rise to approximately 130–160°F (54–71°C).
Maintaining an appropriate temperature range can accelerate decomposition.
However, high temperatures alone don’t guarantee that every weed seed or plant pathogen has been eliminated.
Effective pathogen reduction requires suitable temperatures, duration, and thorough management of all parts of the pile.
Cold Composting
Cold composting is slower and requires less effort.
You continue adding suitable organic materials and allow them to decompose gradually.
The pile may never become noticeably hot.
This is still a valid method for many home gardeners.
Which Method Is Better?
Choose based on your preferences.
Hot composting: More active management, potentially faster results.
Cold composting: Less maintenance, usually slower results.
Both methods can produce useful compost when managed appropriately.
11. How Long Does It Take to Make Compost?
One of the most common beginner questions is how long composting takes.
The answer depends on several factors.
These include:
- Temperature
- Moisture
- Oxygen
- Material size
- Carbon-to-nitrogen balance
- Pile volume
- How frequently the pile is turned
- The type of organic matter
Typical Timeframes
An actively managed compost pile with suitable materials may produce mature compost within a few months.
A slower, less frequently maintained pile may take six months to a year or longer.
Woody materials and thick stems can take particularly long to break down.
How to Speed Up the Process
If you want compost more quickly:
- Chop bulky materials into smaller pieces.
- Balance browns and greens.
- Keep the pile evenly moist.
- Maintain sufficient pile volume.
- Turn when needed.
- Avoid adding thick layers of wet grass or compacted leaves.
Don’t Rush Immature Compost Into the Garden
Partially decomposed material may continue breaking down after being added to soil.
In some situations, this can temporarily affect nutrient availability or harm sensitive seedlings.
Allow the compost to mature properly before using it extensively around young plants.
12. How to Know When Compost Is Ready
Finished compost has several recognizable characteristics.
Color
It usually becomes dark brown.
Texture
It feels crumbly and resembles rich soil.
Smell
It has a pleasant earthy smell.
It should not smell strongly of ammonia, sewage, or rotting food.
Appearance
Most original ingredients are no longer recognizable.
You may still see small pieces of wood or other stubborn material.
Temperature
Finished compost generally stops heating significantly and approaches the surrounding temperature after it has matured.
A Simple Readiness Check
Take a handful of compost.
If it is dark, loose, earthy-smelling, and largely free from recognizable fresh ingredients, it may be ready.
If you still see large quantities of recently added scraps, continue composting.
For sensitive uses, such as seed-starting mixtures, finished compost may require additional screening or testing.
13. Why Does My Compost Heap Smell Bad?
A well-managed compost heap should generally smell earthy rather than offensive.
If the pile develops a strong unpleasant odor, something usually needs adjusting.
Problem: Rotten or Sulfur-Like Smell
Possible cause: Too much moisture or too little oxygen.
What to do:
- Turn the heap.
- Add dry browns.
- Break up compacted areas.
- Improve drainage.
Problem: Strong Ammonia Smell
Possible cause: Too much nitrogen-rich material.
This sometimes happens when a large quantity of fresh grass clippings is added at once.
What to do:
- Add dry leaves.
- Mix in shredded cardboard.
- Turn to distribute materials.
Problem: Visible Food Scraps Attracting Animals
Possible cause: Food waste has been left exposed.
What to do:
- Bury suitable food scraps in the center.
- Cover with dry leaves.
- Use a more secure bin if necessary.
- Avoid meat, dairy, greasy foods, and other attractive materials.
If rodents remain a problem, stop adding food scraps until the issue is controlled.
Composting should not create an ongoing pest problem for your household or neighbors.
14. What if Your Compost Isn’t Breaking Down?
Sometimes a compost pile appears unchanged for weeks.
You keep adding material, but nothing seems to happen.
There are several possible reasons.
The Heap Is Too Dry
Dry microorganisms become less active.
Add a little water and mix the materials.
There Are Too Many Browns
A pile consisting almost entirely of dry leaves or straw can take a long time to decompose.
Add a suitable amount of nitrogen-rich material.
Pieces Are Too Large
Whole branches and thick stems break down slowly.
Cut or shred bulky materials when practical.
The Weather Is Cold
Cold temperatures can slow decomposition.
Be patient, especially during winter.
The Heap Is Too Small
Small piles may not retain enough heat for rapid composting.
Consider combining materials into a larger pile if you have enough suitable waste.
The Materials Are Compacted
Dense, wet layers limit airflow.
Loosen and mix the pile.
Most slow-composting problems can be improved by checking moisture, airflow, and material balance.
15. Keep Pests Away From Your Compost Heap
A compost heap is a place where organic matter breaks down, so it’s natural for some organisms to appear.
Earthworms, springtails, beetles, and other decomposers can be part of the process.
But rodents and other unwanted animals are a different issue.
How to Reduce Pest Problems
- Avoid meat and fish scraps.
- Avoid greasy cooked food.
- Cover fruit and vegetable scraps.
- Don’t leave food sitting on top of the pile.
- Use a suitable enclosed bin when necessary.
- Clean up spilled scraps nearby.
- Avoid placing the heap against buildings.
Is It Normal to See Insects?
Yes.
Many insects and other small organisms participate in decomposition.
Their presence doesn’t automatically mean the pile is unhealthy.
However, large numbers of houseflies, strong odors, or obvious rodent activity suggest that the system needs attention.
16. Can You Compost During Winter?
Yes.
Composting can continue during cold weather, although decomposition generally slows as temperatures drop.
The microorganisms responsible for breaking down materials are affected by temperature.
Winter Composting Tips
- Continue collecting suitable materials.
- Keep a supply of dry leaves nearby.
- Cover new kitchen scraps with browns.
- Avoid making the pile excessively wet.
- Protect the heap from waterlogging.
- Expect slower decomposition.
A well-sized pile may retain some warmth in its center even when the weather is chilly.
But small home compost bins may become largely inactive during freezing conditions.
That’s normal.
Activity usually increases when temperatures rise.
17. How to Use Finished Compost in Your Garden
Once your compost is mature, it’s time to put it to work.
Finished compost is useful in many gardening situations.
Add Compost to Vegetable Beds
Spread a modest layer of finished compost over the soil.
You can gently incorporate it into the upper soil layer when preparing beds, or use it on the surface according to your gardening method.
Use Compost Around Established Plants
Apply finished compost around suitable garden plants, leaving space around stems and crowns.
Avoid piling compost directly against woody trunks or plant stems.
Improve Heavy Soil
Compost can help improve the structure of compacted or clay-rich soil over time.
This may support better water movement and root growth.
Improve Sandy Soil
Sandy soil often drains quickly.
Adding mature compost can help improve its ability to retain moisture and some nutrients.
Top-Dress Garden Beds
A thin layer of compost can be added to established garden beds when appropriate.
Avoid burying delicate plant crowns.
Can You Use Pure Compost as Potting Soil?
Usually, it’s better not to rely on pure homemade compost for container growing.
Container plants often need a potting mix that balances drainage, aeration, moisture retention, and nutrient availability.
Use compost as an appropriate component of a suitable growing mix rather than assuming it can replace all other ingredients.
18. Starting a Compost Heap With Almost No Money
One of the best things about composting is that it doesn’t need to become an expensive project.
You can begin with materials already available around your home.
What You May Already Have
- Fallen leaves
- Grass clippings
- Vegetable scraps
- Plain cardboard
- Small branches
- An old garden fork
- A suitable garden corner
A Simple Budget Compost Setup
If you have enough space, create a designated ground-level heap.
Use suitable reclaimed boards or wire mesh if you want an enclosure.
Make sure the structure is stable and ventilated.
Avoid treated, painted, or contaminated materials.
You don’t need compost starters, expensive additives, or special powders to begin the natural decomposition process.
Suitable ingredients, air, moisture, and time do most of the work.
19. A Simple 7-Day Composting Plan for Beginners
If you’ve never composted before, this one-week plan makes getting started easier.
Day 1: Choose Your Location
Find a suitable, well-drained area.
Check local composting rules if necessary.
Day 2: Gather Browns
Collect dry leaves, shredded cardboard, or other suitable carbon-rich material.
Day 3: Gather Greens
Save appropriate vegetable scraps and fresh garden clippings.
Avoid unsuitable food waste.
Day 4: Build the Heap
Combine browns and greens.
Start with roughly 2–3 parts browns to 1 part greens by loose volume.
Day 5: Check Moisture
Use the wrung-out sponge test.
Add a little water if needed.
Day 6: Check Airflow
Inspect for overly compacted or wet areas.
Loosen material if necessary.
Day 7: Review Your Setup
Check for odors, pests, and moisture problems.
Make adjustments and continue collecting suitable compost ingredients.
By the end of the week, you won’t have finished compost.
But you’ll have a functional composting system ready to maintain.
20. Common Composting Mistakes Beginners Should Avoid
A few simple mistakes can slow down the entire process.
Mistake 1: Adding Too Much Grass at Once
Fresh grass clippings can form a dense, wet layer.
Mix them with dry browns instead.
Mistake 2: Letting the Heap Dry Out
Composting microorganisms need moisture.
Check the pile during dry weather.
Mistake 3: Overwatering
A waterlogged heap may develop unpleasant odors.
Keep it damp, not saturated.
Mistake 4: Using Large Unprocessed Branches
Thick woody materials decompose slowly.
Break them into smaller pieces or compost them separately when practical.
Mistake 5: Adding the Wrong Food Scraps
Meat, dairy, grease, and other unsuitable materials can attract pests.
Stick to appropriate plant-based scraps.
Mistake 6: Expecting Instant Results
Composting is a biological process.
It takes time.
Mistake 7: Ignoring the Heap Completely
Low-maintenance composting is possible, but occasional checks still help prevent problems.
Mistake 8: Assuming Every Weed Seed Will Be Killed
Home composting temperatures aren’t always consistent enough to destroy seeds or plant pathogens.
Be cautious about what you add.
Mistake 9: Applying Unfinished Compost Around Seedlings
Immature material may interfere with sensitive plant growth.
Allow it to mature first.
Mistake 10: Using Compost as a Complete Replacement for Fertilizer
Compost improves soil and supplies some nutrients, but not always in the amounts plants need.
A soil test can help determine whether additional nutrients are required.
Beginner’s Composting Cheat Sheet
Keep this quick reference handy.
| Question | Simple Answer |
|---|---|
| Best location? | Level, accessible, well-drained garden area |
| Good starting size? | Around 3 × 3 × 3 feet for an active pile |
| Browns-to-greens ratio? | Start with about 2–3:1 by loose volume |
| Ideal moisture? | Damp like a wrung-out sponge |
| Does it need air? | Yes, especially for active aerobic composting |
| How often to turn? | As needed; frequent turning can speed an active pile |
| Is a strong odor normal? | No; check moisture, airflow, and ingredients |
| How long does it take? | A few months to a year or more, depending on conditions |
| What does finished compost look like? | Dark, crumbly, and earthy-smelling |
| Main benefit? | Improves soil by adding organic matter |
Frequently Asked Questions About Starting a Compost Heap
Can I Start a Compost Heap Directly on Grass?
Yes, in many gardens.
A ground-level compost heap can be started over an appropriate grassy area.
The grass beneath it will likely die as it is covered.
Choose a location you don’t need for lawn growth.
Do I Need to Buy Compost Starter?
No.
Decomposer organisms are already present in garden materials and the surrounding environment.
Commercial starters aren’t generally necessary for an ordinary backyard compost heap.
Can I Put Bread in Compost?
Small amounts of bread are biodegradable, but they can attract rodents and other pests.
For a typical open backyard heap, it’s often better to avoid adding bread and other cooked foods.
Can I Compost Grass Clippings?
Yes, provided they haven’t been contaminated with unsuitable chemicals.
Mix fresh clippings with dry browns rather than adding them in thick, compacted layers.
Can I Compost Newspaper?
Plain, non-glossy newspaper can be shredded and added in moderation.
Avoid heavily coated or plastic-laminated paper.
Why Is My Compost Full of Worms?
Earthworms and other decomposers can be normal and beneficial in a composting system.
They help process organic material.
Does Compost Need Sunlight?
No.
Compost microorganisms don’t require direct sunlight to break down materials.
The right balance of moisture, air, and organic matter is more important.
Should I Cover My Compost Heap?
A cover can help control excessive rain and drying.
However, it should not prevent the system from receiving necessary airflow.
Use a suitable lid or breathable covering based on your setup.
Can Compost Become Too Hot?
Large, actively managed piles can develop high internal temperatures.
Extremely high heat may reduce the activity of beneficial microorganisms and indicates the pile may need management.
Monitor active hot-compost piles with a suitable compost thermometer if you want more precise control.
Why Is My Compost Not Getting Hot?
Possible reasons include:
- Small pile size
- Insufficient nitrogen-rich material
- Dryness
- Cold weather
- Poor ingredient balance
Remember that cold composting is still a valid method.
Heat isn’t required for every home composting system.
How Do I Know When My Compost Is Finished?
Look for a dark, crumbly texture, earthy smell, and minimal recognizable original materials.
Finished compost should be relatively stable rather than actively heating.
Can I Use Compost on All Plants?
Finished compost benefits many garden soils, but not every plant needs the same amount.
Plants adapted to very lean or specialized soils may require different growing conditions.
Consider your plant’s needs and existing soil quality.
A Simple Compost Heap Maintenance Checklist
Use this checklist to keep your composting routine manageable.
When Adding Materials
- Check that scraps are compostable.
- Add suitable greens.
- Add enough dry browns.
- Mix or cover fresh food scraps.
- Avoid large, compacted layers.
Every Week or Two
- Check moisture.
- Look for unpleasant odors.
- Inspect for pests.
- Loosen or turn compacted areas if needed.
- Add dry material if too wet.
- Add water if too dry.
When Checking for Finished Compost
- Dark brown color
- Crumbly texture
- Earthy smell
- Few recognizable scraps
- No persistent heating
- No obvious signs of contamination
Final Thoughts: Turn Everyday Garden Waste Into Something Valuable
Starting a compost heap is one of the simplest ways to make your garden more resourceful.
Instead of sending every fallen leaf, grass clipping, or vegetable peel to the rubbish bin, you can return much of that organic material to your soil.
And you don’t need to become an expert before beginning.
Start with a suitable garden location.
Collect dry leaves and fresh plant waste.
Mix your browns and greens.
Keep the pile damp without making it soggy.
Provide enough airflow.
Avoid unsuitable ingredients.
And give nature time to do its work.
There will probably be a little trial and error.
Your first pile might become too dry.
You may need to add more leaves.
You might discover that thick grass clippings need better mixing.
That’s all part of learning.
With a little attention, the same garden waste that once filled your rubbish bin can gradually become dark, earthy compost that helps improve your vegetable beds, flower gardens, and other suitable planting areas.
Composting isn’t about creating a perfect pile. It’s about making better use of what you already have and gradually building healthier garden soil.
Start small, keep it simple, and let the composting process become a natural part of your gardening routine.