
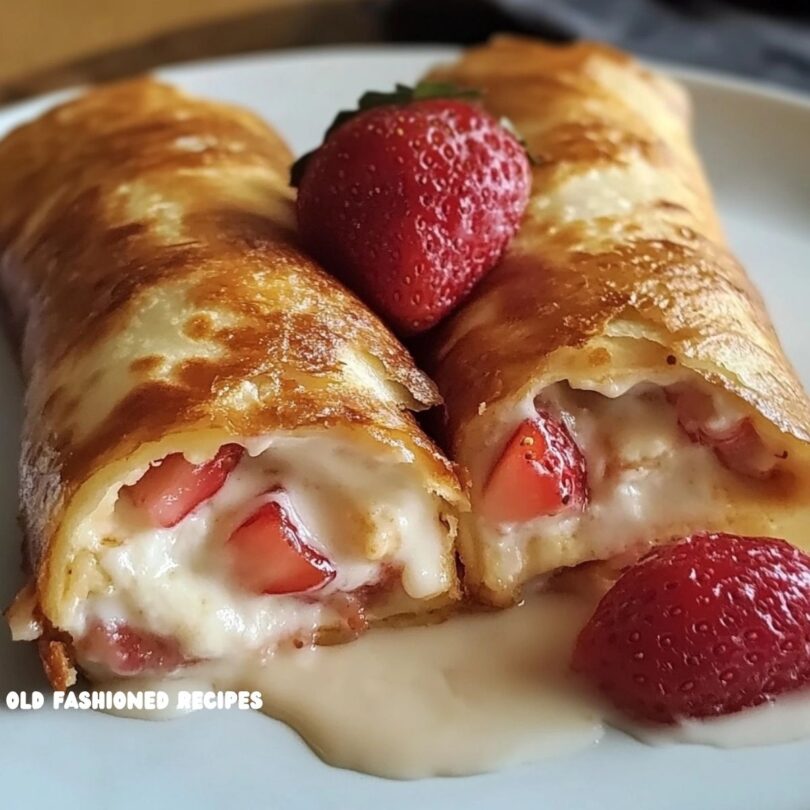

Strawberry Cheesecake Chimichangas 🍓🌯
Golden, crispy, and filled with a luscious cheesecake center and fresh strawberries, these Strawberry Cheesecake Chimichangas are a dreamy dessert twist on a Mexican classic. Perfectly pan-fried and dusted with sugar, they’re easy to make and even easier to love.
Ingredients 📝
For the Filling:
- 8 oz cream cheese, softened
- ¼ cup sour cream
- ⅓ cup powdered sugar
- ½ tsp vanilla extract
- 1 cup fresh strawberries, diced
For the Chimichangas:
- 4–6 flour tortillas (8-inch size)
- 3 tbsp granulated sugar
- 1 tsp cinnamon
- Butter or oil for frying
Instructions 🍴
1. Make the Cheesecake Filling
In a mixing bowl, beat together the cream cheese, sour cream, powdered sugar, and vanilla extract until smooth and creamy. Gently fold in the diced strawberries.
2. Assemble the Chimichangas
- Warm tortillas slightly to make them pliable.
- Spoon 2–3 tablespoons of filling into the center of each tortilla.
- Fold the sides in, then roll up tightly like a burrito.
3. Fry Until Golden
- Heat butter or oil in a skillet over medium heat.
- Place chimichangas seam side down and cook for 2–3 minutes on each side until golden and crispy.
4. Add Sweet Finish
- Mix the sugar and cinnamon in a shallow bowl.
- Roll the hot chimichangas in the cinnamon sugar mixture until fully coated.
Optional Toppings 🍓✨
- Drizzle with melted chocolate or caramel
- Top with whipped cream
- Serve with a scoop of vanilla ice cream
- Garnish with more fresh strawberries
Tips & Variations 💡
- Baked Option: Brush chimichangas with butter and bake at 400°F for 12–15 minutes until golden.
- Make-Ahead: Assemble and chill chimichangas, then fry just before serving.
- Flavor Twist: Add a tablespoon of strawberry jam for extra sweetness.
Storage 🧊
- Fridge: Store any leftovers in an airtight container for up to 2 days.
- Reheat: Warm in an oven or air fryer to maintain crispiness.
These Strawberry Cheesecake Chimichangas are a fun and indulgent dessert that feels fancy but is totally fuss-free. Great for brunches, date nights, or just treating yourself. One bite and you’ll be hooked!
You Might Also Like:
- Loading posts...

Strawberry Cheesecake Chimichangas Recipe
Golden, crispy, and filled with a luscious cheesecake center and fresh strawberries, these Strawberry Cheesecake Chimichangas are a dreamy dessert twist on a Mexican classic. Perfectly pan-fried and dusted with sugar, they’re easy to make and even easier to love.
Ingredients
For the Filling:
- 8 oz cream cheese, softened
- ¼ cup sour cream
- ⅓ cup powdered sugar
- ½ tsp vanilla extract
- 1 cup fresh strawberries, diced
For the Chimichangas:
- 4–6 flour tortillas (8-inch size)
- 3 tbsp granulated sugar
- 1 tsp cinnamon
- Butter or oil for frying
Instructions
1. Make the Cheesecake Filling
In a mixing bowl, beat together the cream cheese, sour cream, powdered sugar, and vanilla extract until smooth and creamy. Gently fold in the diced strawberries.
2. Assemble the Chimichangas
- Warm tortillas slightly to make them pliable.
- Spoon 2–3 tablespoons of filling into the center of each tortilla.
- Fold the sides in, then roll up tightly like a burrito.
3. Fry Until Golden
- Heat butter or oil in a skillet over medium heat.
- Place chimichangas seam side down and cook for 2–3 minutes on each side until golden and crispy.
4. Add Sweet Finish
- Mix the sugar and cinnamon in a shallow bowl.
- Roll the hot chimichangas in the cinnamon sugar mixture until fully coated.
Notes
Optional Toppings 🍓✨
- Drizzle with melted chocolate or caramel
- Top with whipped cream
- Serve with a scoop of vanilla ice cream
- Garnish with more fresh strawberries


Leave a Comment