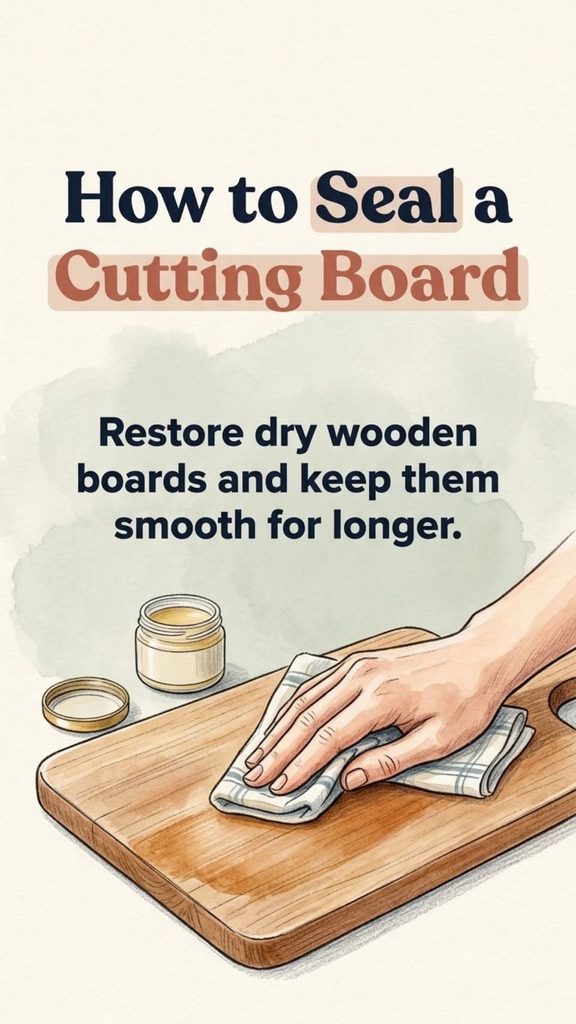
A good wooden cutting board can last for years, but it needs occasional care. Water, repeated washing, knife marks, and everyday use gradually remove moisture from the wood. Eventually, the surface may start looking pale, rough, fuzzy, or noticeably drier than it did when new.
That does not automatically mean the board needs replacing. If the wood is structurally sound, a light refinishing followed by food-safe conditioning can often restore the smooth surface and rich appearance.
The process is straightforward: clean and dry the board, sand it only if necessary, remove every trace of dust, apply a suitable food-safe oil or board conditioner, let it absorb, and wipe away the excess.
You Might Also Like:
- Loading posts...
There is one important distinction, though. What people commonly call “sealing” a cutting board usually does not mean covering it with a hard waterproof coating. For a working wooden board, the goal is normally to condition the wood with a food-contact-appropriate finish that penetrates the fibers and slows moisture absorption without creating a brittle surface film.
How to Tell When a Cutting Board Needs Attention
Not every dry-looking board needs to be completely refinished.
A board that is still smooth but looks lighter, chalky, or dry may simply need another application of food-grade mineral oil or board conditioner.
Refinishing becomes more useful when you notice:
- Raised or fuzzy wood fibers
- A rough surface that catches on a towel
- Shallow knife scratches that have accumulated over time
- Uneven patches caused by wear
- Light staining that remains after normal cleaning
- A surface that no longer feels smooth even after conditioning
Deep cracks, loose laminated sections, severe warping, mold that penetrates deeply into the wood, or grooves that cannot be cleaned properly are different problems. USDA guidance recommends replacing cutting boards once they become excessively worn or develop hard-to-clean grooves.
Sanding cannot safely repair every damaged board.
What You Need
You do not need many supplies for a basic restoration.
For most boards, gather:
- 220-grit sandpaper for light surface refinishing
- A sanding block, if desired
- Clean cloths or paper towels
- Warm water
- Dish soap
- Food-grade mineral oil or a cutting-board conditioner intended for food-contact surfaces
- A dry place where the board can sit undisturbed
If the board is substantially scratched or uneven, you may need to begin with a somewhat coarser grit and progressively work toward 180- or 220-grit paper. Do not start aggressively if the board only needs a light refresh.
Step 1: Wash the Cutting Board Properly
Before sanding or conditioning, the board should be clean.
Wash it with hot or warm soapy water, rinse it, and allow it to dry completely. USDA food-safety guidance recommends washing cutting boards with hot, soapy water after use and then rinsing and air-drying or drying with a clean towel.
Avoid beginning the refinishing process while moisture remains trapped in the wood.
For routine care, do not leave a wooden board soaking in a sink. Extended contact with water can encourage swelling and uneven dimensional changes, especially around glued joints.
Although USDA notes that some solid-wood boards can be dishwasher-safe while laminated boards may crack or split, the safest long-term approach for a valuable wooden board is to follow its manufacturer’s care instructions.
For many traditional wood boards, gentle hand washing is the more conservative choice.
Step 2: Let the Board Dry Completely
This step is easy to rush.
After washing, stand the cutting board on its edge or otherwise position it so air can reach both broad surfaces. Allow it to dry thoroughly before sanding.
Resting a soaking-wet board flat against a countertop can cause one side to dry much more slowly than the other.
Conditioning damp wood is also counterproductive. You want the board dry enough that the oil can penetrate rather than sitting on a water-saturated surface.
Step 3: Sand With the Grain
If the surface is fuzzy, scratched, or uneven, lightly sand it.
For a board that needs only minor restoration, 220-grit sandpaper is a reasonable finishing grit. Sand in the direction of the visible grain rather than repeatedly cutting across it.
Use steady, light pressure.
You are not trying to remove large amounts of wood. The goal is to take away raised fibers and minor surface imperfections until the cutting surface feels uniformly smooth.
Work across the entire face rather than sanding one small damaged area heavily. Concentrating on one patch can create an uneven depression.
Do the same to the other side if it also needs attention, and lightly address the edges if they have become rough.
What About Deep Knife Marks?
Do not expect 220-grit paper to erase substantial grooves quickly.
A badly worn board may require starting with a coarser abrasive and moving progressively through finer grits. Removing deep cuts also means removing more wood, so be conservative.
If a groove is so deep that food residue is difficult to remove, replacement may be more appropriate than repeatedly sanding the board thinner. USDA specifically identifies hard-to-clean grooves as a reason to retire a cutting board.
Step 4: Remove All Sanding Dust
Once the board feels smooth, remove the dust thoroughly.
Wipe the board with a clean cloth and pay particular attention to corners, juice grooves, handles, and edges.
You do not want fine sanding particles trapped beneath the conditioner.
If you dampen the board during cleanup, allow it to dry completely again before applying oil.
A clean, dry surface gives you a much better idea of how evenly the wood has been refinished.
Step 5: Apply a Food-Safe Cutting Board Oil
Pour a modest amount of food-grade mineral oil onto the dry wood and spread it across the surface.
Work the oil over:
- The cutting face
- The reverse side
- All edges
- End-grain areas
- Handle openings or exposed wooden recesses
Do not condition only the top.
Treating all exposed sides helps the board absorb moisture more evenly.
End grain may darken quickly and absorb considerably more oil than other areas because of the orientation of the wood fibers. Add a little more where the surface continues to absorb it readily.
The objective is to coat the wood thoroughly without wasting large amounts of oil.
Why Food-Grade Mineral Oil Works Well
Food-grade mineral oil is commonly used for wood surfaces such as cutting boards because it does not dry into a brittle film and is resistant to becoming rancid.
USDA specifically recommends mineral oil for maintaining bamboo cutting boards.
Avoid assuming that any kitchen oil is suitable simply because it is edible.
Common cooking oils such as olive oil and many vegetable oils can oxidize over time and may develop unpleasant odors or flavors. A product specifically sold as food-grade mineral oil or cutting-board oil removes much of that uncertainty.
Likewise, do not apply an unidentified furniture polish, wood stain, or household finish to a food-preparation surface simply because it works on tables or cabinets.
The finish should be specifically appropriate for food-contact use.
Step 6: Give the Oil Time to Absorb
Once the board is coated, leave it undisturbed so the oil can penetrate.
Several hours can work, but leaving a freshly conditioned board overnight is convenient when the wood is particularly dry.
A neglected board may absorb the first coat surprisingly quickly.
If the surface looks dry again soon after application, another light coat may be useful. Very dry wood sometimes needs several applications before it stops absorbing oil rapidly.
More oil is not always better, however. Once the wood is adequately conditioned, puddles remaining on the surface provide little benefit.
Step 7: Wipe Away the Excess
After the resting period, buff the entire board with a clean cloth.
The surface should feel conditioned and smooth rather than wet, greasy, or sticky.
Pay attention to juice grooves and corners where excess conditioner can collect.
After buffing, allow the board to sit before returning it to kitchen use.
Can You Use Board Butter Instead?
Yes, provided it is made from ingredients appropriate for food-contact wood.
Many cutting-board creams or “board butters” combine mineral oil with a wax such as beeswax. The oil penetrates the wood while the wax adds a slightly more water-resistant surface feel.
Board cream is particularly useful as the final stage after oiling.
A practical routine is:
- Apply food-grade mineral oil to dry wood.
- Allow it time to penetrate.
- Wipe away excess oil.
- Apply a thin layer of cutting-board conditioner.
- Leave it according to the product’s instructions.
- Buff the surface thoroughly.
You do not necessarily need both products every time. A board that receives regular mineral-oil conditioning may already be adequately protected.
How Often Should You Oil a Cutting Board?
There is no universal monthly schedule that works for every wooden board.
A heavily used board that is washed every day may need attention much sooner than a decorative serving board used twice a month.
Instead of relying entirely on the calendar, look at the wood.
It may be ready for conditioning when:
- Its color becomes noticeably lighter
- The surface looks dry
- Water is absorbed quickly instead of briefly beading
- The grain begins feeling slightly raised
- The board has lost its smooth, conditioned appearance
Regular oiling is much easier than waiting until a board becomes rough enough to require sanding.
Sanding should be occasional restoration, not part of routine monthly care.
How to Wash a Wooden Cutting Board Between Treatments
Good daily habits matter more than repeatedly refinishing the board.
After food preparation, wash the board thoroughly with soap and water, rinse it, and dry it.
Food safety matters separately from wood conditioning. Applying oil does not sanitize a cutting board.
After handling raw meat, poultry, or seafood, careful cleaning is particularly important. Using separate boards for raw animal products and foods such as bread or fresh produce can also reduce cross-contamination. USDA recommends this separation when possible.
When sanitizing is needed, use a method appropriate for a food-contact cutting surface rather than a general household disinfectant. USDA notes that cutting boards can be sanitized after cleaning using a properly prepared solution of unscented liquid chlorine bleach and water, followed by rinsing and drying.
Always follow current product directions if using a commercial food-contact sanitizer.
Common Cutting Board Care Mistakes
A few habits shorten the life of wooden boards much faster than ordinary knife use.
Leaving the Board Soaking
Wood absorbs water. Long soaking periods can encourage swelling, warping, and problems around glued joints.
Wash it and get it drying instead.
Storing It While Damp
A board needs airflow while drying.
Do not immediately place a wet board flat inside a closed cabinet.
Oiling Only One Side
Condition the edges and reverse side too. Uneven treatment can contribute to uneven moisture movement through the board.
Using Too Much Pressure While Sanding
Aggressive sanding can change the shape of the board, round edges unexpectedly, or create low spots.
Remove only as much material as necessary.
Using Random Cooking Oils
An edible oil is not automatically a good wood conditioner. Choose a product intended for cutting boards rather than grabbing whichever bottle is closest to the stove.
Treating Oil as a Substitute for Cleaning
Wood conditioner protects the material. It does not remove food residue or make a dirty board hygienic.
Cleaning comes first.
Keeping a Board That Is Beyond Repair
Restoration has limits.
If the board develops severe splitting, inaccessible contamination, loose pieces, or grooves that cannot be adequately cleaned, replacing it is the safer decision.
A Simple Maintenance Routine
Once you have restored the cutting board, keeping it in good condition becomes much easier.
Wash it promptly after use, avoid prolonged soaking, let it dry with adequate airflow, and apply food-grade mineral oil whenever the wood begins looking noticeably dry.
Use board cream occasionally if you prefer the smoother waxed finish.
Save sanding for the point when the grain becomes rough or ordinary conditioning no longer restores the surface.
A well-maintained board should not need a complete refinishing every few weeks. Most of the work is preventive.
Give Dry Wood a Second Chance
A faded, slightly rough cutting board often looks worse than it really is.
If the board remains solid and hygienically cleanable, a careful sanding and fresh application of food-safe oil can dramatically improve both its feel and appearance.
The key is not to overcomplicate the process. Clean it. Dry it completely. Sand only as much as necessary. Remove the dust. Condition every exposed surface. Wipe away the excess.
Then return to simple routine maintenance before the wood becomes severely dried out again.
That small amount of regular care is usually far easier than repeatedly refinishing the board—and it can help a well-made wooden cutting board remain a useful part of the kitchen for years.