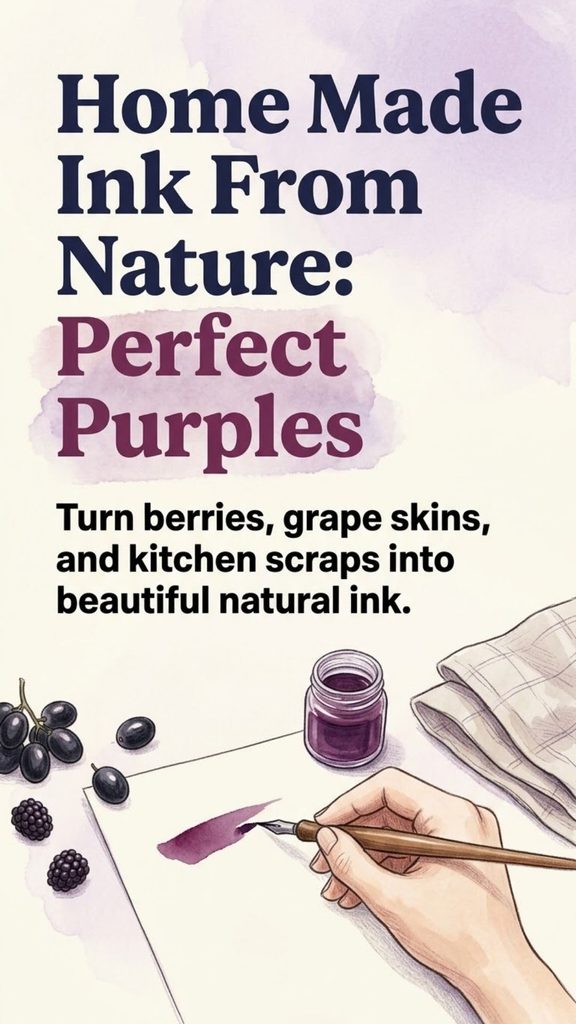
Purple is one of the most rewarding colors to explore when making natural ink. Blackberries, dark grape skins, red cabbage, red onion skins, and other deeply colored plant materials can produce shades ranging from dusky violet and plum to reddish purple, blue-violet, and smoky gray.
The process is simple enough for a kitchen-table art project: extract color from plant material with water, strain out the solids, gently concentrate the liquid, and test it on paper. A small amount of gum arabic can then be added if you want the ink to behave more smoothly with a brush or dip pen.
Natural ink does come with a few surprises. The color in the pot is not always the color that dries on the page. Some plant pigments react strongly to acidity, some fade in bright light, and homemade water-based inks can eventually grow mold.
You Might Also Like:
- Loading posts...
That unpredictability is part of their appeal, but it also means natural ink should be treated as an experimental art material rather than a permanent replacement for commercial archival ink.
Good Plants for Making Purple Ink
The easiest ingredients for a first batch are familiar plants with dark red, blue, or purple coloring.
Useful choices include:
- Blackberries
- Dark purple or black grape skins
- Red cabbage
- Red onion skins
- Beet peelings
- Ripe elderberries, with careful handling
- Sloes, if they are positively identified
Kitchen scraps are especially convenient. Grape skins left after eating the fruit, outer red onion skins, slightly bruised berries, or pieces of red cabbage can all become small batches of ink instead of being immediately discarded.
Do not assume every purple flower will produce purple ink. A flower may look intensely colored while containing too little useful pigment to produce a strong extract. Green leaves, stems, and other plant tissue can also muddy the color.
The useful part of the plant is often the part carrying the most concentrated visible pigment.
Start With Plants You Can Identify With Certainty
Natural ink projects sometimes encourage people to wander outside and collect berries, bark, or leaves. That can be interesting, but plant identification matters.
For a beginner, grocery-store ingredients are the safest and easiest place to start.
If you forage, identify the plant positively before handling or processing it. Do not rely only on berry color. Many unrelated plants produce dark berries, and some can be toxic.
Sloes are a good example of why names matter. A sloe is the fruit of blackthorn, Prunus spinosa. It should not be confused with common or glossy buckthorn, which are entirely different plants. The Royal Horticultural Society identifies blackthorn and sloe as Prunus spinosa.
Children should forage only with knowledgeable adult supervision.
A Special Warning About Elderberries
Elderberries can produce attractive dark color, but they require more caution than grapes or blackberries.
Leaves, stems, unripe berries, and other parts of elderberry plants contain cyanogenic compounds. Extension guidance recommends removing stems, leaves, and unripe fruit and properly heating elderberries before they are eaten.
For an art project, the simplest rule is even stricter: do not taste anything used for ink.
If you choose to work with elderberries, use fully identified ripe fruit, remove plant debris carefully, keep the ink away from food, and wash hands and equipment afterward.
Once a saucepan or utensil is being used regularly for experimental inks made from wild plants, it is sensible to keep it separate from normal cooking equipment.
What You Need
A small batch of natural ink requires very little equipment.
Gather:
- Your chosen plant material
- Water
- A small saucepan
- Knife or scissors
- Fork, spoon, or potato masher
- Fine strainer
- Coffee filter, clean fine cloth, or laboratory-style filter paper
- Small glass jar
- Paintbrush or dip pen
- Heavy drawing or watercolor paper
Optional:
- Gum arabic
- Funnel
- Gloves
- Several small containers for color experiments
Wear old clothing or an apron. Berry, cabbage, and onion extracts can stain fabric, countertops, hands, wooden utensils, and grout.
Step 1: Prepare the Plant Material
Color extraction works better when water can reach a large amount of the plant’s surface.
Chop cabbage and onion skins into smaller pieces. Mash berries gently with a fork. If you are using dark grapes, the skins are especially useful because much of their visible purple coloring is concentrated there.
There is no need to pulverize everything into a puree.
Very fine pulp makes filtration slower and can leave sediment in the finished ink. Break the ingredient down enough to expose its colored tissues without turning it into an unnecessarily thick paste.
Step 2: Add Water
Place the plant material in a small saucepan and add enough water to allow it to move and simmer without scorching.
There is no universal plant-to-water ratio.
A handful of blackberry skins behaves differently from a handful of dry onion skins, and one batch of fruit may contain far more pigment than another.
Start with a modest amount of water. You can always reduce the liquid later.
Adding far too much water simply means you will spend more time evaporating it.
Step 3: Extract the Color With Gentle Heat
Warm the mixture and bring it to a gentle simmer.
For many soft plant materials, approximately 5 to 15 minutes is enough to begin producing a strongly colored liquid.
Mash berries lightly while they heat.
Avoid aggressively boiling the mixture for a long time. Plant pigments can change when exposed to prolonged heat, oxygen, or changes in acidity, and harder boiling does not necessarily produce a better color.
Once the liquid has developed a strong shade and additional heating no longer seems to deepen it significantly, remove the saucepan from the heat.
Let it settle briefly.
Step 4: Strain Out the Solids
Pour the mixture through a fine strainer to remove large pieces.
For a smoother ink, filter it a second time through a coffee filter, fine cloth, or suitable filter paper.
Work slowly.
Trying to force thick berry pulp through a filter can tear the material and push sediment into the ink. Let gravity do most of the work.
For extremely pulpy fruit, a two-stage process works well:
- Remove the large solids with a strainer.
- Pass the remaining liquid through a finer filter.
A clean ink flows much more reliably from a dip pen than one full of seeds, fibers, and fruit pulp.
Step 5: Concentrate the Color if Necessary
Test a drop of the filtered liquid on white paper.
If the color looks too pale, return the liquid to a clean saucepan and simmer it gently to evaporate some of the water.
Check it frequently.
Reducing the liquid by roughly one-third may make a noticeable difference, but there is no need to aim for a particular volume. Stop when the ink has a useful intensity and consistency.
Remember that wet color often looks darker than dry color.
Always allow a test mark to dry before deciding whether the ink needs further concentration.
Step 6: Add Gum Arabic if Desired
Gum arabic is a traditional water-soluble binder used in watercolor and other art materials. Museums and art references describe it as a long-used binding medium that improves the handling of pigments in water-based paints.
For homemade plant ink, a little gum arabic can improve body and help the liquid sit more pleasantly on paper.
Start with a very small amount.
Mix it thoroughly into cooled ink and test again.
Too much gum can make the ink tacky or overly thick, especially in a dip pen. It is easier to add more than to rescue an ink that has become gummy.
If you are painting with a brush, you may find that you do not need it at all.
Step 7: Test the Ink Properly
Make several marks rather than judging the ink from one brushstroke.
Try:
- A heavy brushstroke
- A thin line
- A diluted wash
- Two overlapping layers
- A dip-pen line
- A swatch allowed to dry completely
Write the ingredient beside each sample.
Natural colors can look remarkably similar while wet but dry into completely different shades.
Keeping simple notes makes future batches much easier to reproduce.
Why Red Cabbage Changes Color
Red cabbage is especially interesting because it contains anthocyanins, a group of plant pigments that respond visibly to changes in pH.
In acidic conditions, red cabbage extract tends toward red or pink. Around neutral conditions it appears purple or violet, while increasingly alkaline conditions can shift it toward blue, green, and eventually yellowish shades. University chemistry demonstrations use exactly this property to turn red cabbage extract into a natural pH indicator.
That makes cabbage ink useful for a safe color experiment.
Divide a small amount of cabbage extract among several cups. Leave one untreated. Add a few drops of ordinary vinegar to another. In a third cup, try a small amount of baking-soda solution.
You should see noticeably different colors.
Do not use drain cleaner, concentrated acids, bleach, or other aggressive household chemicals in an art project simply to reach extreme pH values. Chemistry demonstrations involving strong acids and bases require protective equipment because those chemicals can irritate or burn skin and eyes.
Vinegar and baking soda provide enough variation for a simple home experiment.
Blackberry Ink
Blackberries are one of the easiest purple ink sources.
Mash them gently, add a small amount of water, warm them, and strain thoroughly.
Depending on the fruit and the paper, the result may appear purple, magenta, reddish violet, or gray-purple as it dries.
Blackberry extract also responds somewhat to acidity because its dark color comes in part from anthocyanins. Do not expect every batch to match the previous one exactly.
Ripeness, variety, storage conditions, water chemistry, and paper can all affect the final appearance.
Dark Grape Skin Ink
Dark grape skins can produce especially attractive violet and burgundy tones.
If possible, separate the skins from much of the pale fruit flesh before extraction. This increases the proportion of colored material in the batch and can produce a stronger result without adding unnecessary pulp.
Chop or tear the skins, simmer gently in water, strain, and reduce if necessary.
The result can be excellent for greeting cards, sketchbook washes, botanical drawings, and experimental lettering.
Do not describe the finished color as permanent simply because it stains clothing. A substance that is difficult to wash from fabric is not necessarily lightfast on paper.
Red Onion Skin Ink
Red onion skins are an excellent zero-waste material.
Save the dry outer skins from several onions, cut them into smaller pieces, cover them with water, and gently heat them.
The finished ink may be more muted than berry ink. Depending on concentration and paper, expect dusty purple, reddish brown, mauve, or earthy violet rather than a brilliant jewel tone.
That subtle color can be particularly attractive for vintage-style drawings and washes.
Beet Ink
Beetroot creates intense color quickly, but the wet magenta-red liquid can become less vivid as it dries and ages.
Use peelings or small pieces rather than wasting an entire beet.
Because beet color can be strong even without prolonged cooking, begin with gentle extraction and test frequently.
Beet is particularly enjoyable for loose brush painting, abstract work, and temporary craft projects where perfect color permanence is not essential.
What About Lavender?
A purple flower does not guarantee purple ink.
Lavender is a good example. The colorful flower portions make up only part of the plant, while stems and other green tissue can contribute duller colors when everything is extracted together.
If experimenting with flowers, separate the most strongly colored portions before extraction.
Even then, expect surprises.
Plant pigments that make a flower look brilliant in sunlight do not necessarily behave like commercial pigments once extracted into water.
Natural Ink Is Usually Not Archival
One of the most important things to understand is that homemade botanical ink can change.
Color may shift because of:
- Light exposure
- Oxygen
- Heat
- Paper acidity
- pH changes
- Time
- Microbial growth
A beautiful blackberry violet may eventually become brownish or gray. A red-cabbage purple may change if it touches an acidic or alkaline substance.
That makes botanical ink ideal for experimentation, journaling, handmade cards, temporary artwork, color studies, and learning about plant chemistry.
For artwork intended to remain unchanged for decades, use artist materials with established lightfastness information instead.
How to Store Homemade Ink
Water-based plant extracts can support microbial growth.
Do not assume that adding a clove or a drop of essential oil will reliably preserve a homemade ink for months. Such additions are not equivalent to a professionally formulated preservative system.
The simplest approach is to make small batches.
Pour cooled ink into a clean container, refrigerate it, and use it reasonably soon. Keep the jar clearly labeled and separate from food.
Discard the ink if you notice:
- Visible mold
- Gas or pressure
- Unusual cloudiness
- A major change in odor
- Unexpected slime or texture
Never taste homemade ink to decide whether it is still usable.
For longer art sessions, several tiny batches are usually more practical than one large jar that sits for months.
A Simple First Purple Ink Experiment
If you have never made natural ink before, start with three ingredients:
- Blackberries
- Red cabbage
- Dark grape skins
Prepare each one separately using the same basic process.
Chop or mash the material, cover it with a modest amount of water, gently simmer, strain, reduce if necessary, and test it on the same sheet of paper.
Once the samples dry, compare their colors.
Then take a little red-cabbage ink and experiment with vinegar and baking-soda solution. You will quickly see why plant-based color is so interesting: ingredients that all appear “purple” in the kitchen can behave very differently once turned into ink.
Natural ink making is less about finding a single perfect formula and more about learning how plants, water, heat, acidity, and paper interact.
Keep your batches small, write down what you used, save color swatches, and treat every pot as an experiment.
The next purple you make may not match the last one—and that is exactly what makes this old, simple craft so much fun.