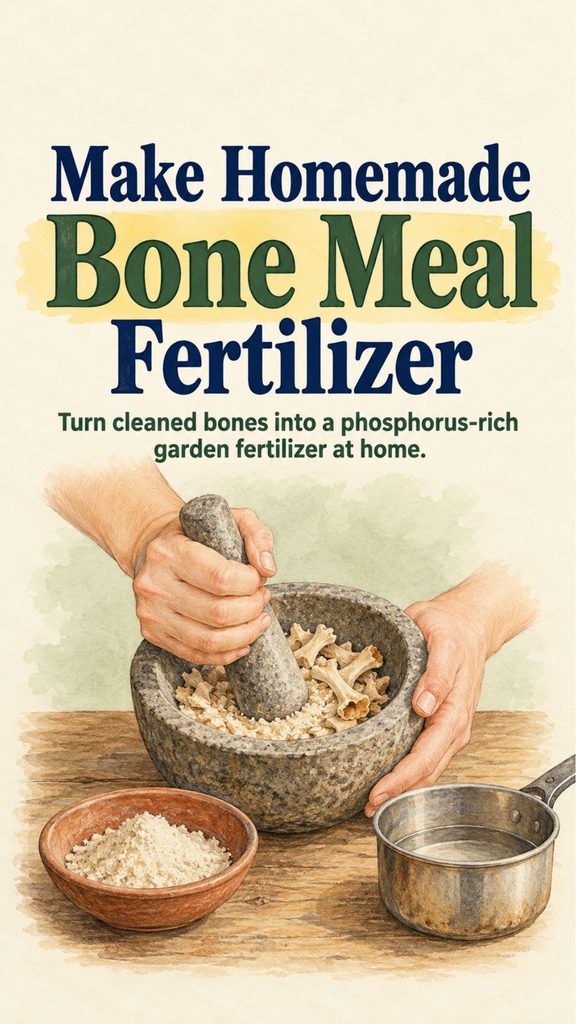
Chicken bones, turkey bones, and other clean animal bones do not necessarily have to go straight into the trash. With enough cleaning, drying, and grinding, they can be turned into homemade bone meal for the garden.
Bone meal is primarily valued as a slow-release source of phosphorus and calcium. Both are essential plant nutrients, but that does not mean every garden needs additional bone meal.
This is the most important thing to understand before making it.
You Might Also Like:
- Loading posts...
Adding phosphorus simply because a plant is flowering, fruiting, or growing poorly is not automatically helpful. Many established garden soils already contain enough phosphorus, and excessive phosphorus can interfere with nutrient balance and contribute to environmental problems if it moves into waterways.
So homemade bone meal is best treated as a soil amendment to use when your soil actually needs it, not as a universal fertilizer for every plant.
The good news is that making it at home is fairly straightforward.
You need clean bones, heat, patience, and a way to grind them very finely.
What Is Bone Meal Fertilizer?
Bone meal is made from animal bones that have been processed until they are dry and brittle, then ground into a powder or fine granular material.
Commercial bone meal is usually produced under controlled conditions and has a labeled nutrient analysis.
Homemade bone meal does not.
That means you cannot know its exact phosphorus or calcium content without laboratory testing.
Still, the basic garden function is similar: as the material breaks down in soil, nutrients become available gradually.
Bone meal is not a balanced fertilizer.
It generally provides little useful nitrogen and does not supply everything plants need for healthy growth.
Think of it as one possible amendment rather than complete plant food.
Why Plants Need Phosphorus
Phosphorus is essential to plant growth.
It plays important roles in:
- energy transfer within the plant
- root development
- flowering and seed production
- cell division
- overall plant metabolism
Plants need phosphorus throughout their lives, not only when they begin flowering.
However, they need it in appropriate amounts.
More phosphorus does not automatically mean more flowers, larger fruit, or stronger roots.
Once the soil already contains enough, adding more provides little benefit.
Don’t Diagnose Phosphorus Deficiency by Leaf Color Alone
Phosphorus deficiency can sometimes produce dark green growth with reddish or purplish coloration, particularly on older leaves.
But purple foliage does not automatically mean a plant needs bone meal.
Cold soil can temporarily limit phosphorus uptake.
Root damage can interfere with nutrient absorption.
Some plants naturally produce purple pigments.
Soil pH can also affect phosphorus availability.
Other nutrient problems and environmental stress can create similar symptoms.
A soil test is much more reliable than trying to diagnose a phosphorus deficiency from leaf color alone.
If you regularly amend a vegetable garden, testing the soil every few years can prevent unnecessary fertilizer use.
Why Homemade Bone Meal Can Be Useful
The main advantage is simple: it turns a waste product into something potentially useful.
If you already cook meat with bones, you can process those bones instead of discarding them.
Making bone meal may also appeal to gardeners who enjoy traditional self-sufficiency skills and want to understand where garden amendments come from.
But homemade bone meal is not automatically cheaper if you need to run an oven for hours, purchase special grinding equipment, or process only a tiny handful of bones.
It makes the most sense when you already have the materials and enjoy the process.
What Bones Can You Use?
Bones from common food animals can be used, including chicken, turkey, beef, pork, or lamb bones.
Smaller poultry bones are generally easier to process and grind than thick beef bones.
Use bones that are reasonably fresh and have been handled safely as food.
Remove as much meat, skin, fat, cartilage, and connective tissue as possible.
The cleaner the bones are before drying, the easier the final grinding process becomes.
Step 1: Clean the Bones Thoroughly
Begin by removing all remaining meat and fatty tissue.
If the bones came from a cooked meal, scrape them as clean as possible.
For bones that still have stubborn tissue attached, simmering them in water can help loosen it.
After simmering, allow them to cool and remove any remaining material.
You want mostly bare bone before the drying stage.
Excess grease is especially undesirable because it can create odors and make the finished material difficult to grind and store.
Step 2: Dry the Bones Completely
The bones must become thoroughly dry and brittle before grinding.
Spread them in a single layer on a baking sheet.
A moderate oven can be used to dry them.
Rather than relying on an exact number of hours for every type of bone, watch their condition.
Small poultry bones will dry much faster than thick beef bones.
The finished bones should be:
dry,
hard,
free from greasy tissue,
and brittle enough to crack rather than bend.
An oven temperature in the neighborhood of 250–300°F (120–150°C) can be used for drying and further heating cleaned bones.
Processing time will vary considerably depending on size and moisture.
Do not leave the oven unattended.
Step 3: Let the Bones Cool Completely
Remove the tray and allow everything to cool.
Do not attempt to grind hot bones.
This cooling period also gives you a chance to inspect them.
If any pieces still contain soft tissue or feel greasy, clean and dry them further.
A properly prepared bone should feel completely dry before it enters the grinder.
Step 4: Break Large Bones Into Smaller Pieces
Large bones are difficult to grind whole.
Place them inside a sturdy bag or wrap them securely in heavy material, then carefully break them into smaller pieces using an appropriate tool.
Wear eye protection.
Bone fragments can be sharp.
Keep your hands away from the impact area and work on a solid surface.
The smaller the pieces are before grinding, the easier the next step will be.
Step 5: Grind the Bones Into Powder
Now grind the dried pieces as finely as your equipment safely allows.
A dedicated heavy-duty grinder, grain mill rated for hard material, or another suitable tool may work.
Do not assume an ordinary household blender can safely pulverize thick animal bones. Hard fragments can damage blades or containers.
It is also wise not to use equipment for bone grinding unless the manufacturer indicates it can handle hard materials.
Wear a dust mask and eye protection while handling fine bone powder.
You do not want to inhale airborne particles.
Ideally, the finished material should resemble coarse flour or very fine grit.
Finer particles generally break down more readily in soil than large chunks.
Skip the Baking Soda Fertilizer Solution
Some homemade bone meal recipes instruct gardeners to mix bone powder with baking soda and water, boil the mixture, and pour the resulting liquid around plants.
There is little reason to do this.
Baking soda contains sodium, and repeatedly adding sodium to garden soil can be harmful to soil structure and plant health.
Boiling bone powder with baking soda also does not turn it into a precisely balanced liquid phosphorus fertilizer.
The simpler approach is better:
make the bone meal, then use the dry material sparingly in soil when phosphorus is actually needed.
How to Use Homemade Bone Meal
Because homemade bone meal has no guaranteed nutrient analysis, precise application rates are difficult to provide.
That is another reason to use it conservatively.
If a soil test indicates that phosphorus is low, mix a modest amount into the soil rather than leaving a thick layer on the surface.
Work it into the root zone before planting when possible.
For an established bed, lightly incorporate it into the soil surface without damaging plant roots.
Do not assume that adding handfuls around every plant will improve growth.
Too much fertilizer of any kind can create problems.
Bone Meal Works Slowly
Bone meal is not an instant fertilizer.
Its phosphorus must become available through soil processes over time.
That makes it very different from a fast-acting soluble fertilizer.
For this reason, bone meal is usually more useful as a pre-planting soil amendment than as an emergency treatment for a plant that appears unhealthy today.
If a plant is suddenly declining, look first at:
watering,
root condition,
light,
temperature,
pests,
disease,
and soil conditions.
Fertilizer cannot correct every gardening problem.
Soil pH Matters
Phosphorus availability is strongly affected by soil chemistry.
In strongly alkaline soils, phosphorus can become chemically bound and less available to plants.
Adding more and more bone meal does not necessarily solve that problem.
This is particularly relevant in regions with naturally alkaline soils.
If your soil pH is high, a soil test can help determine whether phosphorus is actually deficient and whether another management approach is more appropriate.
Which Plants Can Benefit?
Bone meal is often marketed for flowers, bulbs, roses, tomatoes, and root crops.
But plants do not need a fertilizer simply because they belong to one of those groups.
A tomato plant growing in phosphorus-rich soil does not need additional bone meal just because tomatoes produce fruit.
Likewise, bulbs do not automatically require a handful of bone meal in every planting hole.
Use soil conditions—not gardening folklore—as your guide.
If phosphorus is low, many garden plants can benefit from correcting that deficiency.
If phosphorus is already adequate, skip it.
Be Careful When Planting Bulbs
Bone meal has traditionally been sprinkled into holes before bulbs are planted.
There are two potential problems with this habit.
First, phosphorus may already be sufficient.
Second, the smell of bone-based products may attract dogs, raccoons, rodents, or other animals that dig.
If you use bone meal around bulbs, mix it thoroughly into the soil rather than leaving concentrated piles immediately beneath them.
And keep pets away from freshly amended areas.
Bone Meal Can Attract Animals
Homemade bone meal smells much more interesting to animals than it does to gardeners.
Dogs may be especially tempted to dig in soil where it has been used.
Wildlife may also investigate.
Work the meal into the soil rather than scattering it over the surface.
Store unused powder in a sturdy, closed container where animals cannot reach it.
Do not leave bags or open jars in sheds where rodents or pets can access them.
How to Store Homemade Bone Meal
The finished powder must remain dry.
Place it in an airtight or tightly sealed container and store it somewhere cool and protected from moisture.
Label the container clearly.
Do not store it beside flour, cornmeal, or other foods where it might be confused with something edible.
Because homemade bone meal does not contain preservatives and may retain traces of organic material, make only the amount you reasonably expect to use.
If it develops an unpleasant rancid smell, visible mold, or obvious moisture damage, do not use it around valuable plants.
Can You Put Bones Directly Into Compost?
Whole bones break down very slowly in an ordinary backyard compost pile.
Chicken bones may eventually deteriorate, but large bones can remain recognizable for years.
They can also attract animals.
Grinding cooked, cleaned, dried bones before adding small amounts to compost greatly increases their surface area and allows them to break down more effectively.
Still, you do not need to put bone meal into compost simply because you have made it.
If the compost and garden soil already contain sufficient phosphorus, storing or using the material elsewhere may be more appropriate.
Bone Meal Is Different From Eggshell Fertilizer
Eggshells and bones are sometimes treated as interchangeable homemade fertilizers.
They are not.
Eggshells consist primarily of calcium carbonate.
Bones contain substantial calcium but also contain phosphorus in mineral forms associated with the bone structure.
Both materials break down slowly when left in large pieces.
Grinding them increases surface area, but neither should be viewed as instant plant food.
Don’t Build a Homemade Fertilizer Collection Just Because You Can
Banana peels for potassium.
Eggshells for calcium.
Coffee grounds for nitrogen.
Bones for phosphorus.
This sounds like an easy way to build a complete fertilizer from kitchen scraps.
In reality, plant nutrition is more complicated.
The nutrients in organic materials are present in variable concentrations and become available at different rates.
A banana peel does not provide a predictable dose of potassium.
Coffee grounds are not equivalent to nitrogen fertilizer.
Eggshells may remain in soil for a long time before releasing significant calcium.
Homemade amendments can contribute to soil-building, but they should not replace understanding what your soil actually needs.
Often the most useful destination for mixed kitchen and garden scraps is a well-managed compost pile.
Soil Testing Can Save You Money
If the goal of homemade fertilizer is saving money, soil testing is one of the most economical tools available.
Without testing, you may spend time adding nutrients the soil already has.
A basic soil test can tell you about pH and major nutrient levels and may provide fertilizer recommendations based on what you plan to grow.
That information lets you target your effort.
If phosphorus is low, bone meal becomes useful.
If phosphorus is already high, you can save the bones for another purpose and avoid making the imbalance worse.
A Useful Old-Fashioned Skill—When the Garden Needs It
Making homemade bone meal is a good example of turning a household waste product into a garden resource.
Clean the bones.
Remove meat and grease.
Dry them until brittle.
Break them into manageable pieces.
Grind them safely into a fine meal.
Store the powder dry.
Then use it sparingly only where additional phosphorus makes sense.
There is no need to boil the powder with baking soda, make a homemade fertilizer tea, or pour it around plants every month.
Bone meal works slowly, and more is not automatically better.
The smartest homemade fertilizer is not the one you can make from the most kitchen scraps.
It is the one that supplies something your soil actually needs.
If a soil test shows that phosphorus is low, those leftover bones can have a useful second life in the garden.
If the soil already has plenty, the most frugal decision may simply be not to add more.