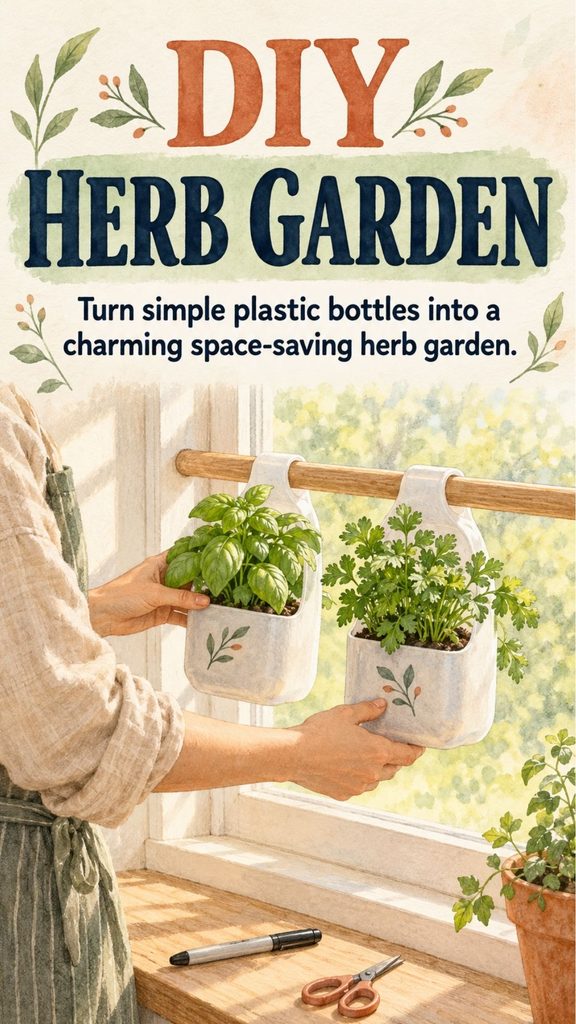
You do not need a large backyard—or even a traditional garden bed—to grow a useful collection of fresh herbs.
A sunny window, a narrow balcony, or a small patio can hold surprisingly productive plants when you make good use of vertical space.
One inexpensive way to do that is by turning sturdy plastic bottles into hanging herb planters.
You Might Also Like:
- Loading posts...
Instead of throwing the containers away, you can cut and reshape them, attach them to a simple wooden support, fill them with potting mix, and use them for compact herbs such as parsley, chives, thyme, oregano, or small basil plants.
The project is simple, but a few practical improvements make a big difference. Herbs need adequate drainage, enough root space, strong light, and a hanging system that can safely support the weight of wet soil.
Done properly, this recycled-bottle herb garden can be a useful little growing station rather than simply a decorative craft.
Why Make a Bottle Herb Garden?
Small herb gardens are ideal for areas where normal pots take up too much room.
A hanging setup allows you to use space that might otherwise remain empty.
It can work near:
- A sunny kitchen window
- A balcony railing
- A sheltered patio
- A porch
- An outdoor wall
- A bright garden fence
It is also a useful way to experiment with container gardening before buying expensive planters.
The materials are inexpensive, and many may already be available around the house.
What You Will Need
For a basic two-container herb garden, gather:
- 2 sturdy plastic bottles or jugs
- A narrow wooden batten or slat
- Scissors
- Craft knife
- Metal ruler
- Permanent marker
- Hole punch or awl
- Drill or other tool for making drainage holes
- Suitable screws, hooks, brackets, or another secure mounting system
- Quality potting mix
- Herb seedlings or seeds
You may also want:
- Sandpaper for rough plastic edges
- Gloves
- Small scoop
- Plant labels
- Waterproof tray if growing indoors
The exact dimensions are flexible.
The important thing is that the wooden support is strong enough for the number of filled containers you intend to hang.
Choose the Right Bottles
Use relatively sturdy containers rather than thin disposable water bottles.
Larger plastic milk or juice bottles are often easier to work with because they provide:
- More root space
- More potting mix
- Better moisture retention
- A wider planting opening
Wash the containers thoroughly and remove any labels.
Avoid containers that previously held:
- Cleaning chemicals
- Automotive products
- Pesticides
- Solvents
- Other hazardous substances
For an edible herb garden, start with clean containers that originally held food or beverages.
Think About Root Space Before Cutting
One common mistake with recycled planters is concentrating on appearance while forgetting that plants need enough growing medium.
Do not cut away so much of the bottle that only a shallow strip remains.
The lower portion should hold several inches of potting mix.
Compact herbs tolerate small containers better than large, vigorous plants.
This project is best suited to herbs rather than deep-rooted vegetables.
Step 1: Wash and Prepare the Bottles
Rinse each bottle thoroughly.
Wash with ordinary dish soap and water, then rinse away all residue.
Allow the bottles to dry.
Remove labels and adhesive where practical.
You do not need them to look perfect, but clean containers are much nicer to work with.
Step 2: Mark the Cutting Area
Use a permanent marker to draw the section you want to remove.
A useful design leaves most of the lower bottle intact while removing the upper portion and handle area to create an open planter.
Make the opening large enough that you can easily:
- Add potting mix
- Plant herbs
- Water
- Remove old roots later
Try to keep the two bottles similar in shape so the finished garden hangs evenly.
Step 3: Cut the Plastic Carefully
Begin the opening with a craft knife if necessary, then continue with strong scissors.
Cut away from your hands.
A metal ruler can help guide straight cuts when making slots, but always work on a stable surface.
Plastic can split unpredictably, so do not rush.
If children are helping with the garden, an adult should handle the cutting portion of the project.
Step 4: Smooth Sharp Edges
Run your fingers carefully near—but not directly across—the cut edges.
If they feel sharp or jagged, trim them with scissors or smooth them with fine sandpaper.
This is especially important for a planter placed near a frequently used window or work surface.
You will be reaching into the container regularly to water, harvest, and prune.
Step 5: Make Openings for the Wooden Support
The original style of this project uses slits in the bottles so they can slide onto a narrow wooden batten.
Measure the width and thickness of your wooden strip.
Mark corresponding slots on both sides of each bottle.
Cut carefully so the wooden support can pass through without making the openings excessively large.
The containers should sit securely rather than wobbling freely.
Test the fit before adding soil.
Step 6: Add Drainage Holes
This is one of the most important steps.
Plastic bottles are watertight.
Without drainage holes, excess irrigation collects around the roots and can create soggy growing conditions.
Make several small holes in the lowest part of each planter.
The holes should allow excess water to escape freely.
If the planter will hang indoors, place something underneath to catch drainage water.
Never assume that a layer of stones at the bottom replaces drainage holes. The water still needs somewhere to leave the container.
Step 7: Decorate and Label the Bottles
Before filling the planters, label them.
A permanent marker works well for a simple recycled look.
You could write:
- BASIL
- THYME
- PARSLEY
- CHIVES
- OREGANO
- MINT
You can also add simple patterns or botanical drawings.
Keep decoration away from drainage openings and attachment points.
For a more finished appearance, use outdoor-safe paint intended for the type of plastic you are using, but decoration is completely optional.
Step 8: Slide the Planters Onto the Wooden Batten
Insert the wooden strip through the prepared slots.
Space the bottles apart so each plant has room to grow.
Before mounting anything, hold the assembly and make sure:
- Bottles stay upright
- The batten does not bend
- Openings remain accessible
- Drainage holes point downward
Remember that the finished garden will become considerably heavier after you add wet soil.
Step 9: Mount the Garden Securely
Do not rely on a weak hook or improvised attachment.
A container of moist potting mix can weigh much more than an empty bottle.
Choose a fixing appropriate for the wall, window frame, railing, or other structure.
If you are uncertain whether a surface can carry the load, use a freestanding support instead.
Avoid hanging heavy planters directly over:
- Beds
- Seating
- Children’s play areas
- Electronics
- Frequently used walkways
A recycled planter is useful only if it is mounted safely.
Step 10: Fill With Potting Mix
Use a good-quality container potting mix.
Do not fill the planters with heavy garden soil.
Ordinary soil from the yard can:
- Compact in containers
- Drain poorly
- Become extremely heavy
- Make watering difficult
A container mix stays lighter and generally provides a better balance of moisture and air.
Fill each bottle while leaving some space below the top edge.
This prevents soil from washing out during watering.
Step 11: Plant the Herbs
Make a planting hole in the center.
Remove the herb carefully from its nursery pot.
Loosen tightly circling roots gently if needed.
Place the plant at approximately the same depth it was previously growing.
Fill around it with potting mix.
Press lightly rather than compacting the soil heavily.
Water thoroughly and allow excess water to drain.
The Best Herbs for Small Bottle Planters
Some herbs adapt to compact containers better than others.
Good choices include:
Chives
Chives remain relatively compact and can be harvested repeatedly.
Snip leaves as needed rather than cutting the entire plant down continuously.
Parsley
Parsley works well in containers but appreciates more root depth than tiny planters provide.
Use one of the larger bottles for it.
Thyme
Thyme is a good choice for relatively small planters because it stays compact and prefers good drainage.
Avoid keeping it constantly wet.
Oregano
Oregano can spread, but regular harvesting keeps it manageable.
It also works attractively near the edge of a container where stems can trail slightly.
Basil
Basil can grow quickly and may eventually outgrow a very small bottle.
Choose a compact variety or harvest regularly.
It appreciates warmth and good light.
Cilantro
Cilantro can work well during cooler weather but tends to bolt quickly in heat.
Instead of expecting one plant to last all season, sow small batches periodically.
Be Careful With Mint
Mint is easy to grow, but it is vigorous.
A separate container is actually one of the best ways to grow it because it prevents underground spreading.
However, a tiny bottle may dry too quickly for a thirsty mature mint plant.
Use one of your largest containers and be prepared to prune regularly.
How Much Sun Do Herbs Need?
Most commonly grown culinary herbs perform best with substantial light.
A bright window may be adequate for some plants, but indoor light is much weaker than outdoor sunlight.
If your herbs become:
- Pale
- Thin
- Stretched
- Weak
- Bent strongly toward the window
they may need more light.
An outdoor location with several hours of direct sun is usually easier for sun-loving herbs such as basil, rosemary, oregano, and thyme.
In very hot climates, some afternoon protection can help prevent small plastic planters from overheating and drying excessively.
Watch How Hot the Plastic Becomes
Small plastic containers can warm quickly in direct summer sun.
Dark-colored bottles become especially hot.
That means roots may experience harsher temperature swings than they would in a larger pot.
If the planter receives intense afternoon sun and repeatedly wilts despite proper watering, move it to a position with morning sun and some later shade.
How to Water a Bottle Herb Garden
Small containers dry more quickly than large pots.
Check the soil regularly.
Push a finger into the upper layer.
If it feels dry, water thoroughly until moisture drains from the holes underneath.
Do not use a fixed rule such as “one cup every day.”
Water needs change with:
- Temperature
- Wind
- Container size
- Plant size
- Sun exposure
- Humidity
Check the soil and plant rather than the calendar.
Do Not Leave the Roots Sitting in Water
If the bottle garden is indoors and you use a drainage tray, empty collected water after watering.
Standing water can keep the bottom of the planter too wet.
Most culinary herbs appreciate drainage even when they differ in how much moisture they prefer.
Feed Container Herbs Lightly
Container plants eventually use the nutrients available in their potting mix.
If growth slows after the herbs have been growing for some time, use a suitable fertilizer according to its label instructions.
Do not assume more fertilizer means more herbs.
Excess feeding can create weak growth and unnecessary salt accumulation in a small container.
Harvest Frequently
Regular harvesting encourages many culinary herbs to remain productive.
For basil, pinch stems just above a pair of leaves to encourage branching.
For parsley, harvest outer stems first.
For chives, cut a portion of the leaves while leaving enough growth for the plant to recover.
For thyme and oregano, trim tender stem tips rather than removing huge portions at once.
Frequent modest harvests are generally better than allowing plants to become overgrown and then cutting everything heavily.
Prune Flowers When Appropriate
If you are growing basil primarily for leaves, pinch off flower buds when they begin developing.
Flowering is part of the plant’s natural life cycle, but allowing it to flower extensively can change the texture and flavor of the foliage.
Other herbs, such as thyme and oregano, can be allowed to flower if you enjoy the blooms and want to support pollinating insects outdoors.
A Two-Bottle Herb Garden Is Only the Beginning
Once you understand the construction, you can adapt the idea.
You might make:
- A three-bottle kitchen herb rail
- Several separate hanging planters
- A balcony herb station
- A tiered outdoor herb wall
- A row of labeled children’s garden containers
Do not keep adding bottles to the same wooden strip without considering the additional weight.
It is usually safer to make several smaller supports than one very heavy one.
Avoid Packing Too Many Herbs Into One Bottle
A small recycled planter may look large when seedlings are tiny.
A few weeks later, several herbs can become badly crowded.
Give each plant enough room for:
- Roots
- Leaves
- Air circulation
For many bottle sizes, one established herb per container is simplest.
Small seedlings can sometimes begin together, but eventually they may need separating.
Watch for Root-Bound Plants
If a plant begins drying unusually quickly, stops growing, or has roots filling the entire container, it may have outgrown its bottle.
Do not force the plant to stay there merely because the recycled planter looks nice.
Move it into a larger pot.
You can then reuse the bottle for another smaller herb.
Reuse the Planters Next Season
At the end of the growing season:
- Remove old plants.
- Empty the spent potting mix.
- Wash the containers.
- Check for cracking.
- Check the wooden support.
- Store everything dry.
If the plastic has become brittle from long exposure to sunlight, replace it rather than risking a container splitting while full of wet soil.
Small Improvements That Make the Project Better
A few details can make a homemade bottle garden far easier to maintain.
Make Enough Drainage Holes
One tiny hole can become blocked by potting mix.
Several small holes are more reliable.
Leave Watering Space
Do not fill soil right to the rim.
Use Large Bottles
The more root space you can provide without making the support unsafe, the easier the plants will be to maintain.
Keep Similar Watering Needs Together
Thyme and oregano prefer somewhat drier conditions than very thirsty herbs.
Grouping plants with similar needs makes care easier.
Make Labels Before Planting
Tiny herb seedlings can be difficult to distinguish.
Common Problems
Herbs Wilt Every Afternoon
Check soil moisture.
If the soil is dry, the small container may be drying too quickly.
If the soil is wet, excessive heat or root problems may be involved.
Leaves Turn Yellow
Do not immediately add fertilizer.
Check for:
- Constantly wet soil
- Poor drainage
- Root crowding
- Insufficient light
- Natural aging of older leaves
Plants Become Tall and Thin
They probably need stronger light.
Soil Falls Out of the Drainage Holes
Use smaller drainage openings or place a small piece of mesh over the holes before adding potting mix.
Do not seal them.
Bottles Lean Forward
The support slots may be too loose or the container may be unevenly loaded.
Fix the support before continuing to use it.
A Recycled Garden Should Still Be Practical
Upcycling is most useful when the finished object works well.
A bottle herb garden should not merely keep plastic out of the bin for a little longer.
It should provide:
- Enough soil for the plant
- Reliable drainage
- Strong light
- Safe support
- Easy watering
- Convenient harvesting
If the container becomes too small, transplant the herb.
If the plastic deteriorates, replace it.
If the hanging position does not provide enough light, move the garden.
The plants come first.
An Easy Garden for a Small Space
A recycled plastic bottle will never replace a large raised bed.
It does not need to.
For a few herbs, a compact hanging system can be remarkably useful.
Two cleaned bottles, one wooden strip, a little potting mix, and a handful of herb plants can turn an unused sunny space into a small edible garden.
Start with two containers.
Plant the herbs you actually cook with.
Give them plenty of light and proper drainage.
Harvest regularly.
If the system works for your space, add another small section later.
That is one of the best things about small-space gardening: you do not need acres of land or an expensive setup to begin.
Sometimes a useful garden starts with something as simple as an empty bottle that would otherwise have been thrown away.