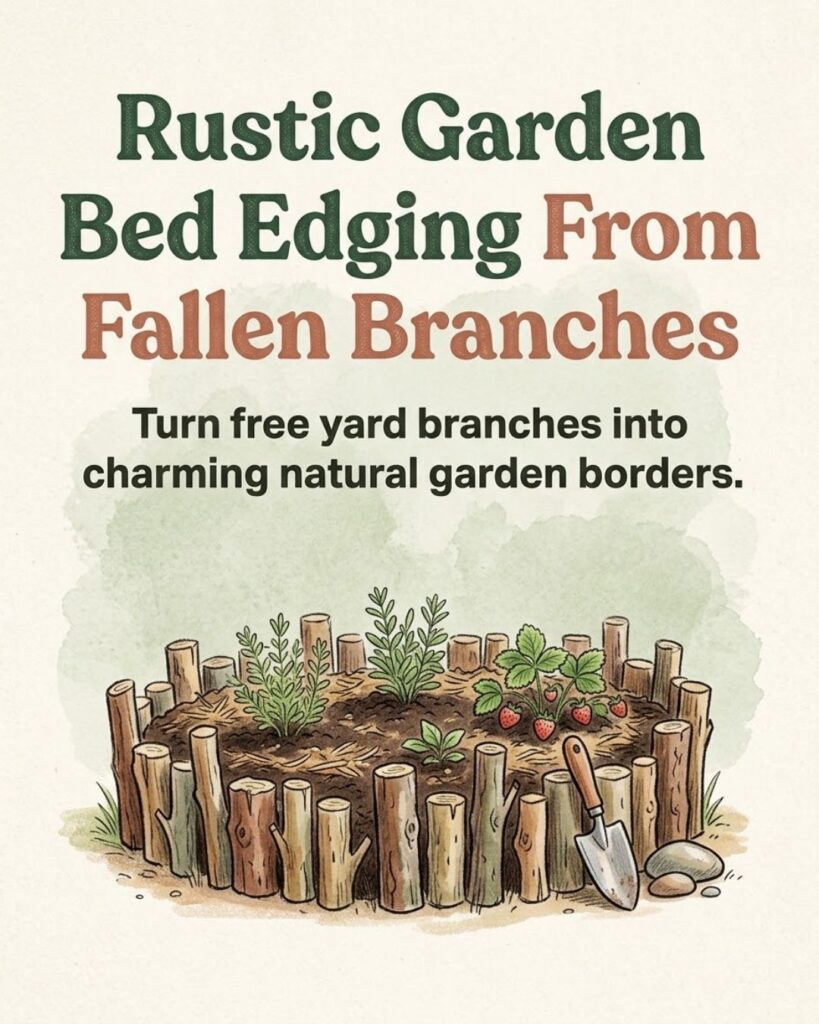
A garden bed does not need expensive metal edging, plastic borders, or perfectly cut lumber to look finished. If you have fallen branches, trimmed limbs, or small logs around the yard, you can turn them into a practical border that feels much more at home in a natural garden.
The idea is simple: cut the wood into short sections, stand those pieces upright around the perimeter of the bed, and partially bury them so they form a low retaining edge. The finished border helps separate the planting area from paths or lawn, reduces the amount of soil and mulch that spills outward, and gives the bed a relaxed woodland character.
This type of edging is especially well suited to cottage gardens, herb beds, strawberry patches, pollinator gardens, and informal backyard landscapes. It will not last forever because untreated wood eventually decomposes outdoors, but that is part of its character. Instead of treating the border as permanent construction, think of it as a useful way to repurpose material that would otherwise be chipped, burned where permitted, or discarded.
You Might Also Like:
- Loading posts...
Why Use Branches as Garden Edging?
The most obvious advantage is cost. If the wood comes from pruning or storm-damaged branches already on your property, the main material is essentially free.
There are practical benefits too.
A line of closely spaced log sections can help hold mulch and loose soil inside a raised or slightly mounded bed. It also creates a visible boundary that makes mowing, weeding, and maintaining nearby paths easier.
Visually, the effect is very different from manufactured edging. Uneven diameters, bark textures, and slightly different heights make the border look intentionally rustic rather than perfectly engineered.
That makes it particularly useful in gardens where straight plastic or metal edging would look too formal.
There is also no need to make every piece identical. In fact, slight variation often produces the better result.
What You Will Need
For a basic branch-edged garden bed, gather:
- Fallen branches, pruned limbs, or small untreated logs
- A pruning saw or suitable cutting tool
- A shovel or narrow spade
- A mallet if the soil is firm
- Compost or garden soil if you are building or refreshing the bed
- Mulch
- Gloves and appropriate eye protection when cutting wood
Choose wood that is reasonably solid. Pieces that are already soft, hollow, heavily rotted, or crumbling will not remain upright for very long.
Exact size is flexible, but pieces should be thick enough to resist snapping when partially buried.
1. Decide on the Shape Before You Cut
Start by marking the outline of the garden bed.
You can use a garden hose, rope, stakes and string, or even a line drawn lightly in the soil.
Straight beds can work, but this style of edging looks particularly attractive around gentle curves. A curved layout also makes it easier to use branches of different diameters without drawing attention to small inconsistencies.
Walk around the proposed bed before digging.
Make sure the shape leaves enough room for nearby paths, mowing equipment, gates, walls, or other garden features.
It is much easier to change the outline now than after installing dozens of pieces of wood.
2. Choose and Prepare the Branches
Collect the branches or logs you plan to use and inspect them before cutting.
Ideally, choose pieces that are:
- free from obvious rot
- thick enough to stand firmly
- reasonably straight for at least the section you intend to use
- free of dangerous protruding nails, wire, or other debris
You do not need to remove the bark unless it is already loose and falling away. Leaving the bark attached usually contributes to the natural appearance.
Cut the branches into short sections.
They do not all have to be identical. Mixing slightly taller and shorter pieces gives the finished bed the uneven woodland look that makes this technique appealing.
However, avoid extreme differences in height unless that is a deliberate design choice. A few inches of variation can look charming; a border that constantly jumps between very short and very tall sections may look accidental.
Remember that part of each piece will be buried, so cut it longer than the amount you want visible above the soil.
3. Dig a Narrow Trench
Dig a shallow trench around the marked perimeter.
The trench should be wide enough to accept the log sections and deep enough to hold them securely.
There is no single required depth because stability depends on the height and diameter of the pieces, as well as the type of soil. Tall, narrow sections generally need to be buried more deeply than short, thick ones.
The goal is simple: once packed into place, the pieces should not topple over from a light push.
If the soil is hard and compacted, loosen the trench first rather than trying to hammer every piece directly into undisturbed ground.
Be especially careful around buried irrigation lines, landscape lighting cables, or other utilities.
4. Set the Logs Upright
Begin placing the cut pieces vertically in the trench.
Set them close together so there are no large openings where soil or mulch can easily escape.
They do not need to fit together perfectly. Small irregular gaps are part of the rustic appearance.
Work along the border a few pieces at a time.
For curved sections, thinner pieces are often easier to arrange because they can follow the curve more smoothly. Thicker pieces can provide useful visual anchors at corners or major bends.
If one section rocks excessively, remove it and deepen or reshape the hole instead of forcing it into an unstable position.
A rubber mallet can help settle sturdy pieces in firm ground, but avoid hitting brittle or partially decayed wood aggressively.
5. Pack the Soil Around the Base
Once several pieces are in position, backfill the trench around them.
Firm the soil around both sides of the wood so each section remains upright.
This step deserves more attention than it usually gets. A border that looks stable immediately after installation may loosen after heavy rain if the soil around the base was left fluffy.
Pack it firmly, but there is no need to compact the entire planting bed into hard soil.
After installing a section, gently push on several pieces. If they move easily, add more soil or reset them deeper.
Continue until you have completed the entire perimeter.
6. Improve the Soil Inside the Bed
Once the edging is secure, you can prepare the planting area.
If the existing soil is suitable, you may simply loosen it and add compost according to the needs of the plants you plan to grow.
Avoid assuming that every bed needs to be filled entirely with purchased soil. Existing garden soil can often remain part of the bed unless there is a specific reason to replace it.
Organic matter such as finished compost can improve many garden soils, but the amount needed varies with existing conditions.
If you are unsure about the quality of your soil, a basic soil test can provide much more useful information than adding amendments at random.
Do not mound loose soil so high against the log edging that it immediately spills over the top.
7. Finish With Mulch
After planting, add an appropriate layer of mulch.
Mulch can help reduce weed growth, limit moisture loss, and reduce soil splashing during rain or irrigation.
Common options include shredded leaves, wood chips, straw, or other materials appropriate to the plants being grown.
Keep thick mulch slightly away from plant stems and crowns rather than piling it directly against them.
You can also mulch the outside of the border if that area is part of a path or landscaped strip. This softens the transition between the bed and the surrounding yard and can make the finished project look more deliberate.
What Kind of Wood Should You Use?
For this project, naturally fallen or freshly pruned untreated wood is usually the simplest choice.
Different species decompose at different rates, so some borders will last longer than others. Dense hardwoods generally resist decay longer than very soft or already decomposing branches, although local climate and soil moisture also have a major effect.
Wood in constant contact with damp soil will eventually break down. That is normal.
You may need to replace individual sections from time to time rather than rebuilding the entire border.
What About Pressure-Treated Wood?
For a vegetable or herb bed, many gardeners prefer untreated wood when convenient, particularly when they are reusing material from around the yard.
Modern pressure-treated lumber is not the same as some older treated products, and regulations and treatment chemicals have changed over time. Still, unidentified salvaged lumber can be difficult to evaluate.
If you do not know where a piece of timber came from or what it was treated with, using known untreated branches is the simpler choice for this type of project.
Painted, stained, oily, or chemically contaminated scrap wood should also be avoided.
Good Plants for a Rustic Branch-Edged Bed
This style of border works with many types of small garden beds.
Herbs
A small herb garden looks particularly natural inside a branch border.
Herbs with different foliage textures can soften the hard edge of the wood while still leaving enough of the border visible.
Choose herbs according to the sunlight, soil, water, and winter conditions in your location rather than simply filling the bed with varieties that have different appearances.
Strawberries
Strawberries can work well in a defined bed where runners and fruit are easier to monitor.
A low border helps make the planting area visually distinct, although it will not stop strawberry runners from crossing the edge if they are allowed to spread.
Flowers
Annuals and perennials can both work well.
A mix of flowering plants can create a cottage-garden appearance, while a more restrained selection can keep the bed simple.
Pollinator Plants
A small pollinator patch can also fit nicely within a rustic border.
Whenever possible, choose flowering plants that are appropriate to your region and growing conditions. Locally native species can be particularly useful additions, depending on availability and the specific insects you hope to support.
Expect the Border to Change Over Time
One of the biggest differences between natural branch edging and manufactured garden products is lifespan.
Wood touching moist soil eventually decomposes. Bark may loosen. Some pieces may split. Others may become soft near ground level.
That does not necessarily mean the project has failed.
The advantage of using simple individual sections is that damaged pieces are easy to replace. Pull one out, cut another branch to roughly the same size, and install it in the gap.
An annual inspection is worthwhile.
Look for:
- badly rotted pieces
- sharp splinters
- logs leaning into pathways
- large gaps
- insect damage that has weakened the wood
- sections that have become loose after winter or heavy rain
Replace anything that no longer feels secure.
Common Mistakes to Avoid
The project is forgiving, but a few mistakes can shorten its useful life or make the border frustrating to maintain.
Do not use branches that are already badly rotted. They may look charming for a few weeks but can quickly collapse once buried.
Do not leave large gaps between sections if your goal is to retain loose mulch or soil.
Avoid making the visible border unnecessarily tall. A tall wall made from narrow branches requires much deeper anchoring and becomes easier to knock over.
Do not expect the wood to behave like permanent masonry or metal edging. This is a natural, gradually changing border.
Finally, avoid obsessing over perfectly level tops. The variation is part of the design.
A Garden Border That Does Not Need to Be Perfect
A branch-edged bed works because it turns an ordinary yard material into something both practical and attractive.
Mark the bed, cut sound branches into manageable sections, bury them securely around the perimeter, and pack the soil firmly around their bases. Fill or improve the planting area, add mulch, and let the differences in bark, diameter, and height create the character.
It will not have the crisp precision of stone or steel edging, and it is not supposed to.
For herbs, flowers, strawberries, or a small pollinator garden, that irregularity can make the bed feel less like a manufactured landscape feature and more like it naturally belongs in the backyard. And when one section eventually rots, replacing it is as simple as finding another suitable branch and giving it a new purpose.