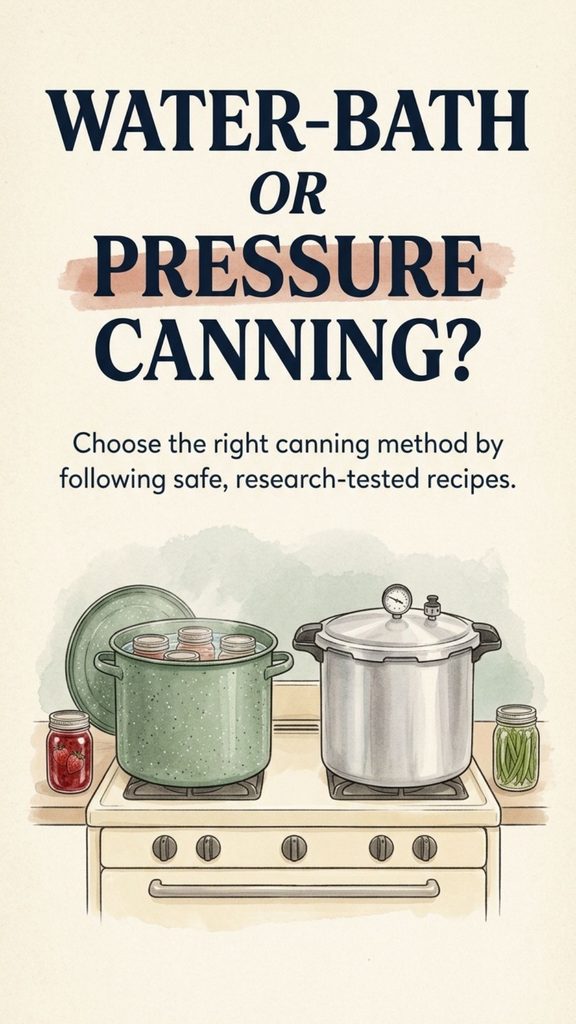
A garden full of ripe tomatoes, crisp green beans, and fresh fruit can quickly turn into a kitchen full of canning jars. Preserving that harvest is satisfying, but before filling the first jar, there is one decision you cannot afford to guess: should you use a boiling-water bath or a pressure canner?
Both methods preserve food for shelf storage, but they work differently. Choosing the wrong one can leave dangerous microorganisms alive inside a sealed jar, even when the lid appears perfectly secure.
The safest method depends on the food’s acidity, the ingredients in the recipe, and the processing instructions established through food-safety testing. Understanding these differences will help you preserve your harvest confidently without relying on outdated shortcuts.
You Might Also Like:
- Loading posts...
Why the Canning Method Matters
Home canning uses heat to control microorganisms that could cause food to spoil or become unsafe. The amount of heat required depends partly on the acidity of the food being preserved.
Food scientists use a measurement called pH to describe acidity. Lower pH numbers indicate greater acidity.
For home canning, the important dividing line is pH 4.6.
- High-acid foods have a pH of 4.6 or lower.
- Low-acid foods have a pH above 4.6.
This distinction matters because low-acid foods can support the growth of Clostridium botulinum, the bacterium associated with botulism. Its spores can survive ordinary boiling temperatures. If improperly processed low-acid food is stored in an airtight jar, conditions may allow the bacteria to produce a dangerous toxin.
Pressure canning reaches temperatures above those possible in a regular boiling-water canner, making it the recommended method for low-acid foods.
High-acid foods and foods properly acidified according to a tested recipe can be processed using boiling water because their acidity prevents the growth and toxin production of C. botulinum.
Water-Bath Canning: Best for High-Acid Foods
Water-bath canning is a common starting point for beginners because it requires relatively simple equipment.
Filled jars are placed on a rack inside a large pot and completely surrounded by boiling water. The jars remain in the boiling water for the time specified in a tested recipe.
The process relies on two essential factors: sufficient acidity and adequate processing time.
Foods Commonly Suitable for Water-Bath Canning
Examples include:
- Many fruits, such as peaches, pears, apples, and berries
- Jams, jellies, and properly prepared fruit preserves
- Pickles made according to tested recipes
- Certain relishes and chutneys
- Properly acidified tomato products
- Tested salsa recipes specifically developed for boiling-water canning
These examples are categories, not permission to use any homemade recipe.
A fruit spread made with unusual ingredients, for example, may require different instructions from traditional jam. Likewise, adding vegetables to a tomato sauce can change its acidity and processing requirements.
The ingredients and proportions matter just as much as the food’s name.
How Water-Bath Canning Works
A boiling-water canner is usually a deep pot fitted with a rack that keeps jars off the bottom.
For a typical tested process, you will:
- Prepare the food exactly as directed in the recipe.
- Fill clean, appropriate canning jars, leaving the required headspace.
- Remove trapped air bubbles when instructed, wipe the rims, and apply the lids.
- Place the jars on the canning rack, ensuring the water covers them by the depth specified in the instructions.
- Bring the water to a vigorous boil and begin timing as directed.
- Maintain the required boil for the full processing period.
- Follow the recipe’s instructions for turning off the heat, resting the jars, and removing them safely.
Processing time varies according to the food, jar size, preparation method, and elevation.
Adding a few extra minutes at random is not a substitute for using the correct recipe.
Pressure Canning: Essential for Low-Acid Foods
Pressure canning is necessary for most plain vegetables, meats, poultry, and other low-acid foods intended for shelf-stable storage.
A pressure canner is specially designed to create a controlled, high-temperature processing environment.
Unlike a boiling-water canner, which operates at the local boiling temperature of water, a pressure canner uses pressurized steam to reach the higher temperatures required for low-acid food preservation.
Foods That Require Pressure Canning
Common examples include:
- Green beans
- Carrots
- Corn
- Peas
- Potatoes
- Asparagus
- Plain pumpkin or winter squash cubes, where an approved procedure exists
- Meat and poultry
- Many tested soups and vegetable mixtures
- Some seafood products
These foods cannot safely be processed in a boiling-water bath simply by leaving the jars in longer.
For example, plain green beans require pressure canning. Pickled green beans may qualify for boiling-water canning because a tested pickling recipe includes a carefully measured amount of acid.
The difference is the complete recipe, not the vegetable itself.
A Pressure Canner Is Not the Same as a Pressure Cooker
This is an especially important distinction for anyone buying canning equipment.
A pressure cooker is generally designed to prepare meals quickly. A pressure canner is designed for processing jars of food under controlled conditions.
The USDA’s home-canning procedures are developed for pressure canners large enough to hold at least four quart-sized jars upright on a rack.
Small pressure cookers and ordinary electric multicookers should not be substituted for these tested pressure-canning procedures, even if they can reach a similar pressure reading.
The temperature history inside the jars matters, not merely the pressure displayed on the appliance.
Dedicated canning equipment should be used only for the processes that have been established for that equipment.
Water-Bath and Pressure Canning Compared
| Feature | Water-Bath Canning | Pressure Canning |
|---|---|---|
| Main purpose | High-acid and properly acidified foods | Low-acid foods |
| Heating method | Boiling water surrounding the jars | Pressurized steam |
| Common foods | Fruit, jam, pickles, tested acidified tomatoes | Plain vegetables, meat, poultry |
| Equipment | Deep boiling-water canner with rack | Approved pressure canner |
| Altitude adjustments | Usually require increased processing time | Require pressure adjustments according to the instructions |
| Main safety concern | Correct acidity and adequate processing | Correct temperature, pressure, and processing time |
Neither method is automatically better. Each has a specific purpose, and a tested recipe determines which procedure is appropriate.
Why Tomatoes Need Special Attention
Tomatoes are one of the most commonly misunderstood home-canning foods.
Although tomatoes are often considered acidic, their acidity varies. Some may not be acidic enough to process safely as high-acid food without additional acid.
That is why established tomato-canning instructions commonly call for measured amounts of bottled lemon juice, citric acid, or another specified acidifying ingredient.
Bottled lemon juice is generally preferred over freshly squeezed juice when a tested recipe requires it because its acidity is standardized.
One detail surprises many home canners: some tested tomato recipes require acidification even when they provide a pressure-canning option.
Choosing the pressure-canning instructions does not automatically mean you can leave out the acid.
What About Homemade Tomato Sauce and Salsa?
The ingredients in a tomato recipe can significantly affect its safety.
Onions, peppers, garlic, and other low-acid vegetables may change the acidity of a mixture. Simply adding some vinegar or lemon juice by taste does not establish that it is safe for boiling-water canning.
For homemade salsa, pasta sauce, and mixed tomato products:
- Begin with a research-tested recipe.
- Measure the vegetables and acidifying ingredients accurately.
- Do not increase the amounts of peppers or onions beyond the permitted adjustments.
- Use the jar size and processing method specified.
- Avoid adding untested thickening ingredients before canning.
If you want complete freedom to adjust a family sauce recipe, freezing it may be the safer and more practical choice.
Why Altitude Changes Canning Instructions
Two people following the same recipe may need different processing instructions if they live at different elevations.
Water boils at a lower temperature as altitude increases. That means boiling-water canning generally requires longer processing times at higher elevations.
Pressure canning also requires altitude adjustments, usually involving a higher operating pressure.
The exact adjustment depends on the tested procedure and the type of pressure gauge being used.
Never assume that a processing time or pressure recommendation for sea level applies everywhere.
Before canning, determine your location’s approximate elevation and consult the altitude instructions that accompany your tested recipe.
Seven Canning Mistakes Worth Avoiding
1. Trusting a Sealed Lid as Proof of Safety
A lid that seals only tells you that a vacuum formed as the jar cooled.
It does not prove that the food received adequate heat processing.
Even a jar that looks, smells, and tastes normal may be unsafe if it was processed incorrectly. The toxin responsible for botulism cannot reliably be detected by sight, smell, or taste.
Never taste food from a jar you suspect was improperly canned.
2. Using Family Traditions Without Checking Current Guidance
Many cherished family recipes have been passed down for generations. Their flavors may be worth preserving, but their canning procedures deserve a fresh look.
Methods such as oven canning, open-kettle canning, or sealing hot food in jars without a validated heat process are not recommended substitutes for established home-canning procedures.
You can often keep a family’s favorite flavors while using modern, tested preservation instructions.
3. Changing Jar Sizes Without Adjusting the Process
A recipe tested for pint jars should not automatically be used for quart jars.
Larger jars may require different processing schedules because heat takes longer to reach the food in the center.
Use only the jar sizes listed in the recipe. If your preferred size is not covered by the instructions, find another tested recipe.
4. Changing Ingredients That Affect Acidity or Heat Penetration
Adding extra vegetables, reducing vinegar, or thickening soup can change how a recipe must be processed.
Even a change that seems small in the kitchen can affect the food’s acidity or the way heat moves through the jar.
Follow the tested preparation and ingredient proportions. Make optional flavor adjustments only when the recipe or its source specifically permits them.
5. Skipping Pressure-Canner Venting
Pressure canners must be operated according to established procedures, including venting air before pressurization.
USDA guidance calls for venting pressure canners for 10 minutes before bringing them to the required pressure.
Trapped air can interfere with the temperature needed for safe processing.
6. Letting Pressure Drop During Processing
For pressure canning, the required pressure must be maintained throughout the specified processing period.
If pressure falls below the required level, follow the USDA procedure for correcting the problem, which generally means bringing the canner back to the required pressure and restarting the full processing time.
Do not simply add the missing minutes to the end.
7. Rushing the Cooling Process
Never force a pressure canner to cool by opening its vent early or running cold water over it.
Sudden pressure changes can interfere with the process and cause liquid loss from jars.
Allow the canner to depressurize naturally and follow the manufacturer’s instructions before opening it.
A Safe Home-Canning Routine for Beginners
Good preparation makes canning much easier, particularly when the kitchen is crowded with freshly harvested produce.
Step 1: Choose the Recipe Before Preparing the Food
Begin with a tested recipe from a reliable food-preservation source.
Check the ingredients, required equipment, jar size, processing instructions, and altitude adjustments before you start chopping or cooking.
Step 2: Inspect Your Equipment
Use suitable home-canning jars and compatible lids. Check jar rims for chips and inspect the equipment for wear.
If using a dial-gauge pressure canner, have the gauge checked according to the manufacturer’s recommendations or your local Extension service’s guidance.
Make sure the canner’s vent, safety mechanisms, and sealing components are clean and functioning properly.
Step 3: Prepare Ingredients Exactly as Directed
Wash produce, remove damaged portions, and follow the preparation method in the recipe.
Pay attention to instructions about peeling, cutting, blanching, precooking, and hot or raw packing.
Do not assume those details are interchangeable.
Step 4: Fill and Process the Jars
Use the specified headspace and remove air bubbles when directed.
Apply lids according to the lid manufacturer’s instructions and process the jars using the recipe’s prescribed method, time, and altitude adjustment.
Use a timer, and monitor the canner throughout processing.
Step 5: Cool the Jars Undisturbed
After processing, remove jars according to the canner instructions and place them upright on a towel or cooling rack.
Allow them to cool undisturbed at room temperature for 12 to 24 hours.
Avoid tightening the bands or pressing the centers of the lids while they are cooling.
Step 6: Check the Seals and Store Properly
Once jars have cooled, remove the screw bands and check the seals.
Label each jar with its contents and processing date, then store properly sealed jars in a clean, cool, dark, dry place.
If a jar has not sealed, follow tested guidance for prompt refrigeration, freezing, or reprocessing. Never place an unsealed jar on the pantry shelf.
Remember that a successful seal is only one part of safe canning. It cannot correct an unsafe recipe or processing method.
Where to Find Reliable Canning Recipes
Not every recipe shared online has been tested for safe shelf storage. A beautiful photograph, positive reviews, or years of family use cannot replace research-based processing instructions.
Reliable references include:
- National Center for Home Food Preservation: Detailed instructions for canning fruits, vegetables, tomatoes, meats, and other foods.
- USDA Complete Guide to Home Canning: Research-based recipes and processing tables.
- CDC Home-Canning Safety Guidance: Information about preventing foodborne botulism.
- University Cooperative Extension services: Practical canning education and region-specific guidance, including altitude considerations.
When a recipe conflicts with current, tested food-preservation instructions, follow the research-based source.
What If You Want to Preserve a Recipe That Hasn’t Been Tested?
Sometimes a favorite soup, stew, salsa, or sauce does not have a matching tested canning procedure.
The safest solution may be to freeze it.
Freezing allows greater flexibility with ingredients, thickness, and seasoning without requiring you to develop a shelf-stable canning process yourself.
For example, you can freeze homemade vegetable soup made with your preferred combination of vegetables instead of guessing at a pressure-canning schedule.
You can also freeze customized tomato sauces or salsas when you cannot find tested canning directions for the exact formulation.
This does not mean homemade recipes are unsuitable for preserving. It means the preservation method should fit the recipe’s safety requirements.
The Safest Rule to Remember
Home canning becomes much simpler once you understand the difference between water-bath and pressure processing.
High-acid foods and foods properly acidified according to tested instructions can often be processed in a boiling-water canner. Low-acid foods require a tested pressure-canning procedure.
But acidity alone does not provide a complete set of instructions. Processing time, jar size, packing method, ingredients, equipment, and altitude all contribute to a safe result.
Before every canning session, ask yourself three questions:
- Is this a current, research-tested recipe?
- Am I using the exact equipment, jar size, ingredients, and processing method it requires?
- Have I made the necessary adjustment for my altitude?
If you cannot answer all three confidently, pause and check a reliable source before proceeding.
A pantry lined with colorful jars is rewarding, but the real success of home canning is knowing that the food inside was preserved using a safe, established method.