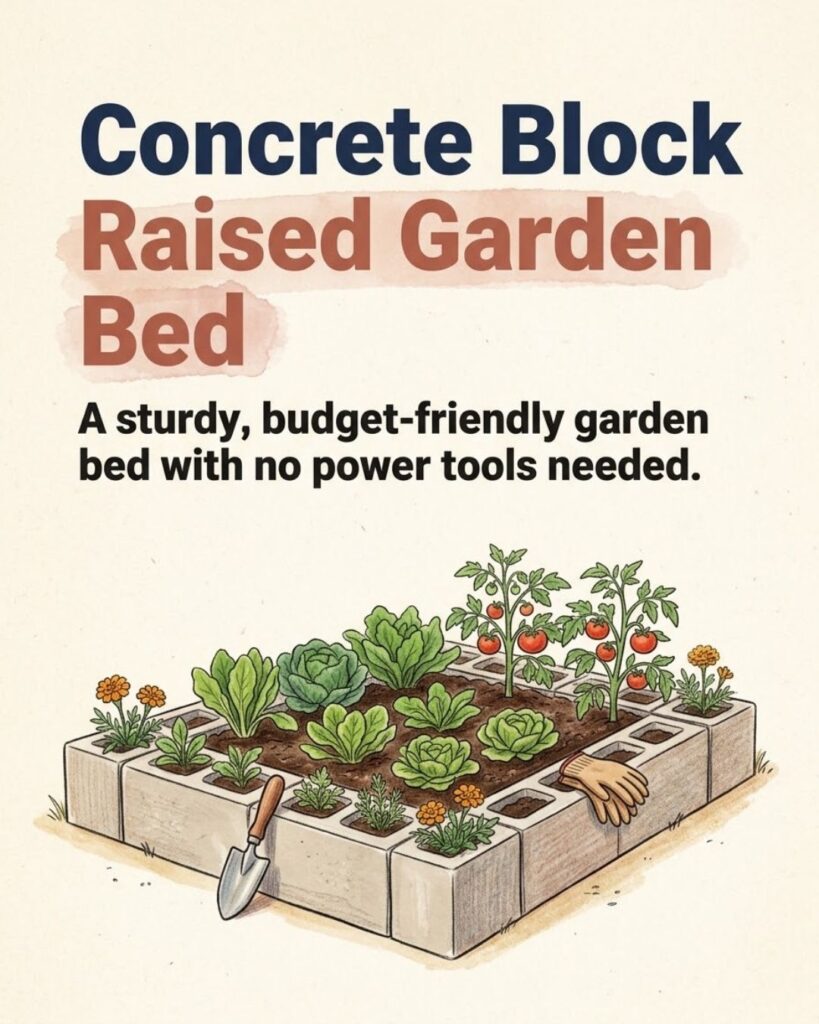
A raised garden bed does not have to involve lumber, saws, screws, or complicated construction. Concrete blocks can create a sturdy growing space with very little building experience, and their hollow centers offer something most wooden beds do not: extra planting pockets around the perimeter.
Concrete block is an established option for framed raised beds, alongside materials such as wood, brick, and stone. A basic bed can be assembled by arranging the blocks on level ground, covering existing grass if needed, filling the center with suitable soil, and planting directly into it.
The design works particularly well for gardeners who want a permanent-looking bed without cutting lumber or using power tools. It can also be expanded later simply by adding more blocks.
You Might Also Like:
- Loading posts...
There are a few details worth getting right, though. Sunlight, bed width, soil depth, drainage, and watering all affect how well the garden performs. The small openings inside the blocks also behave differently from the larger center of the bed and may dry out faster during hot weather.
Here is how to build the bed properly and make good use of all that planting space.
Why Concrete Blocks Work for Raised Beds
Concrete blocks are heavy enough to form a stable border without requiring the same joinery as a wooden frame. They do not rot like untreated lumber, and individual blocks can be repositioned if you decide to change the shape later.
University extension guidance specifically includes concrete block among the materials that can be used to frame raised beds.
They also create a useful edge.
Most standard hollow concrete blocks contain openings that can hold small amounts of soil. Those pockets can be planted with compact crops or flowers while the main bed is reserved for vegetables that need more root space.
Possible pocket plants include herbs, green onions, lettuce, compact flowers, and other relatively small plants.
The center can then accommodate larger vegetables such as tomatoes, peppers, beans, cucumbers, kale, or other crops suited to your climate and season.
What You Will Need
The exact quantity depends on the dimensions of your bed, but the basic materials are simple:
- Concrete blocks
- Plain cardboard for suppressing existing grass, if needed
- Garden soil or a raised-bed growing mix
- Finished compost
- Organic mulch such as straw or shredded leaves
- Seeds or starter plants
- A shovel or garden fork
- A level, if available
Landscape fabric is sometimes used beneath garden beds, but it is not always necessary. If you are building directly over lawn, cardboard can provide a temporary barrier while the vegetation underneath dies back.
University of Maryland Extension specifically describes cardboard being used beneath raised beds to smother existing lawn.
1. Choose a Sunny, Level Location
Start with location rather than construction.
Most common vegetable crops perform best in full sun. Penn State Extension recommends approximately 6 to 8 hours of sunlight per day for most vegetables grown in raised beds.
Watch your yard before placing the bed permanently. An area that looks sunny early in the morning may be shaded by a house, fence, or tree during much of the afternoon.
Also consider access to water.
A bed located conveniently near a hose or watering source is much easier to maintain during hot periods than one at the far end of the property.
The ground should be reasonably level. Concrete blocks placed on uneven soil can rock, tilt, or create an irregular top edge.
Remove large stones, branches, and other debris before beginning.
2. Decide on the Size Before Laying Blocks
One common raised-bed mistake is making the bed so wide that the middle cannot be reached comfortably.
You should be able to tend the plants without repeatedly stepping into the bed, because walking on growing soil compacts it.
If you can reach the bed from both sides, a width of roughly 3 to 4 feet is common for raised-bed designs. Oregon State Extension, for example, recommends beds in this general width range for accessible garden design.
The length can be adjusted to fit your available space.
Before permanently positioning the blocks, arrange a few temporarily and make sure you can comfortably reach the center.
3. Lay Out the Concrete Blocks
Arrange the blocks into a rectangle, square, or another simple shape.
Place each block so the hollow openings face upward if you plan to use them as planting pockets.
Take your time with the first row.
A neat, level first course gives the entire bed a cleaner appearance and makes subsequent blocks easier to position.
If the soil is very uneven, scrape away high spots or add and compact a small amount of appropriate base material beneath low areas.
For a single-layer garden bed, mortar generally is not necessary for a simple freestanding border on stable, level ground. However, taller walls are a different matter. Stacking several courses of loose blocks creates more potential for shifting or tipping and may require a properly engineered approach.
For a basic home vegetable bed, keeping the structure low and simple is usually easiest.
4. Cover Existing Grass With Cardboard
If the bed is going directly over lawn, you do not necessarily have to remove every blade of grass first.
Lay plain cardboard over the ground inside the frame, overlapping the edges so vegetation cannot easily grow between gaps.
Cardboard is used in sheet-mulching and bed-establishment techniques to suppress existing plants by blocking light. Oregon State University Extension describes cardboard as a useful material for this purpose.
Remove plastic tape, shipping labels, staples, and other non-paper materials before putting cardboard into the garden.
Do not create an excessively thick waterproof layer. The goal is to suppress grass temporarily while allowing the cardboard to break down.
If you are building the bed over already-cleared garden soil, a cardboard layer may not be necessary.
5. Fill the Bed With Suitable Growing Soil
Do not fill the entire bed with poor subsoil just because it is inexpensive.
Vegetables need a growing medium that holds moisture while still draining properly and providing nutrients and air to the roots.
A practical raised-bed fill usually includes good-quality soil combined with mature compost or other appropriate organic material.
Compost contributes organic matter and nutrients, but more compost is not always better. Some composts can contain high concentrations of salts or nutrients, so treating compost as one component of the growing mix rather than automatically filling the entire bed with it is more sensible.
If possible, know something about the soil you are buying. Products sold simply as “topsoil” vary considerably.
Once the bed is filled, rake the surface level without packing it down heavily.
Raised beds generally drain and warm differently from surrounding ground, and their soil can also dry more quickly. Oregon State Extension notes that raised-bed soil and organic-matter mixtures may dry faster than heavier native soils.
6. Fill the Block Openings for Small Plants
One of the best features of this design is the row of small planting pockets created by the blocks.
Fill selected holes with planting mix, leaving a little space below the top so water does not immediately wash soil out.
Good candidates are plants that remain fairly compact.
You might use the openings for:
- Green onions
- Lettuce
- Parsley
- Chives
- Thyme
- Other compact herbs
- Small annual flowers
Marigolds are often used around vegetable gardens because their flowers can provide nectar and pollen for visiting insects. However, avoid treating them as a universal pest-control solution. The effects of companion plants depend on the pest, crop, and growing conditions, and simply planting a marigold beside a tomato does not guarantee protection from insects or disease.
Think of the pocket flowers primarily as attractive companion plantings rather than as substitutes for normal pest management.
7. Plant Larger Crops in the Main Bed
Reserve the larger central growing area for plants with greater root and canopy needs.
Tomatoes, peppers, leafy greens, bush beans, cucumbers, and many herbs can all be grown in raised beds, provided their spacing, season, and environmental requirements are suitable.
Do not try to grow every possible crop at once.
A small bed can become overcrowded surprisingly quickly.
A young tomato transplant may occupy only a few inches in spring but can become a large plant by midsummer. Cucumbers and pole beans may need a trellis. Kale can develop broad leaves that shade smaller crops.
Check the mature spacing listed for each variety rather than spacing plants according to their size at planting time.
Plan for Vertical Crops
If you intend to grow pole beans or vining cucumbers, install their support before the plants become large.
A trellis placed along one side of the bed can make better use of vertical space.
Position tall plants where they will not unnecessarily shade shorter sun-loving crops. The ideal side depends on your location and the path of the sun.
Tomatoes may also need cages or stakes depending on the variety.
Planning these supports at planting time is much easier than trying to force them into a bed full of mature roots later.
8. Water Thoroughly After Planting
After planting, water deeply enough to moisten the root zone.
New transplants need consistent moisture while they establish, but raised beds should not remain permanently waterlogged.
The concrete-block pockets deserve special attention.
They contain much less soil than the central bed, so they can behave more like small containers. In hot, dry weather, those pockets may lose moisture faster and require more frequent watering than plants growing in the middle.
Check the soil itself instead of following a rigid watering schedule.
If the soil a short distance below the surface is still reasonably moist, additional water may not be necessary. If it is dry around the root zone, watering is appropriate.
Weather, plant size, wind, soil composition, and the depth of the bed all affect how quickly water is used.
9. Add Mulch Around the Plants
Once seedlings are established, cover exposed soil with a layer of appropriate organic mulch.
Straw, shredded leaves, and other plant-based mulches can reduce evaporation and suppress many annual weeds. University of Minnesota Extension notes that organic mulches can help conserve soil moisture and control weeds while gradually contributing organic matter as they decompose.
Leave a little breathing room around plant stems rather than piling wet mulch tightly against them.
Mulch is especially useful in raised beds because elevated soil can dry more quickly during hot weather.
It can also prevent soil from splashing onto low-growing leaves during watering or rain.
How Deep Should a Concrete Block Raised Bed Be?
Depth depends partly on the crop and on what lies beneath the bed.
Penn State Extension notes that most vegetables need at least about 6 inches of soil, though many crops benefit from considerably more root space.
If your raised bed sits directly over healthy, loosened garden soil, plant roots may eventually extend beneath the frame.
If the bed sits over pavement or another hard surface, all usable root depth has to come from the raised bed itself. In that case, a deeper bed becomes much more important.
University of Minnesota Extension also recommends a bottom liner when a raised bed is built over a non-soil surface such as a patio, where the liner can help retain the growing medium.
Deep-rooted crops generally need more soil volume than shallow-rooted greens.
A Few Mistakes to Avoid
Concrete block beds are simple, but several small mistakes can make them harder to maintain.
Do not build where the bed stays shaded all day. Most fruiting vegetables will struggle without enough sunlight.
Do not make the bed too wide. If you cannot reach the middle, maintenance becomes frustrating.
Do not assume raised beds never need weeding. Weeds can still arrive through seeds carried by wind, birds, compost, or surrounding soil. Raised beds and mulch reduce some weed problems but do not eliminate them.
Do not overcrowd the planting pockets. Each block opening contains limited soil, water, and nutrients.
Do not forget drainage. Raised beds need water to leave the root zone rather than collecting indefinitely.
Do not rely entirely on the initial compost. Nutrients are removed whenever crops are harvested, so soil fertility may need to be replenished over time based on crop needs and, ideally, soil testing.
Expanding the Bed Later
Another advantage of a block design is that it does not have to be permanent in its original size.
You can start with one modest bed, learn which crops grow well in the location, and expand later.
Additional blocks can create another bed nearby or extend an existing layout if space allows.
Starting small is often more manageable than building a huge vegetable garden in the first season. A smaller bed requires less soil, less watering, and less maintenance while you learn how the site behaves through summer.
A Sturdy Raised Bed Without Complicated Construction
Concrete blocks offer a practical middle ground between temporary garden mounds and more involved wooden construction.
Place them on a level, sunny site, keep the bed narrow enough to reach comfortably, suppress existing grass with cardboard if necessary, and fill the interior with a suitable soil-and-compost mixture. Use the hollow block openings for compact plants and reserve the center for crops that need more room.
The design is not maintenance-free. Pocket plants can dry quickly, large crops still need proper spacing, and the soil will need ongoing care from season to season.
But for a gardener who wants a sturdy raised bed without cutting lumber or operating power tools, concrete blocks can make a simple and adaptable starting point. Build one bed first, see how it performs, and add another only when you actually need the extra growing space.