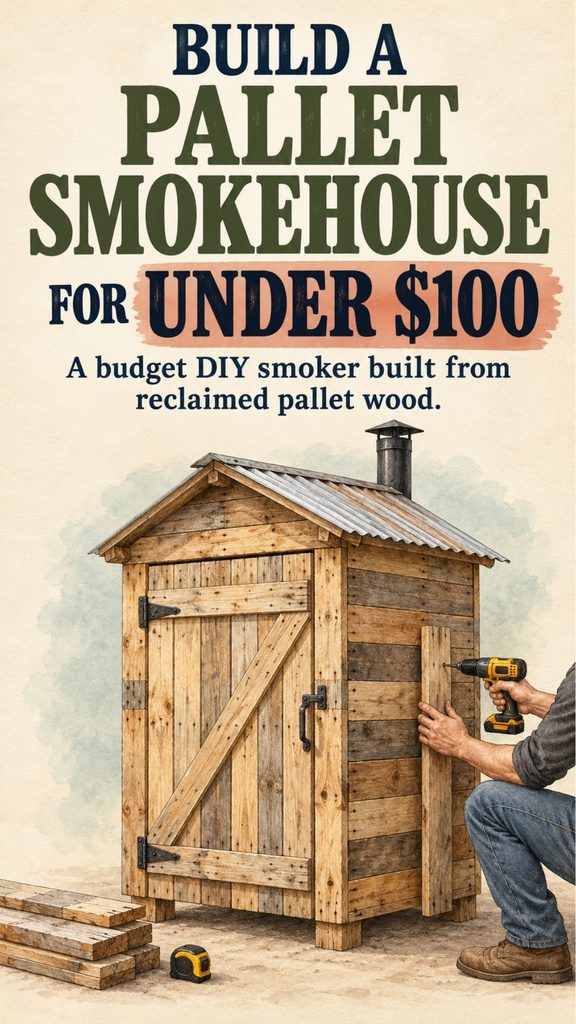
A backyard smokehouse can be a surprisingly practical DIY project if you enjoy smoking meat, fish, or sausages and want more capacity than a small store-bought smoker provides.
The basic idea is simple: build a tall wooden cabinet, add several removable smoking racks, create adjustable vents, line the inside, and protect the top with a metal roof.
Using reclaimed pallet wood can keep material costs low, although pallet projects require more preparation than working with new lumber. Boards may be warped, split, dry, or inconsistent in size, so expect to sort through more wood than you ultimately use.
You Might Also Like:
- Loading posts...
The original project was designed at roughly 3 feet by 3 feet, giving enough interior room for several racks and hanging space above.
This is not a tiny weekend tabletop smoker. It is a full-size outdoor structure, so careful construction, appropriate materials, and fire safety matter.
Before You Start
The three main goals of this design are:
- Enough interior space to smoke several items at once
- A relatively inexpensive build using reclaimed material
- Construction simple enough for someone with basic woodworking experience
Because this smokehouse will be used around heat, smoke, and food, do not treat pallet selection casually.
Use only wood you are confident is appropriate for the project. Avoid visibly contaminated, heavily stained, rotten, moldy, or chemically questionable material.
Also check local fire, building, and food-safety requirements before installing or operating an outdoor smokehouse.
Approximate Finished Size
The original design is approximately:
3 feet wide × 3 feet deep
with a taller front wall and slightly shorter rear wall to create roof pitch.
The interior contains several rack levels plus space near the bottom for the heat or smoke source.
Exact measurements can be adjusted, but maintaining enough separation between the fire area and food racks is important.
Materials
The original project used approximately:
- 20–30 pallets, deconstructed
- 2½-inch exterior screws
- 1¼-inch screws
- Aluminum flashing
- Corrugated metal roofing, approximately 4 × 3 feet
- Heavy-duty aluminum foil
- Aluminum screen
- 3 hinges
- Door handle
- Staples
You may need additional fasteners or bracing depending on the condition and size of your reclaimed wood.
Tools
Useful tools include:
- Reciprocating saw with a bi-metal blade
- Drill/driver
- Drill bits
- Countersink bit
- Measuring tape
- Circular saw or table saw
- Metal snips
- Utility knife
- Staple gun
- Safety glasses
- Work gloves
A carpenter’s square and level are also extremely useful even if they are not part of the basic original tool list.
Suggested Cut List
The original build used the following approximate dimensions.
Frame Pieces
- 2 top braces — 33 inches
- 2 vertical door-frame pieces — 70 inches
- 2 horizontal door-frame pieces — 29 inches
- 2 front wall-frame pieces — 6 feet
- 2 back wall-frame pieces — 5 feet 6 inches
- 2 rear frame pieces — approximately 5 feet 4 inches
- 8 shelf supports — 33 inches
- 8 shelf-frame pieces — 32¾ inches
- 8 shelf-frame pieces — 30½ inches
Pallet Panel Pieces
- Left side boards — approximately 36¼ inches
- Right side boards — approximately 34½ inches
- Door boards — approximately 35¾ inches
- Back boards — approximately 35¾ inches
- Roof boards — approximately 38 inches
- 2 vent covers — approximately 18–24 inches
- 1 bottom front brace — approximately 36 inches
Roof
- Corrugated metal sheet — approximately 4 × 3 feet
Treat these dimensions as a starting point rather than assuming every pallet will produce identical boards.
Reclaimed lumber varies significantly.
Measure your actual frame repeatedly as you build.
Step 1: Choose the Best Pallets
Pallets are rarely uniform.
Some boards will be:
- Straight
- Warped
- Split
- Thick
- Thin
- Extremely dry
- Damaged around nail holes
Collect more pallets than the estimated minimum so you can reject poor boards.
For a project of this size, the original build used approximately 20–30 pallets.
Look for pieces with long usable sections and relatively little splitting.
You do not need perfect lumber, but severely warped material will make it much harder to build square walls and a properly closing door.
Step 2: Deconstruct the Pallets
Taking pallets apart can be one of the slowest parts of the project.
Instead of trying to pry every nail out first, a reciprocating saw fitted with a blade capable of cutting both wood and nails can make dismantling much faster.
Cut between the pallet slats and supporting boards.
Once the pallet has been separated, sort the material into:
- Structural frame boards
- Wall paneling
- Rack material
- Short pieces useful for braces
Remove dangerous protruding nails and inspect every piece before using it.
Wear gloves and eye protection during this stage.
Step 3: Trim the Boards
Reclaimed pallet boards often have split or damaged ends.
Trim those ends before making your final measurements.
Remove only as much material as necessary.
Once the ends are clean, cut the pieces according to your plan.
It is helpful to label them as you go:
Door
Front frame
Back frame
Shelf support
Roof
That prevents similarly sized reclaimed boards from becoming confusing later.
Step 4: Predrill the Old Wood
Dry pallet wood splits easily.
Predrilling screw holes can save a lot of frustration.
Use an appropriately sized drill bit to create the pilot hole, then countersink where necessary before driving the screw.
This is especially helpful near board ends.
Do not overtighten screws into old, dry lumber.
You want secure joints without crushing or splitting the wood.
Step 5: Build the Two Side Frames
The side walls form the main structure of the smokehouse.
Each side uses:
- One taller front vertical
- One shorter rear vertical
- Several horizontal shelf supports
The original design positioned shelf supports at approximately:
- 24 inches
- 36 inches
- 44 inches
- 52 inches
These measurements can be changed.
The clever part of the design is that the shelf supports perform two jobs:
- They hold the smoking racks.
- They brace the side walls.
This makes the interior rack system part of the structural framework.
Simple Side-Frame Diagram
A side frame will look roughly like this:
    FRONT                  BACK
      |                     |
      |---------------------|  52"
      |---------------------|  44"
      |---------------------|  36"
      |---------------------|  24"
      |                     |
      |                     |
      |_____________________|
The front upright is taller than the back upright so the finished roof can slope.
Step 6: Leave Enough Room for the Heat Source
The lowest rack support in the original design was positioned at approximately 24 inches.
This was intended to leave space underneath for the firebox or smoke source.
Do not blindly copy that measurement.
Determine the dimensions of your actual heat or smoke system first.
The important principle is:
Heat source below — food racks safely above.
The lower portion of the smokehouse should never be improvised after everything else is built.
Plan it before installing the shelves.
Step 7: Keep Everything Square
Before permanently fastening each shelf support, check the frame with a square.
Then compare corresponding measurements on both side walls.
If one side is even slightly different from the other, the racks may sit crooked later.
Check:
- Bottom alignment
- Rack-support height
- Frame width
- Vertical alignment
A few minutes spent measuring now can prevent hours of correction later.
Step 8: Build the Door Frame
The original door frame used:
- Two vertical pieces approximately 70 inches long
- Two horizontal pieces approximately 29 inches long
Arrange them as a rectangle.
A simple representation:
    ┌─────────────────┐
    │                 │
    │                 │
    │                 │
    │                 │
    │                 │
    │                 │
    └─────────────────┘
Secure the corners firmly.
Check both diagonal measurements.
If the diagonals are equal, the frame is much more likely to be square.
Do not add the pallet cladding yet.
Building the frame first makes fitting the door opening easier.
Step 9: Stand the Walls Upright
With both side frames completed, stand them upright.
Position the door frame between the front edges.
Temporarily attach or brace everything so the structure can stand while you check alignment.
At this point it may look something like:
            BACK

      |---------------|
      |               |
      |               |
      |               |
      |               |
      |               |

    SIDE             SIDE
      |               |
      |               |
      |     DOOR      |
      |     FRAME     |
      |_______________|

            FRONT
Do not rush this stage.
Check the structure from several directions before permanently fastening it.
Step 10: Create the Roof Pitch
Because the front wall is taller than the rear wall, the upper side edges must be cut to create the roof slope.
Lay a straight panel or board across the top.
Use it to mark the roof angle.
Transfer the same angle to both side frames.
Cut carefully so both sides match.
The roof should slope enough to shed rain rather than allowing water to collect.
Step 11: Brace the Top
Install the top front and rear braces.
These pieces tie the two walls together and lock the basic box shape into position.
At this point, continually check:
- Width
- Square
- Plumb
- Level where appropriate
Reclaimed wood will rarely behave as predictably as new construction lumber, so minor adjustments may be necessary.
Step 12: Brace the Rear
Add the vertical rear-frame pieces.
These provide attachment points for the back paneling and make the structure more rigid.
Do not rely only on thin pallet boards for structural strength.
The frame should stand solidly before the exterior paneling is installed.
Step 13: Add Pallet Paneling
Start covering the smokehouse with pallet boards.
The original build began with the rear wall and then moved to both sides.
Work from the bottom upward.
Fit boards closely enough to reduce large gaps.
The goal is not furniture-grade perfection.
A smokehouse made from reclaimed material will naturally look rustic.
What matters is creating a reasonably enclosed smoking chamber.
Step 14: Fit the Door
Once the front opening is stable, position the door frame.
Install three sturdy hinges along one side.
Check that the door:
- Swings freely
- Does not scrape badly
- Sits reasonably square in the opening
- Has room to expand and contract slightly
The original instructions leave approximately a ½-inch gap near the bottom.
Once the movement is correct, cover the door frame with pallet boards.
Install the handle on the side opposite the hinges.
Step 15: Construct the Smoking Racks
Each removable rack is built as a rectangular wooden frame.
A simple rack looks like:
    ┌───────────────────┐
    │###################│
    │###################│
    │###################│
    │###################│
    └───────────────────┘
The # area represents the metal screen.
Build the rectangular frame first.
Lay the screen over it.
Cut the screen to size using metal snips.
Staple one edge, then the opposite edge.
Pull the material tight before securing the remaining sides.
Trim any sharp protruding edges carefully.
Make several racks so different foods can be arranged at different heights.
Step 16: Add Hanging Space
One advantage of a tall smokehouse is the ability to hang foods above the racks.
If your design allows enough headroom, sturdy hooks or hanging rods can be incorporated near the top.
This can be useful for foods such as sausage.
Make sure anything used directly around food is appropriate for that purpose and securely supported.
Step 17: Build Adjustable Vents
A smokehouse needs controllable airflow.
The original design places vent openings toward both the lower and upper portions of the door.
The basic arrangement is:
    ┌─────────────────┐
    │   UPPER VENT    │
    │      ○ ○ ○      │
    │                 │
    │                 │
    │                 │
    │      ○ ○ ○      │
    │   LOWER VENT    │
    └─────────────────┘
Drill several holes in the selected door boards.
Then create sliding wooden covers large enough to expose or close the openings.
Do not drill the holes so close together that the cover cannot seal them.
The lower vent admits air.
The upper vent gives smoke and heat a controlled exit.
Adjustability is important because different fires and weather conditions change airflow.
Step 18: Add the Wooden Roof Base
Cover the top framing with the roof boards.
The boards provide a base underneath the exterior metal roofing.
Allow the roof to extend slightly beyond the walls when possible so rainwater is directed away from the wooden siding.
Step 19: Install the Metal Roof
Place the corrugated sheet over the roof boards and secure it appropriately.
The source specifically instructs builders to use raw, non-galvanized metal for this project.
Follow appropriate material and food-safety guidance for any metal exposed to smoke, heat, or the food chamber.
The roof should:
- Cover the entire wooden top
- Follow the roof pitch
- Shed water away from the structure
- Be firmly secured against wind
Step 20: Line the Interior
The original project lines the smokehouse interior with heavy-duty aluminum foil and secures it using a staple gun.
Work carefully around seams and corners.
The original build reportedly required approximately two to three rolls.
The aim is to reduce gaps and create a more enclosed chamber.
Keep foil smooth and securely attached so loose pieces do not fall near food or the heat source.
Step 21: Install the Racks
Slide the completed racks onto their supports.
The arrangement might look like:
    ┌─────────────────────┐
    │                     │
    │   SAUSAGE / HOOKS   │
    │                     │
    │=====================│
    │       RACK 4        │
    │=====================│
    │       RACK 3        │
    │=====================│
    │       RACK 2        │
    │=====================│
    │       RACK 1        │
    │                     │
    │     HEAT / SMOKE    │
    │       SOURCE        │
    └─────────────────────┘
Because the racks are removable, you can change the internal arrangement depending on what you are smoking.
Remove a rack when you need extra vertical space.
Add more rack levels when smoking smaller items.
Step 22: Inspect the Entire Smokehouse
Before using it, check every part.
Look for:
- Loose screws
- Protruding nails
- Sharp screen edges
- Loose foil
- Unstable racks
- Excessively large wall gaps
- Door problems
- Roof leaks
- Poor vent movement
- Combustible debris around the base
Also make sure the smokehouse stands on a stable location with suitable clearance from structures and other combustible materials.
Do not assume a wooden smokehouse can be treated casually around an active heat source.
Why Adjustable Racks Are Useful
The rack arrangement is one of the best features of this style of smokehouse.
Different foods require different amounts of vertical space.
A small tray may fit comfortably on a high shelf.
Larger pieces need more room.
Sausages can hang near the top.
By making the racks removable, you avoid permanently dividing the smoker into equal sections.
That flexibility is particularly useful in a small 3-by-3-foot structure.
Why Reclaimed Wood Makes the Project More Challenging
Pallet wood saves money, but it adds labor.
Expect to deal with:
- Nail holes
- Split ends
- Uneven widths
- Warped boards
- Dry wood
- Irregular thickness
- Boards that cannot be used
That is normal.
Do not try to force a badly twisted board into an important structural position simply because it was free.
Use your straightest material for:
- Main wall frames
- Door
- Rack supports
- Roof structure
Use less-perfect material for siding where appropriate.
Do Not Obsess Over Perfect Appearance
A pallet smokehouse is supposed to look rustic.
Slight differences in board width and color are part of the character.
Concentrate on:
- Structural stability
- Door operation
- Rack support
- Controlled ventilation
- Weather protection
- Safe heat management
Those things matter far more than perfectly matching wood grain.
Important Fire-Safety Considerations
A smokehouse combines a wooden structure with heat, so safety must be part of the design rather than an afterthought.
Keep the unit well away from:
- Houses
- Garages
- Fences
- Dry vegetation
- Fuel
- Propane cylinders not being actively used in an appropriate system
- Other combustible materials
Never leave an active fire unattended.
Keep an appropriate fire extinguisher or other suitable fire-control equipment readily accessible.
Follow the requirements of the particular smoking system you use rather than improvising the heat source.
Food Safety Still Matters
Smoking food is not simply a matter of filling a wooden building with smoke.
Different foods require appropriate:
- Preparation
- Curing where necessary
- Smoking temperatures
- Internal cooking temperatures
- Cooling
- Refrigeration
- Storage
Use reliable food-safety guidance for the specific meat, fish, poultry, or sausage you plan to smoke.
A beautifully built smokehouse does not make unsafe food safe.
Can This Really Be Built Cheaply?
The original project was presented as a sub-$100 build because much of the wood came from free pallets.
Your actual cost can be very different.
You may need to buy:
- Screws
- Hinges
- Metal roofing
- Screen
- Foil
- Handle
- Saw blades
- Additional lumber
- Firebox components
Prices also vary considerably by location and over time.
The best way to keep costs down is to reuse safe material where appropriate while spending money on the components that affect structural and operational safety.
A Simple Build Order
If you want the entire project reduced to one checklist, use this sequence:
- Select suitable pallets.
- Deconstruct them.
- Trim damaged ends.
- Cut and label the pieces.
- Predrill the dry wood.
- Build both side frames.
- Install shelf supports.
- Build the door frame.
- Stand and brace the structure.
- Cut the roof pitch.
- Install top and rear braces.
- Add wall paneling.
- Hang and panel the door.
- Build removable racks.
- Create adjustable vents.
- Add the wooden roof.
- Install corrugated metal roofing.
- Line the interior.
- Install racks and hanging hardware.
- Inspect everything before operation.
The Finished Smokehouse
When complete, the smokehouse should be a tall enclosed cabinet with:
- Several removable racks
- Space for hanging foods
- Adjustable lower and upper vents
- A hinged front door
- A sloped weather-resistant roof
- An enclosed interior smoking chamber
- Dedicated space below the racks for the smoke or heat system
What makes this project appealing is not complicated woodworking.
It is smart use of space.
The rack supports strengthen the walls, the tall cabinet allows both racks and hanging foods, and reclaimed boards keep the basic structure inexpensive.
The final smokehouse does not need to look perfect.
It needs to stand securely, provide controllable airflow, accommodate the planned smoking system, and be built with appropriate materials.
Take extra time selecting your wood, measuring the frame, building a properly operating door, and planning the heat source safely.
Those details will matter far more than whether every pallet board matches.