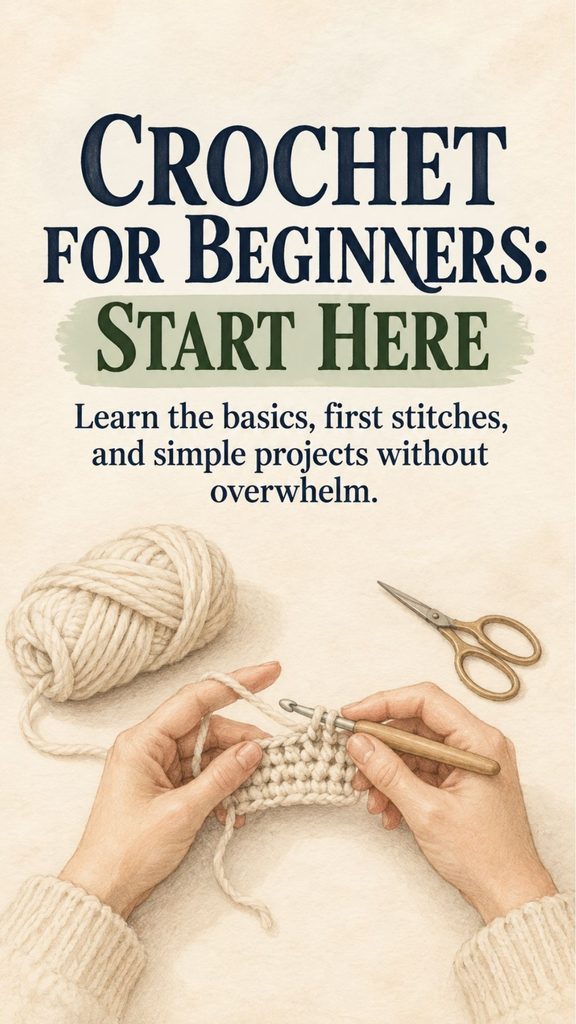
Crochet can look confusing when you first see a finished blanket, a complicated pattern, or someone moving a hook through yarn at impressive speed. What you do not see is the awkward beginning that came before it—the dropped loops, uneven stitches, tangled yarn, and rows that had to be pulled apart and started again.
That stage is normal.
Crochet is not a skill you need to be naturally talented at. It is a series of small hand movements that become easier through repetition. At first, your brain may understand what you are supposed to do while your fingers seem determined to do something else. With practice, those movements gradually become familiar.
You Might Also Like:
- Loading posts...
The easiest way to learn is to keep your supplies simple, focus on one skill at a time, and allow your first pieces to be imperfect.
This guide takes you from choosing your first hook and yarn through making a chain, working single crochet, turning rows, fixing common mistakes, and choosing an easy first project.
Why Crochet Feels Difficult at First
Crochet has its own vocabulary, tools, abbreviations, and motions. Seeing everything at once can make the craft appear much more complicated than it really is.
A beginner may immediately encounter:
- Different hook sizes
- Many types of yarn
- Yarn weights
- Pattern abbreviations
- Stitch names
- Tension
- Gauge
- Turning chains
- Stitch markers
You do not need to learn all of these at once.
At the beginning, concentrate on four things:
- Holding the hook comfortably.
- Controlling the yarn.
- Making a foundation chain.
- Learning one basic stitch.
Everything else can wait.
Crochet becomes much easier once your hands repeat the same motions enough times that you no longer have to consciously think through every movement.
What You Actually Need to Start Crocheting
Beginners often buy far more equipment than they need.
You can begin with just:
- One crochet hook
- One skein of yarn
- A pair of scissors
A yarn needle will eventually be useful for weaving in loose ends, but you do not need a large crochet kit, multiple hook sets, yarn bowls, stitch counters, or dozens of accessories on your first day.
Keeping your setup simple lets you spend your attention on learning rather than choosing equipment.
The Best Crochet Hook for Beginners
A 5 mm crochet hook, commonly marked H-8 in U.S. sizing, is a comfortable starting size for many beginners when paired with medium-weight yarn.
It is large enough that the stitches are easy to see without being so large that the hook becomes awkward to handle.
Smooth aluminum hooks are a particularly practical beginner choice because yarn generally slides across them easily.
Plastic hooks can also work well.
Bamboo and wood hooks are popular with experienced crocheters, but some have more surface friction. That is not necessarily bad, but beginners who already struggle to pull yarn through stitches may find a smooth metal hook easier.
You do not need to commit to one material forever. Crochet hooks are inexpensive enough that you can experiment later.
Choose Beginner-Friendly Yarn
Your first yarn can make learning either much easier or unnecessarily frustrating.
Look for yarn labeled:
Medium / Worsted / Weight 4
Choose a smooth yarn with clearly defined strands.
A basic acrylic yarn is often a good choice because it is:
- Affordable
- Widely available
- Easy to work with
- Available in many colors
- Durable enough for repeated practice
Avoid very fuzzy, fluffy, textured, or novelty yarn while learning. Those yarns make it difficult to see individual stitches.
Color matters too.
Choose a light or medium shade such as:
- Cream
- Light blue
- Pale green
- Soft pink
- Mustard
- Medium gray
Avoid black, dark navy, and other very dark shades at first because the stitch structure is harder to see.
One skein is plenty for learning.
You will probably crochet, unravel, and reuse the same yarn several times before making a finished project.
How to Read a Yarn Label Without Getting Overwhelmed
Yarn labels contain a lot of information, but beginners only need to pay attention to a few things.
Look for:
Yarn weight: Medium or 4.
Suggested hook size: This gives you a useful starting point, although it is not an absolute rule.
Fiber: Acrylic is perfectly suitable for practicing.
Care instructions: These become more important when you begin making washable projects.
You can ignore most of the remaining information until you start following patterns or making garments that require precise sizing.
Create a Comfortable Crochet Space
Crochet is easier when you can clearly see what your hands are doing.
Choose a place with:
- Good lighting
- Comfortable seating
- Support for your back
- Enough room for the yarn to move freely
Try not to hunch over your work.
Keep your shoulders relaxed and your elbows comfortable.
Short practice sessions are often better than trying to crochet for several hours immediately. Your hands and wrists are learning unfamiliar movements, so they may tire more quickly than expected.
Ten to twenty minutes of focused practice can be enough at first.
If your fingers, wrist, or forearm begin hurting, stop and rest.
How to Hold a Crochet Hook
There is no single correct way to hold a crochet hook.
Most crocheters naturally use one of two common grips.
Pencil Grip
Hold the hook somewhat like a pencil.
Simple side view:
fingers
  \\
   \\____ hook
    \====>
This grip gives some people a feeling of precision.
Knife Grip
Hold the hook more like a table knife.
hand
/
| =======>
______/
The hand sits more above the hook.
Some crocheters use one grip exclusively. Others switch between them depending on the project.
Choose whichever allows your hand to remain relaxed.
If your knuckles are white or your fingers are tightly clenched around the hook, you are probably gripping harder than necessary.
What Your Other Hand Does
Beginners naturally pay most attention to the hand holding the hook, but the other hand is equally important.
Your non-hook hand usually:
- Holds the crochet fabric
- Guides the working yarn
- Helps regulate tension
- Positions the next stitch
This can initially feel harder than manipulating the hook.
You are asking one hand to control several things at once, and the coordination takes time to develop.
There is no need to force it.
Experiment until the yarn moves smoothly through your fingers.
Understanding Crochet Tension
Tension describes how tightly or loosely you control the yarn while making stitches.
Beginner crochet often has inconsistent tension.
Some stitches may be:
- Very tight
- Extremely loose
- Different sizes
- Hard to work into
- Wider than neighboring stitches
That is normal.
Do not spend your first practice session trying to achieve perfectly identical stitches.
A useful beginner goal is simply to keep the yarn moving without pulling it excessively tight.
If you cannot easily insert your hook into a stitch, your tension may be too tight.
If your work is floppy with very large loops, you may be holding the yarn too loosely.
Your hands gradually learn the balance.
How to Hold the Yarn
There are many ways to guide crochet yarn.
A simple approach is to let the yarn pass over the index finger of your non-hook hand while gently controlling it with one or more of the remaining fingers.
For example:
yarn from skein
      |
      v
   / index
—-/———
/ hand
/
working yarn
Do not worry about copying an exact hand position.
If the yarn slides too freely, wrap it lightly around another finger.
If it feels difficult to pull, reduce the number of wraps.
Comfort is more important than reproducing someone else’s technique exactly.
Step 1: Make a Slip Knot
The slip knot creates the first loop on your crochet hook.
One simple method:
- Make a loop with the yarn.
- Pull a section of the working yarn through that loop.
- Place the new loop onto your crochet hook.
- Gently tighten it around the hook.
The loop should slide along the hook without becoming extremely tight.
A simple representation:
yarn
 \
  \____
  /    \
 ( loop )
  \____/
     \
      working yarn
Pull a loop of the working yarn through the center.
You now have your starting loop.
Step 2: Make a Foundation Chain
The foundation chain is commonly the first structure beginners learn.
With the slip knot on your hook:
- Hold the working yarn behind the hook.
- Catch the yarn with the hook. This is called yarn over.
- Pull the yarn through the loop already on the hook.
- Repeat.
Each repetition creates another chain.
A chain often looks something like this:
V V V V V V V V
V V V V V V V V
Each visible V represents a chain stitch.
Practice making a chain without worrying about creating a project.
Try making twenty or thirty chains.
Then pull them out and try again.
Your goal is to make the loops reasonably similar in size while keeping them loose enough to work into later.
Avoid Making Your Starting Chain Too Tight
One of the most common beginner problems is making the foundation chain extremely tight.
When you later try to insert the hook into those chains, there may barely be enough room.
Relax your grip and let each newly formed chain sit naturally on the wider part of the hook rather than tightening it against the narrow tip.
Your chain does not need to look perfect.
It only needs to remain workable.
Step 3: Learn Single Crochet
Single crochet is one of the most useful beginner stitches.
In U.S. crochet terminology it is abbreviated sc.
Once you have a foundation chain, you can begin making actual fabric.
To make a single crochet:
- Insert the hook into the second chain from the hook.
- Yarn over.
- Pull the yarn through the chain.
You now have two loops on your hook.
- Yarn over again.
- Pull through both loops.
You have completed one single crochet.
The sequence can be remembered like this:
INSERT
   ↓
YARN OVER
   ↓
PULL UP LOOP
   ↓
2 LOOPS ON HOOK
   ↓
YARN OVER
   ↓
PULL THROUGH BOTH
That is the entire stitch.
Repeat it across the row.
How to Recognize a Crochet Stitch
Once you have completed a row, look at the top edge.
You should begin seeing small V shapes.
Something like:
V V V V V V V VThose V shapes mark the tops of your stitches.
On the following row, the hook is usually inserted underneath the two strands forming the V unless a pattern instructs you otherwise.
Learning to recognize these shapes is one of the biggest breakthroughs for a beginner.
Eventually you will stop seeing a mass of yarn and start seeing individual stitches.
Turning Your Work
Crochet fabric is often worked back and forth in rows.
When you reach the end of a row:
- Make the required turning chain.
- Turn the piece around.
- Work back across the stitches you just made.
For basic single crochet, beginners commonly use one turning chain, although exact instructions can vary between patterns.
Conceptually, the movement looks like this:
Row 1  >>>>>>>>

         TURN

Row 2  <<<<<<<<

Row 3  >>>>>>>>
You continue reversing direction after each row.
That is how a flat rectangle grows.
Count Your Stitches
Counting stitches may feel tedious, but it is one of the most useful habits you can develop.
Suppose you begin with 15 single crochet stitches.
After completing the next row, count them.
You should still have 15.
If you have 14, you probably skipped a stitch.
If you have 16, you may have accidentally worked into an extra location.
Beginners commonly lose stitches at the beginning or end of rows because edge stitches can be difficult to recognize.
Regular counting catches the problem before you crochet several more rows.
Why Crochet Pieces Become Triangles
A beginner may try to crochet a rectangle and instead produce something that gradually becomes narrower:
____________
 __________
  ________
   ______
    ____
This usually means stitches are being skipped.
If the work gradually becomes wider:
    ______
   ________
  __________
 ____________
______________
you are probably adding extra stitches.
Neither problem means you are bad at crochet.
They are normal signs that you are still learning where the first and last stitch of each row are located.
Counting solves most of the problem.
Use Stitch Markers If the Edges Confuse You
Although stitch markers are not required, they can be useful once you begin working rows.
Place a marker in the first stitch of a row.
This makes it easier to identify that stitch when you return to it.
If you do not own stitch markers, you can temporarily use:
- A safety pin
- A small piece of contrasting yarn
- A removable clip
Just make sure whatever you use will not damage the yarn.
Learning to Read Your Crochet
Reading crochet means understanding the structure of the fabric by looking at it.
At first, everything may seem like tangled loops.
With practice, you begin noticing:
- The V-shaped tops of stitches
- The posts beneath them
- The first and last stitch of a row
- Loops that are unusually large
- Places where stitches were accidentally skipped
This visual awareness becomes extremely useful.
Instead of depending entirely on written instructions, you can look at the fabric and understand what happened.
Common Crochet Mistakes for Beginners
Mistakes are part of learning crochet.
Most can simply be undone.
Your Chain Is Too Tight
If you cannot insert the hook into the chain, loosen your starting tension.
Your Stitches Are Extremely Tight
Relax your yarn hand and stop pulling each stitch closed after completing it.
Your Stitches Are Very Loose
Try applying slightly more resistance with the fingers guiding the yarn.
Your Edges Are Uneven
Count every row.
Most uneven edges come from accidentally adding or dropping stitches.
The Yarn Keeps Splitting
Make sure the hook is catching the entire strand of yarn rather than passing through part of it.
Smooth yarn makes this easier.
The Yarn Keeps Falling Off the Hook
Slow your movement and rotate the hook slightly downward while pulling yarn through a loop.
Your Hands Become Tired
Stop.
Crochet should not require pushing through pain.
Take breaks, stretch gently, and return later.
How to Undo Crochet
One of crochet’s nicest features is how easy it is to undo mistakes.
Remove the hook from the active loop and gently pull the working yarn.
The stitches will begin unraveling one at a time.
This is commonly called frogging.
When you reach the mistake, stop pulling, place the hook back into the active loop, and continue crocheting.
Undoing stitches is not wasted work.
It teaches you how stitches are constructed.
Do Not Chase Perfect Tension Too Early
Perfectly even stitches are not a realistic expectation for your first practice piece.
Your first square may contain:
- Large loops
- Tight sections
- Crooked edges
- Missed stitches
- Strange corners
Keep it.
That little square is evidence of where you started.
After several practice sessions, make another one and compare them.
The improvement is often much easier to see than it is to feel.
How to Finish Your Crochet
Once you complete a practice piece or project, you need to secure the final stitch.
Leave a yarn tail of roughly 15 cm or 6 inches.
Cut the yarn.
Yarn over with the cut end and pull it completely through the final loop.
Gently tighten.
The crochet itself is now secured.
However, the loose tail still needs to be woven into the fabric.
How to Weave In Yarn Ends
Thread the loose tail onto a yarn needle.
Pass the needle through several nearby stitches.
Then change direction and weave through another section.
A simplified path might look like:
>>>>>>>>
     <<<<<<
          >>>>
Changing direction helps reduce the chance of the yarn slipping free.
Trim the remaining end close to the fabric without cutting the crochet stitches themselves.
Do not simply cut the yarn directly beside the final knot. Leaving and weaving a tail gives the project a much more secure finish.
The Best First Crochet Projects
Your first project should give you plenty of repetition without requiring complicated shaping.
Excellent beginner projects include:
Dishcloth
A simple square or rectangle made entirely from single crochet is ideal practice.
You learn:
- Foundation chains
- Single crochet
- Turning
- Counting
- Straight edges
- Finishing
Cotton yarn is often chosen for actual dishcloths because it absorbs water well, although inexpensive practice yarn is fine while learning technique.
Simple Scarf
A scarf is essentially a long rectangle.
The repetition gives you many opportunities to improve tension.
Practice Square
There is nothing wrong with making a square that has no purpose other than teaching you crochet.
Practice pieces are valuable.
They remove the pressure of creating something perfect.
Projects to Avoid at the Very Beginning
Some projects are much easier once you understand the basics.
Consider waiting before attempting:
- Fitted sweaters
- Complicated garments
- Lace
- Very fine yarn
- Tiny hooks
- Multi-color designs
- Complex stuffed toys
- Projects with extensive shaping
- Intricate charts
There is no prize for starting with the hardest project.
A simple square teaches the same fundamental hand movements you will later use in much more elaborate work.
A Good Beginner Practice Routine
Instead of trying to master crochet in one afternoon, divide your learning into short sessions.
Session 1
Practice slip knots and chains.
Session 2
Practice making more even chains.
Session 3
Learn single crochet.
Session 4
Work several rows.
Session 5
Practice identifying and counting stitches.
Session 6
Make a small square.
Session 7
Finish the square and weave in the ends.
You can repeat any stage as many times as necessary.
There is no required timetable.
Some people understand a movement immediately but need time to coordinate their fingers. Others move more slowly and suddenly find everything becomes easier after enough repetition.
Both are normal.
What Comes After Single Crochet?
Once you are comfortable making chains and single crochet, you have enough foundation to begin learning more stitches.
Common next steps include:
- Half double crochet
- Double crochet
- Slip stitch
- Working in the round
- Increasing
- Decreasing
- Reading simple patterns
- Understanding gauge
Do not rush toward all of them simultaneously.
Adding one new skill at a time keeps crochet enjoyable and makes it easier to understand what each technique changes.
Crochet Abbreviations You Will Eventually See
Patterns often use abbreviations to save space.
In U.S. terminology, some common ones include:
| Abbreviation | Meaning |
|---|---|
| ch | chain |
| sc | single crochet |
| hdc | half double crochet |
| dc | double crochet |
| sl st | slip stitch |
| st | stitch |
| sts | stitches |
Be aware that crochet terminology differs between countries. For example, U.S. and U.K. stitch names are not always the same even when they describe the same technique.
Always check which terminology a pattern uses before beginning.
The Most Important Thing to Learn First
The hardest part of crochet is rarely memorizing a stitch.
It is accepting the temporary awkwardness of learning something new.
Your first chain may twist.
Your first row may be too tight.
Your first rectangle may slowly become a triangle.
You may unravel the same section several times.
None of those things indicates that you lack talent.
They are simply what learning crochet looks like.
Start with one hook and one easy-to-see skein of yarn. Learn how the yarn moves through your hands. Practice the chain until it feels less strange. Add single crochet. Count your stitches. Undo mistakes when necessary and try again.
Crochet gradually changes from something you have to think through step by step into a movement your hands recognize.
You do not need perfect stitches to begin.
You only need the first loop.