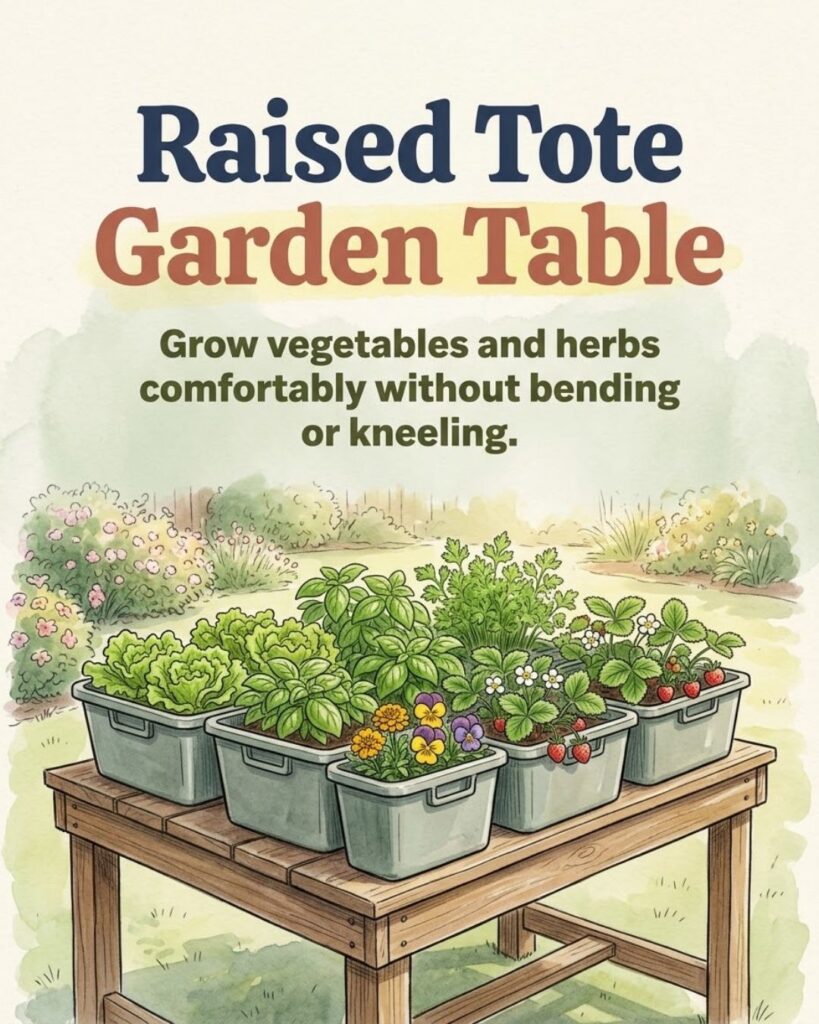
A productive garden does not have to start at ground level. For anyone who finds kneeling, crouching, or repeatedly bending over uncomfortable, a raised tote garden table can bring plants up to a much easier working height.
The idea is simple: build a sturdy outdoor table frame that supports several plastic totes, then use each tote as an individual growing container. Instead of filling one large raised bed with soil, you end up with several separate mini gardens sitting side by side.
That separation is one of the biggest advantages of this design. Basil can grow in one tote, lettuce in another, strawberries in a third, and flowers in the next. Each container can be watered, amended, replanted, or even removed without disturbing everything else.
You Might Also Like:
- Loading posts...
A six-tote setup can provide a surprising amount of useful growing space while keeping the garden neat and easy to reach.
Why a Raised Tote Garden Table Can Work So Well
Traditional raised beds reduce some bending, but many are still only 12 to 24 inches high. A garden table can be built much higher, allowing much of the routine work to happen while standing or sitting beside it.
That can make everyday jobs such as planting, harvesting, removing damaged leaves, checking for pests, and watering considerably easier.
The individual containers also make the garden more flexible.
In one large bed, every plant shares essentially the same soil and drainage conditions. With separate totes, each container can be managed on its own.
For example, you might have:
- lettuce and spinach in one tote
- basil and parsley in another
- strawberries in a third
- compact peppers in another
- flowers in the remaining containers
If one tote develops a soil problem or needs to be replanted, the others can stay exactly as they are.
What You Need
For a basic six-container table, you will need:
- 6 sturdy plastic totes
- Outdoor-suitable lumber
- Exterior-grade screws
- Drill and appropriate drill bits
- Saw or pre-cut lumber
- Measuring tape
- Level
- Potting mix
- Compost or another appropriate soil amendment
- Plants or seeds
- Optional drainage screening or similar material
- Optional casters designed for heavy outdoor loads
The exact amount and size of lumber depend on the dimensions of your totes and how high you want the finished table.
Do not build the frame first and hope the containers fit afterward. Buy or select the totes before cutting the wood.
Start With the Right Totes
Not every plastic storage tote is equally suitable for this project.
Choose containers made from relatively sturdy plastic that will not flex excessively once filled with moist potting mix. Thin, brittle storage boxes may crack or bow under the weight.
The containers should also have a shape that allows the wooden frame to support them securely.
A wide rim is helpful because the tote can rest against the frame, but the rim alone should not necessarily be expected to carry the entire load. Wet growing mix is heavy, particularly in large containers.
Providing support underneath the totes is safer than suspending them entirely by their upper edges.
If possible, choose matching containers. Identical dimensions make it much easier to build evenly spaced supports.
Decide on a Comfortable Working Height
Before cutting any lumber, decide how high you want the planting surface.
There is no single perfect height because people differ in stature and mobility. A good approach is to stand where the table will go and imagine planting or harvesting from the container.
The top should be high enough that you do not need to bend deeply, but not so high that reaching into the middle of a tote becomes awkward.
If the table is being built primarily for someone who will garden while seated, design the height and frame so there is enough comfortable access from the chair.
Remember that the soil surface will sit several inches below the top edge of the tote.
1. Build a Strong Rectangular Frame
Begin with an outer frame large enough to accommodate your six containers.
A common arrangement is two rows of three totes, although a single long row may be easier to reach from one side.
Measure each tote carefully, including the rim.
Leave enough clearance that the containers can be lifted out without becoming wedged in the frame.
Construct the main rectangle from outdoor-suitable lumber and secure the joints with exterior screws. The legs need to be strong enough to support not only the frame but also six containers filled with wet growing medium and mature plants.
This is not a project where lightweight furniture construction is a good idea.
2. Add Cross Supports for Every Tote
Cross supports are what turn the table from a wooden rectangle into a reliable container garden.
Add dividers between the totes so each one has its own space.
Then provide adequate support underneath.
Depending on the design, this might mean several horizontal boards, rails, or a supporting platform beneath each container.
The goal is to distribute the weight instead of allowing a tote full of wet soil to hang from a narrow plastic lip.
Give the frame a gentle push once assembled. It should feel rigid rather than wobbly.
Diagonal bracing can improve stability on taller designs.
3. Protect the Wood for Outdoor Use
The frame will spend its life around water, damp soil, sun, and changing weather.
Use lumber appropriate for outdoor construction and exterior-rated fasteners.
If you apply a finish, choose one suitable for outdoor use and follow its curing instructions before placing plants or containers against it.
Pay particular attention to exposed cut ends because they frequently absorb moisture more readily than finished surfaces.
Keeping the wooden feet out of constantly wet soil can also help the structure last longer.
4. Add Proper Drainage to the Totes
Drainage is essential in container gardening.
A tote without drainage holes can hold water after irrigation or heavy rain, leaving roots in saturated growing mix.
Drill multiple holes across the bottom rather than making one opening in the center.
You can also add a few low holes near the bottom of the sides if appropriate for the container design.
Make sure water leaving the tote has somewhere to go. If the wooden support sits tightly against every drainage hole, water may not escape efficiently.
Leaving small gaps beneath the container or designing the supports around the drainage points helps.
Do You Need Gravel in the Bottom?
A layer of gravel is often suggested for container drainage, but it is usually unnecessary.
The important features are drainage holes and a well-draining potting mix.
Filling several inches of the container with gravel also reduces the amount of rooting space available to plants while adding extra weight to the table.
If you are concerned about potting mix washing through large holes, a small piece of mesh or another suitable permeable material over the opening can help keep the mix in place without blocking water flow.
The container should still drain freely.
5. Use Potting Mix Instead of Heavy Garden Soil
Filling the totes with soil dug straight from the yard is one of the easiest ways to make the system harder to manage.
Ordinary garden soil can become dense and poorly aerated inside containers. It can also make the totes extremely heavy.
Use a quality potting mix intended for container growing.
Potting mixes are designed to balance water retention with air space around the roots.
Compost can be incorporated when appropriate, but avoid filling the entire container with pure compost. Plants generally perform better in a balanced growing medium that provides both moisture retention and drainage.
Leave a little space between the soil surface and the rim so water does not immediately spill over the sides.
6. Treat Every Tote as a Separate Mini Garden
Once filled, each container can be managed independently.
That is where this design becomes much more useful than a single large bed.
You might dedicate one tote entirely to salad greens while using another for herbs. A third could hold strawberries, while another grows compact flowering plants.
Grouping crops by similar growing needs can make maintenance simpler.
For example, leafy greens generally appreciate consistently moist growing conditions, while some established herbs tolerate slightly drier conditions between waterings.
Because the containers are separate, watering one does not automatically saturate the others.
Good Crops for a Tote Garden Table
The best choices are usually plants that do not require an enormous root zone or extremely heavy trellising.
Lettuce
Leaf lettuce is well suited to containers and can make good use of the broad surface area of a tote.
Instead of planting everything on the same day, you can sow smaller amounts periodically to extend the harvest where the climate allows.
Spinach
Spinach is another useful choice for cooler growing periods.
It can be planted relatively close compared with larger vegetables, making good use of container space.
Basil
Basil grows well in containers provided it receives suitable warmth, sunlight, water, and drainage.
A dedicated herb tote can also make harvesting convenient because the plants remain near waist height.
Parsley
Parsley adapts well to container culture and can share space with other appropriately sized herbs.
Because it develops a substantial root system over time, give it more depth and spacing than very shallow-rooted greens.
Strawberries
Strawberries are particularly attractive in a raised setup because the fruit is easier to see and pick.
Keep the crown of each plant at the proper level rather than burying it deeply.
Containers may also dry faster than in-ground beds, so moisture should be checked regularly.
Compact Peppers
Compact pepper varieties can grow successfully in adequately sized containers.
They need more root room than lettuce or herbs and generally prefer plenty of sunlight and warm conditions.
Avoid overcrowding them with multiple large plants in a small tote.
Flowers
Flowers can be planted for appearance, pollinator interest, or simply to make the table more attractive.
Choose varieties suited to the container size and available sunlight.
Mixing vegetables with flowers can turn a purely functional growing table into an attractive feature near a patio or entrance.
7. Water Slowly and Check Each Tote Separately
Container gardens require a slightly different watering routine from in-ground beds.
Because the growing medium is surrounded by air on several sides, containers can dry more quickly, particularly during hot or windy weather.
Do not water purely according to a fixed schedule.
Check the growing mix instead.
Insert a finger into the upper portion of the mix. If it is still noticeably moist, the container may not need more water yet. If it is becoming dry and the crop requires consistent moisture, water thoroughly.
Apply water slowly enough that it penetrates the mix rather than immediately running down the sides.
You should eventually see some excess water drain from the bottom.
Watch for Uneven Watering
One of the benefits of separate totes is also a potential maintenance challenge: six containers can dry at six different rates.
A tote full of large, leafy plants may need water more often than one holding small herbs.
Containers receiving stronger afternoon sun may dry more quickly than those partially shaded by nearby plants.
Check each tote rather than assuming the entire table needs exactly the same amount of water.
Feeding Container Plants
Nutrients in containers are limited to what exists in the growing medium and what you add later.
Some commercial potting mixes already contain fertilizer, while others contain little or none.
Read the label before adding additional fertilizer.
Then feed the plants according to the crop and fertilizer directions rather than applying the same amount automatically to everything on the table.
Leafy greens, flowering plants, herbs, and fruiting vegetables can have different nutrient demands.
One advantage of the tote system is that each container can receive its own treatment.
Give Plants Enough Sun
The table itself does not change the light requirements of the crops.
Before placing it permanently, observe how much direct sun reaches the location throughout the day.
Vegetables grown for fruit, including peppers and strawberries, generally need strong light to perform well.
Leafy greens can often tolerate less intense conditions, especially in warm weather.
Avoid placing the table somewhere merely because it is convenient if the plants will receive inadequate light.
If the structure will be difficult to move once filled, choose the location carefully before adding soil.
Make Sure the Table Cannot Tip
Six full totes create a considerable load.
A properly built table should be stable on level ground and resistant to wobbling.
This becomes even more important if the garden will be used around children, pets, or anyone who might steady themselves against the edge.
Do not assume that a tall frame is automatically safe because it is heavy.
Use strong joints, adequate cross bracing, and a wide enough footprint.
If the table is placed on soil, check occasionally for settling around the legs.
Consider Removable Totes
Building the table so each container can be lifted out offers several advantages.
At the end of a crop cycle, you can remove one tote, refresh the mix, and replant it without disturbing the rest of the garden.
A damaged tote can be replaced individually.
Containers can also be emptied and cleaned more easily.
Just remember that a tote filled with wet potting mix may be too heavy to lift safely. If removal is part of your plan, empty much of the growing medium first.
A Good Layout for a Six-Tote Salad Garden
If the goal is fresh herbs and salad ingredients, a simple arrangement might look like this:
- Tote 1: leaf lettuce
- Tote 2: spinach or other suitable greens
- Tote 3: basil
- Tote 4: parsley and compatible herbs
- Tote 5: strawberries
- Tote 6: compact flowers or another seasonal crop
The exact combination should change with your climate and season.
In a hot summer, cool-season greens such as spinach may struggle while basil and peppers thrive. During cooler weather, the opposite may be true.
One of the best features of separate containers is how easily you can swap crops as conditions change.
Common Mistakes to Avoid
A raised tote garden is straightforward, but several mistakes can shorten its useful life.
Do not underestimate the weight of wet potting mix. Build the frame for the filled containers, not the empty ones.
Do not rely solely on thin plastic rims for support.
Do not skip drainage holes.
Avoid filling the totes with dense yard soil simply because it is free.
Do not crowd large vegetables into every available inch.
And do not forget that containers may need more frequent moisture checks than an in-ground garden.
A few thoughtful decisions during construction can prevent most of these problems.
A Small Garden That Is Easier to Reach
The real appeal of a raised tote garden table is not that it uses complicated gardening technology. It does the opposite.
It takes ordinary containers, lifts them to a useful working height, and turns each one into a manageable growing space.
For gardeners who prefer not to work on their knees, that can make planting and harvesting much more comfortable. For small-space growers, it creates an organized area where different crops can be managed separately. And for anyone who enjoys experimenting, six individual containers provide plenty of opportunities to try different herbs, greens, berries, vegetables, or flowers without committing an entire bed to one crop.
Build the frame strongly, support the totes from underneath, provide reliable drainage, and use a growing mix designed for containers. After that, each tote can function as its own little raised bed.
A table filled with lettuce, basil, parsley, strawberries, compact peppers, and flowers can provide both useful harvests and an attractive garden feature—all without requiring you to spend the season working at ground level.