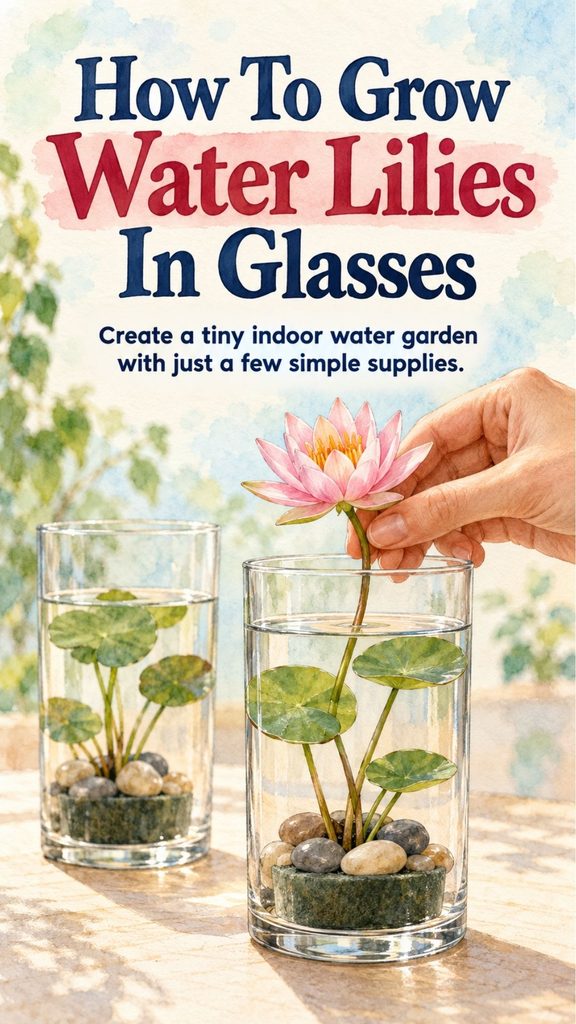
Water lilies can make even a small patio, balcony, courtyard, or garden feel like a miniature pond retreat. Their round floating leaves and colorful flowers create the look of a traditional water garden without requiring a large in-ground pond.
But there is an important distinction to make before getting started: a cut water-lily flower placed in a drinking glass is not a growing water lily.
A true water lily needs its living rhizome or tuber, roots, suitable aquatic soil, adequate water depth, warmth, and plenty of light. Simply cutting a stem and pushing it into floral foam or a sponge may create a temporary flower arrangement, but the plant will not continue growing that way.
You Might Also Like:
- Loading posts...
Fortunately, dwarf water lilies can be grown successfully in containers, making them a much better choice for gardeners with limited space.
Can Water Lilies Really Grow in Glass Containers?
Potentially, but the container needs to be much larger than an ordinary drinking glass.
Water lilies are rooted aquatic plants. Their roots grow in soil beneath the water while their leaves rise on flexible stems and float on the surface.
The Royal Horticultural Society notes that dwarf or small water-lily cultivars generally spread about 30–60 cm (1–2 feet) and are suited to water roughly 30–45 cm (12–18 inches) deep once established.
That means the tall glasses often shown in decorative DIY projects are usually better suited to displaying cut water-lily flowers than growing healthy plants long term.
For actual cultivation, choose a broad waterproof container such as:
- A small patio pond
- A glazed ceramic pot without drainage holes
- A half barrel lined for water use
- A large glass vessel
- A sturdy decorative water bowl
- A small preformed pond container
The container must be large enough for both the submerged planting pot and the floating leaves.
Choose a Dwarf Water Lily
Not every water lily belongs in a small container.
Large cultivars can spread several feet across and quickly overwhelm a patio water garden.
Look specifically for varieties labeled:
- Dwarf
- Miniature
- Small-growing
- Suitable for tubs or container ponds
Check the mature spread and recommended planting depth before purchasing.
Water lilies can be hardy or tropical, and the two groups have different temperature requirements.
Hardy types are usually the easiest choice for outdoor container ponds in climates where they are adapted.
Tropical water lilies often need warmer water and may need special winter protection in cooler climates. Penn State notes that many tropical or subtropical water lilies require warm conditions and long periods of direct sunlight to bloom well.
Choose a cultivar suited to your climate rather than selecting by flower color alone.
What You Need
A simple container water garden does not require much equipment.
Gather:
- One dwarf water lily with a healthy rhizome or tuber
- A waterproof container
- A small aquatic planting basket or pot
- Heavy loam or aquatic planting compost
- Washed pea gravel or small stones
- Water
- Bricks or overturned pots for adjusting planting height if necessary
Avoid ordinary lightweight potting mix.
Typical container composts contain organic materials that can float into the water and make it cloudy.
Penn State recommends planting aquatic plants in containers using ordinary topsoil without added organic matter, while the RHS recommends aquatic compost or heavy clay-based loam for water lilies.
Do Not Use Floral Foam or a Sponge
Floral foam is appropriate for arranging cut flowers, not establishing a living water lily.
A growing water lily needs its roots anchored in soil.
The rhizome or tuber stores energy and produces both roots and new leaves. Cutting the flower stem away from that plant removes it from the structure it needs to continue growing.
So if you want a water lily that survives, produces new leaves, and flowers repeatedly, buy a living plant rather than a cut flower.
Step 1: Prepare the Aquatic Pot
Choose an aquatic basket or small sturdy pot appropriate for your cultivar.
Dwarf water lilies do not require the enormous baskets used for large varieties, but they still need enough room for the root system.
The RHS recommends aquatic baskets filled with aquatic compost or loamy soil and notes that a dwarf water lily may be suitable for a basket of around 2 liters.
If the basket has large openings, line it with a material intended for aquatic planting so soil does not wash out.
Add the soil and gently firm it.
Do not fill the pot completely to the rim because you will add gravel later.
Step 2: Position the Water-Lily Rhizome
Planting technique depends somewhat on the water-lily type you purchased, so follow the instructions that came with the plant.
For many hardy water lilies, the rhizome is positioned so that the growing point remains near the soil surface rather than being buried deeply.
The RHS recommends keeping the crown at the compost surface and trimming damaged leaves or excessively long roots before planting.
Some tropical water lilies grow from tubers and are planted differently.
Missouri Botanical Garden, for example, recommends placing tropical water-lily tubers with the crown slightly above the soil surface for cultivars grown in containers.
This is another reason to identify your plant before planting it.
Step 3: Add a Layer of Gravel
Once the plant is positioned, gently cover the soil surface with washed pea gravel.
This serves a practical purpose.
The gravel helps prevent the soil from floating away when the pot is submerged.
Do not bury the crown or active growing point beneath a thick layer of stones.
Use clean, washed material rather than gravel coated with dust or unknown chemicals.
Step 4: Fill the Container With Water
Place the planted basket into the larger waterproof container.
Then slowly add water.
Adding water gently reduces disturbance to the soil.
For a newly planted hardy water lily, you do not necessarily need to place it at its maximum eventual depth immediately.
The RHS recommends initially positioning young water lilies so the crown is covered by around 15–25 cm (6–10 inches) of water, allowing the young leaves to reach the surface. As the plant grows, the basket can gradually be lowered.
Use bricks or another stable support underneath the basket when necessary.
As stems lengthen, remove the supports one at a time until the plant reaches the appropriate depth for the cultivar.
Step 5: Keep the Leaves Floating on the Surface
Water-lily leaves are designed to float.
Do not intentionally keep mature leaves submerged beneath several inches of water.
When establishing the plant, adjust the pot height so existing leaves can reach or float on the surface.
As new leaves grow, their stems will lengthen to accommodate greater water depth.
If the plant is placed too deeply before it has established, young leaves may struggle to reach the light.
Step 6: Give the Plant Plenty of Light
Water lilies are sun-loving plants.
A bright outdoor location generally produces better flowering than a dark indoor corner.
Missouri Botanical Garden recommends full sun to partial shade for water lilies and notes that good flowering is associated with adequate sunlight.
For a patio water garden, look for a location receiving several hours of direct sunlight.
A decorative water lily placed far from a bright window indoors may survive poorly or stop flowering.
Tropical varieties can be particularly demanding about both sunlight and warmth.
Can You Grow a Water Lily Indoors?
Growing one indoors is more challenging than keeping one in an outdoor container pond.
The main problems are usually:
- Insufficient sunlight
- Water that is too cool
- Limited container depth
- Lack of seasonal conditions
- Rapid algae growth in bright indoor containers
Tropical water lilies may be maintained in warm conservatories or greenhouse conditions, but an ordinary living room is not automatically suitable.
If you want a long-term indoor aquatic display, choose plants actually recommended for indoor aquariums or indoor water gardens rather than assuming every pond plant will adapt.
Do You Need Distilled Water?
Distilled water is not generally a requirement for growing water lilies.
The original idea of filling a glass with distilled water makes sense for a decorative arrangement because distilled water contains few dissolved minerals, but a rooted water lily is different.
What matters most is using water that will not harm the plant.
If your municipal water is heavily treated, follow recommendations from the nursery where you bought the plant or your local water-gardening guidance.
Once your container is established, top it up as water evaporates.
Do not allow the water level to drop so far that the planting basket becomes exposed.
Keep the Water Level Stable
Container ponds lose water to evaporation, particularly during warm, sunny, or windy weather.
Check the level regularly.
Top up as needed rather than repeatedly emptying and refilling the entire container.
A mature container water garden develops its own biological balance, and unnecessarily replacing all the water can disrupt it.
During hot weather, shallow containers may warm quickly, so a larger body of water is generally easier to keep stable than a tiny glass vessel.
This is another reason a broad container is usually more successful than a narrow jar.
What About Algae?
Some algae is normal in a water garden.
A transparent glass container makes algae especially noticeable because sunlight reaches the sides and every patch is visible.
If the container develops excessive algae, resist the temptation to continually scrub and replace all of the water.
First consider:
- Whether the container receives excessive nutrients
- Whether fertilizer has escaped into the water
- Whether decomposing leaves are accumulating
- Whether the plant is large enough to shade part of the surface
Remove yellowing or decaying leaves promptly.
Do not add ordinary garden fertilizer directly to the water.
Fertilizing Water Lilies
Water lilies are flowering plants and may eventually need additional nutrients.
Aquatic fertilizer tablets designed for water lilies can be pushed into the soil where nutrients remain close to the roots.
Follow the fertilizer manufacturer’s instructions carefully.
Adding too much fertilizer can encourage algae and create poor water quality.
Missouri Botanical Garden recommends fertilizer tablets in the soil for some tropical water-lily cultivars rather than simply adding nutrients freely to the surrounding water.
Remove Fading Flowers and Leaves
Good maintenance is simple.
Remove:
- Dead flowers
- Yellow leaves
- Damaged foliage
- Decaying plant material
This keeps the container looking tidy and prevents dead material from decomposing in the water.
Cut unwanted leaves or flower stems near their base using clean tools.
Do not cut healthy floating leaves simply to make the plant fit a container that is too small.
If the water lily constantly outgrows the container, move it to something larger.
What Happens in Winter?
Winter care depends on whether your water lily is hardy or tropical and how cold your climate becomes.
Hardy water lilies can survive cold winters when their rhizomes remain protected below water that does not freeze completely around them.
Penn State notes that hardy water lilies can remain in ponds through winter as long as their roots do not freeze.
That becomes more difficult in a small container because the entire volume can freeze solid.
In cold climates, container-grown hardy lilies may need to be moved to an appropriate protected location for winter.
Tropical types require warmer conditions and usually cannot simply be left outside through freezing weather.
Always follow care recommendations for the cultivar you own.
Can You Propagate a Water Lily From a Cut Flower?
Generally, no.
A flower stem placed in a glass is not equivalent to a stem cutting from a houseplant.
Most water lilies are propagated by division of the rhizome or tuber, by specific plantlets produced by some tropical varieties, or from seed.
The RHS describes division as removing an established plant, cutting the clump into sections containing a young shoot and healthy roots, and replanting those divisions in aquatic baskets.
So if someone gives you a bouquet containing a water-lily flower, enjoy it as a cut flower.
Do not expect it to become a new mature plant simply by placing the stem in water.
If You Only Want the Glass-Jar Look
You can still create the attractive display that inspires many water-lily-in-glass projects.
Use a cut water-lily flower temporarily in a tall glass of clean water.
Add a few washed stones if you like the appearance.
But describe it accurately as a cut-flower water display, not as a method for growing water lilies.
The flower will eventually fade just like any other cut flower.
For a permanent miniature water garden, use a live dwarf water lily planted correctly in a larger container.
Small-Space Water Lilies Are Completely Possible
You do not need a large country pond to enjoy water lilies.
What you do need is the right plant and enough room for it to grow naturally.
Choose a dwarf cultivar.
Plant the rhizome or tuber in suitable aquatic soil.
Cover the soil with washed gravel.
Submerge the pot at the appropriate depth.
Give the plant plenty of light.
Keep its leaves floating on the water surface.
Maintain the water level and remove dying foliage.
With the right setup, a large tub or decorative container can become a genuine miniature pond—and unlike a cut flower pushed into a sponge, the water lily can continue growing and producing new flowers through the season.
That gives you the same beautiful small-space effect, but with a living plant that is being grown the way water lilies actually need.