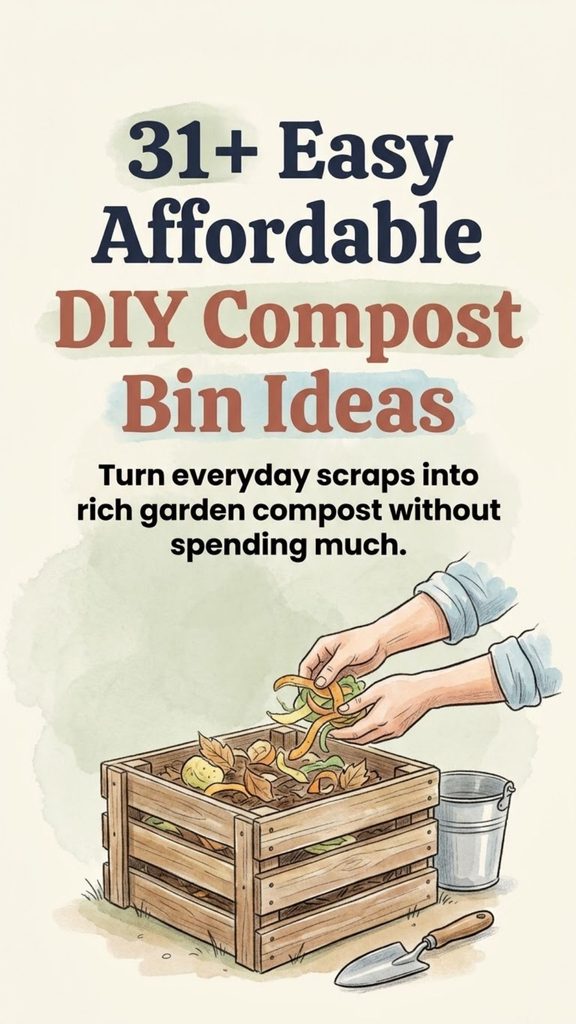
Starting a compost pile does not require an expensive tumbler, a large garden, or complicated equipment. Some of the most effective compost bins can be made from materials you already have: old pallets, a trash can, wire mesh, leftover lumber, plastic totes, buckets, or even a few concrete blocks.
A good compost bin has a simple job. It keeps organic materials together while allowing enough moisture and oxygen for microorganisms to break them down. The container itself does not make the compost. What matters most is the mixture inside it and how well you manage air and moisture.
That means a homemade bin can work every bit as practically as an expensive commercial system.
You Might Also Like:
- Loading posts...
Whether you have a large vegetable garden, a small backyard, or only a sheltered patio, these affordable DIY compost bin ideas offer plenty of ways to start turning kitchen scraps and garden waste into useful compost.
Understand the Basics Before Building Your Compost Bin
Before choosing a design, it helps to understand what compost actually needs.
Most backyard compost depends on four basic ingredients: carbon-rich materials, nitrogen-rich materials, moisture, and oxygen.
Brown materials supply carbon. Examples include dry leaves, shredded plain cardboard, straw, small woody prunings, and uncoated paper.
Green materials supply more nitrogen and moisture. Examples include vegetable scraps, fruit scraps, coffee grounds, fresh grass clippings, and green garden trimmings.
You do not need to calculate an exact carbon-to-nitrogen ratio every time you add something. For ordinary backyard composting, a practical starting point is to use noticeably more browns than greens by volume. If the pile becomes wet or smelly, add more dry brown material. If it stays dry and hardly changes, add moisture and some fresh green material.
The pile should generally feel damp, similar to a wrung-out sponge, rather than dripping wet.
Oxygen matters too. A pile that becomes compacted and waterlogged can develop unpleasant odors. Turning it, adding coarse browns, or improving ventilation can help.
What Can Go Into a Home Compost Bin?
A successful compost pile can handle many ordinary household and garden materials.
Good additions include fruit and vegetable scraps, coffee grounds and paper filters, crushed eggshells, dry leaves, untreated plant trimmings, grass clippings in thin amounts, shredded cardboard, plain paper, straw, and small quantities of untreated sawdust.
Banana peels can absolutely go into ordinary compost. Cutting thick peels and other large scraps into smaller pieces simply helps them decompose more quickly.
Materials that are better kept out of a basic backyard compost bin include meat, fish, bones, dairy products, large amounts of oil or grease, pet feces from dogs or cats, and coal or charcoal ash. These can create pest, odor, contamination, or decomposition problems.
Diseased plants and weeds loaded with mature seeds are also worth handling carefully. A home pile that never reaches and maintains sufficiently high temperatures may not reliably destroy every plant pathogen or weed seed.
Does a Compost Bin Need a Lid?
Not necessarily.
Open pallet and wire bins can produce excellent compost without one. A lid becomes useful when you need to control heavy rain, reduce drying, or discourage animals from digging through fresh scraps.
In rainy climates, some type of cover can prevent the pile from becoming waterlogged. In dry areas, leaving more of the pile exposed to occasional rain can be useful.
If you cover your compost, do not seal it so tightly that airflow disappears.
Choosing the Best Location
Place an outdoor compost bin somewhere convenient enough that you will actually use it.
A level, reasonably well-drained site is ideal. Direct contact with soil can be convenient for open-bottom bins, but it is not essential for composting. Composting microorganisms are already present on many of the materials you add.
Avoid putting an open pile directly against wooden siding, fences, or other structures that could remain damp.
If rodents are common in your area, consider lining the bottom and lower sides with small-mesh hardware cloth and use a secure lid.
Now for the fun part: choosing a bin.
1. Basic Pallet Compost Bin
Pallets are one of the easiest materials for building a large compost bin.
Stand three pallets upright to create the back and two sides. Add a fourth pallet to the front or leave the front partially open for access. Secure the corners with exterior screws, heavy wire, brackets, or sturdy cable ties.
The gaps between pallet boards naturally provide ventilation.
If you use reclaimed pallets, choose clean pallets with a known history. Pallets marked HT have been heat-treated. Avoid heavily stained, oily, chemically contaminated, or questionable pallets around compost you plan to use in a food garden.
2. Pallet Bin With a Hinged Front
Make the basic pallet design easier to use by converting the front pallet into a gate.
Attach it to one side with outdoor hinges and add a simple latch to the other. Opening the front makes it much easier to turn the pile or shovel out finished compost.
This small improvement is especially worthwhile for larger piles.
3. Three-Bay Pallet Compost System
Gardeners who generate a lot of organic waste may prefer three separate compartments.
One common system uses:
- One bay for new materials
- One bay for actively decomposing compost
- One bay for compost that is nearly finished or ready to use
The compartments can be built from pallets joined side by side.
A multi-bay system takes more room, but it makes compost management much easier when you produce a steady supply of yard waste.
4. Scrap-Lumber Compost Bin
Leftover boards from another outdoor project can become a sturdy compost enclosure.
Build four corner posts and attach horizontal boards while leaving small gaps between them for airflow.
A removable front is especially useful. Instead of permanently screwing the front boards into place, slide them into channels or brackets so you can remove boards individually as you shovel compost out.
5. Cedar Compost Bin
Cedar is naturally more resistant to outdoor decay than many common untreated woods, making it useful for a longer-lasting bin.
A simple cedar frame with slatted sides can look neat enough to place near a vegetable garden or patio.
It costs more than reclaimed pallets, however, so it makes the most sense when appearance and durability are priorities.
6. Repurposed Fence-Board Bin
Replacing an old wooden fence can leave you with a supply of boards that still have useful life in them.
Sound, clean boards can be attached to four posts to create a basic square compost enclosure.
Avoid reusing boards that are badly rotten or contaminated with unknown paints, stains, or other substances.
7. Rustic Log Compost Bin
Straight branches and small logs can form the walls of a rustic compost enclosure.
Stack them horizontally between corner supports, leaving small gaps for ventilation.
This works particularly well in woodland-style gardens where a manufactured-looking plastic container would feel out of place.
8. Woven Willow Compost Bin
Flexible willow or similar pliable branches can be woven between upright stakes to form an attractive circular or square compost enclosure.
The gaps allow air to move through the pile, while the woven structure keeps loose materials contained.
Expect natural woven bins to deteriorate gradually. That can be acceptable if your goal is a low-cost structure made primarily from garden materials.
9. Wire-Mesh Cylinder Compost Bin
This may be the fastest DIY compost bin to build.
Cut a length of sturdy wire mesh, curve it into a cylinder, overlap the ends, and secure them with wire or strong fasteners.
Wear gloves while cutting and handling wire because freshly cut edges can be sharp.
A wire cylinder is particularly useful for leaves, garden trimmings, and large volumes of plant material.
10. Chicken-Wire Compost Holder
Chicken wire can also contain a compost pile.
Wrap it around several sturdy stakes driven into the ground to create a circular enclosure.
Chicken wire is inexpensive and provides excellent airflow, but its large openings are not rodent-proof. If pest exclusion matters, hardware cloth with smaller openings is a better choice.
11. Hardware-Cloth Compost Bin
Hardware cloth produces a stronger, more protective version of the simple wire bin.
Form it into a cylinder or attach it to a simple wooden frame.
Small-mesh hardware cloth around the lower section can help discourage rodents while still allowing excellent airflow.
For a neater design, build a wooden top frame or removable lid.
12. Wooden Frame and Wire Bin
Combine the strength of wood with the ventilation of wire.
Build a square timber frame and staple heavy wire mesh securely to the inside faces. The result is lighter than a fully wooden box while still holding its shape well.
A hinged wooden-and-wire front panel can make emptying the finished compost easier.
13. Concrete-Block Compost Bin
Concrete blocks are useful when you want something more permanent.
Stack blocks to create three walls, leaving the front open or partly enclosed with removable boards. Small gaps between some blocks can improve ventilation.
Unlike wood, concrete does not rot. The drawback is that once built, the bin is not particularly easy to move.
14. Dry-Stacked Brick Compost Bin
Leftover bricks can be used in much the same way as concrete blocks.
Build low walls around three sides of the pile without mortaring every opening closed.
Because compost can become heavy, keep the structure stable and avoid building unnecessarily tall unsupported walls.
15. Upcycled Trash-Can Composter
An old plastic trash can with a secure lid can make a compact compost system.
Drill ventilation holes around the sides and several drainage holes near or in the bottom. Fill it with alternating additions of kitchen scraps and dry browns.
Because the container is enclosed, pay careful attention to moisture. Too much wet food waste can quickly turn the contents soggy and smelly.
16. Wheelie-Bin Composter
An old wheeled garbage bin can also be converted into a larger stationary composter.
Add ventilation and drainage holes while retaining the original lid.
The wheels make an empty bin easy to reposition, although a full compost bin can become extremely heavy, so it is usually best to decide on a permanent location before filling it.
17. Plastic Storage-Tote Composter
A lidded plastic tote can work for households with limited outdoor space.
Drill several small holes through the sides for ventilation and through the bottom for drainage. Place the tote where any drainage will not damage a floor or patio.
Totes hold much less material than a full outdoor pile, so decomposition may remain relatively cool and slow. They work best when scraps are cut smaller and plenty of dry browns are included.
18. Five-Gallon Bucket Composter
A food-grade bucket can become a tiny compost container.
Drill ventilation holes around the upper sides and drainage holes in the bottom. Use a secure lid if animals could reach it.
The limited volume means a bucket will not behave like a large hot compost pile. It is better for small quantities of scraps or as a temporary system than for a household producing large amounts of organic waste.
19. Stacked Bucket Worm Bin
Worm composting, or vermicomposting, is different from ordinary backyard composting.
A simple worm system can be made from stacked plastic buckets. Drainage and ventilation must be carefully managed, and composting worms such as red wigglers are normally used rather than ordinary garden earthworms.
Worm bins are especially useful for processing moderate amounts of fruit and vegetable scraps where a large outdoor compost pile is not practical.
20. Plastic Tote Worm Bin
A shallow plastic tote is another straightforward vermicomposting option.
Add ventilation holes, suitable moist bedding such as shredded cardboard, composting worms, and modest amounts of appropriate food scraps.
A worm bin should be kept out of temperature extremes. It is not simply a bucket full of food scraps—the worms need air, bedding, suitable moisture, and manageable feeding.
21. Stacked Milk-Crate Compost System
Old plastic milk crates already contain plenty of ventilation.
Line the inside with cardboard or another breathable material so small pieces do not immediately fall out, then stack the crates to create separate composting sections.
This system is better for relatively dry materials and small quantities because exposed crates can dry quickly.
22. Wooden Crate Composter
Sturdy produce crates or homemade wooden crates can be stacked or placed side by side to create a simple modular compost system.
The slatted construction encourages airflow.
Line large openings if necessary to stop fine material from falling through while still preserving ventilation.
23. Sheltered Cardboard Compost Box
Heavy cardboard can work as a temporary compost enclosure, but it should not be expected to last for years.
Place the box somewhere protected from heavy rain. Fill it largely with shredded leaves, cardboard, and modest amounts of moist compostable material.
As moisture reaches the cardboard, the box itself will eventually soften and decompose.
For wet food scraps or locations with rodents, a more durable and secure container is preferable.
24. Leaf-Mold Cage
If your property produces mountains of autumn leaves, you do not necessarily need to mix all of them into regular compost.
Make a large cage from wire mesh and fill it primarily with fallen leaves. Keep them slightly moist and allow fungi and other decomposers to break them down gradually.
Leaf mold develops more slowly than actively managed mixed compost, but the finished material can be a valuable soil conditioner and mulch.
25. Stationary Plastic Barrel Composter
A clean food-grade plastic barrel can become a durable compost container.
Add ventilation holes around the sides and drainage openings near the bottom. A removable top makes additions easier.
Do not reuse barrels that previously held hazardous chemicals or unknown substances.
26. DIY Barrel Tumbler
If you prefer turning compost without using a fork, mount a food-grade barrel horizontally on a strong frame so it can rotate.
Add a secure access hatch and enough ventilation holes to provide oxygen.
Tumblers are convenient, but they are not magic. The contents still require the right moisture and a sensible mixture of green and brown materials.
27. Double-Barrel Tumbler
A two-barrel system solves one of the main drawbacks of a single tumbler.
One barrel can be filled with fresh scraps while the other contains material that is actively decomposing. This prevents you from continuously adding new food to a batch that is nearly finished.
Build the supporting frame strong enough to safely carry both barrels when full.
28. Repurposed Wine-Barrel Compost Bin
An old wooden barrel can make an attractive stationary compost container.
Remove or modify the top for easy access and add ventilation if the barrel is relatively airtight.
Because wood remains in constant contact with moisture, check it periodically for decay.
29. PVC Frame and Mesh Composter
PVC pipe can provide the skeleton for a lightweight compost enclosure.
Build a cube or rectangular frame and attach mesh around the sides with outdoor-rated fasteners.
The finished bin is light and easy to move when empty. Anchor it well if your garden is exposed to strong winds.
30. Corrugated-Metal Compost Enclosure
Scraps of corrugated metal can be attached to wooden corner posts to make a durable enclosure.
Do not completely seal the pile. Leave ventilation gaps or use wire mesh on one or more sides.
Be careful when cutting metal because unfinished edges can be extremely sharp. Fold, cap, or otherwise protect exposed edges.
31. Removable-Front Garden Compost Bin
No matter what material you choose, a removable-front design deserves its own place on the list because it makes composting much easier.
Build three permanent sides, then create channels at the front that hold individual wooden boards.
As the pile grows, add boards. When you want the finished compost, remove the boards one at a time.
This is one of the most useful designs for anyone who plans to shovel compost into a wheelbarrow.
32. Three-Stage Scrap-Wood Composting System
If you have enough room, combine several of the ideas above into one larger system.
Build three side-by-side compartments from reclaimed lumber, clean pallets, hardware cloth, or a combination of materials.
Use the first compartment for new additions. Move partly decomposed material into the second when you turn it. Allow the third batch to finish without constantly adding fresh scraps.
For gardeners who produce plenty of leaves, weeds, crop residues, and kitchen scraps, this arrangement can make composting much more organized.
How to Keep a Compost Bin Working Well
The bin is only the container. What happens inside determines whether you end up with pleasant, crumbly compost or a wet, smelly mess.
Keep adding a mixture of greens and browns rather than filling the pile almost entirely with kitchen scraps or lawn clippings.
Whenever you add a layer of moist food scraps, cover it with dry leaves, shredded cardboard, straw, or another brown material. This helps absorb moisture and can reduce odors and flies.
Smaller pieces decompose faster than very large ones, so chop thick stems, large vegetable scraps, and oversized leaves when convenient. There is no need to turn everything into tiny pieces.
Turn the pile when you want faster decomposition or when it becomes compacted. A garden fork works well for open bins. Tumblers can simply be rotated.
Cold composting with little or no turning also works, but expect it to take longer.
Solving Common Compost Problems
A sour or rotten smell usually means conditions are too wet, compacted, or rich in nitrogen-heavy material. Mix in dry browns and improve airflow.
If the pile is dry and seems unchanged for months, check its moisture. Add water gradually while mixing until the contents are evenly damp.
Fruit flies around fresh kitchen scraps can often be reduced by burying scraps several inches into the pile and covering each addition with browns.
Rodents require stronger measures. Use a secure container, line vulnerable areas with small-mesh hardware cloth, keep meat and dairy out of ordinary compost, and avoid leaving food exposed on top.
You may occasionally find fly larvae or other decomposer organisms in an outdoor pile. Their presence is not automatically evidence that the compost has failed. However, a sudden abundance of larvae may indicate that the pile is very wet or contains large quantities of exposed food scraps.
Do You Need Worms to Make Compost?
No.
Ordinary aerobic composting relies on microorganisms and many naturally occurring decomposers. You do not need to purchase or add worms.
Vermicomposting is a separate method in which specific composting worms are deliberately maintained in bedding and fed suitable organic scraps. It can be an excellent choice for apartments, small gardens, or people who want to process kitchen scraps without building a large outdoor pile.
Choose one method based on your available space and the amount of material you need to compost.
How Long Does Homemade Compost Take?
There is no single timetable.
A carefully balanced, adequately sized pile that is kept moist and turned regularly can break down much faster than a small pile that is left completely alone. Cold compost may take many months or longer.
Temperature, weather, particle size, moisture, aeration, and the materials you add all affect decomposition.
Instead of relying only on a calendar, look at the compost itself. Finished compost should be dark and crumbly, smell earthy rather than sour, and contain relatively few recognizable pieces of the original ingredients.
Woody fragments may remain and can simply be screened out and returned to the next pile.
Ways to Use Finished Compost
Finished compost is useful because it adds organic matter to soil.
Mix it into garden beds before planting, spread a moderate layer over established beds, add some around perennials, or use screened compost as a light lawn top dressing.
It can also be included as one ingredient in homemade container mixes, although straight compost is not automatically a complete potting medium. Container plants need an appropriate balance of drainage, water retention, aeration, and nutrients, so use a tested potting-mix recipe rather than simply filling pots with garden soil and compost.
Around trees and shrubs, compost can be spread over the root zone, but avoid piling it directly against trunks or stems.
Which DIY Compost Bin Is Best?
The right bin depends less on what looks impressive and more on how you actually garden.
If you want the cheapest and quickest solution, start with wire mesh.
If you generate lots of yard waste, build a pallet bin.
If rodents are a concern, choose an enclosed bin with hardware-cloth protection.
If you have very little space, consider a plastic tote or properly managed worm bin.
If you want to turn compost easily, a barrel tumbler may be worth the extra effort.
And if you garden seriously and have enough room, a two- or three-bay system is difficult to beat.
There is no need to build the most complicated option first. A basic container, a supply of dry leaves or shredded cardboard, kitchen scraps, air, and the right amount of moisture are enough to begin.
Start With What You Already Have
One of the nicest things about composting is that the system itself can reflect the same principle as the compost pile: waste can become useful again.
A discarded trash can can become a composter. Fallen leaves can become a soil conditioner. Clean pallets can become a three-bin system. Cardboard packaging can become both a carbon source and, temporarily, part of the container itself.
You do not need an expensive setup to make good compost.
Start with a design that fits your available space, make sure it provides adequate drainage and airflow, keep your materials reasonably balanced, and adjust when the pile tells you something is wrong.
Once that first batch turns into dark, earthy compost, it becomes much easier to understand why such a simple backyard habit can be so useful. What once filled trash bags can instead return to the garden and help improve the soil that grows the next season’s plants.