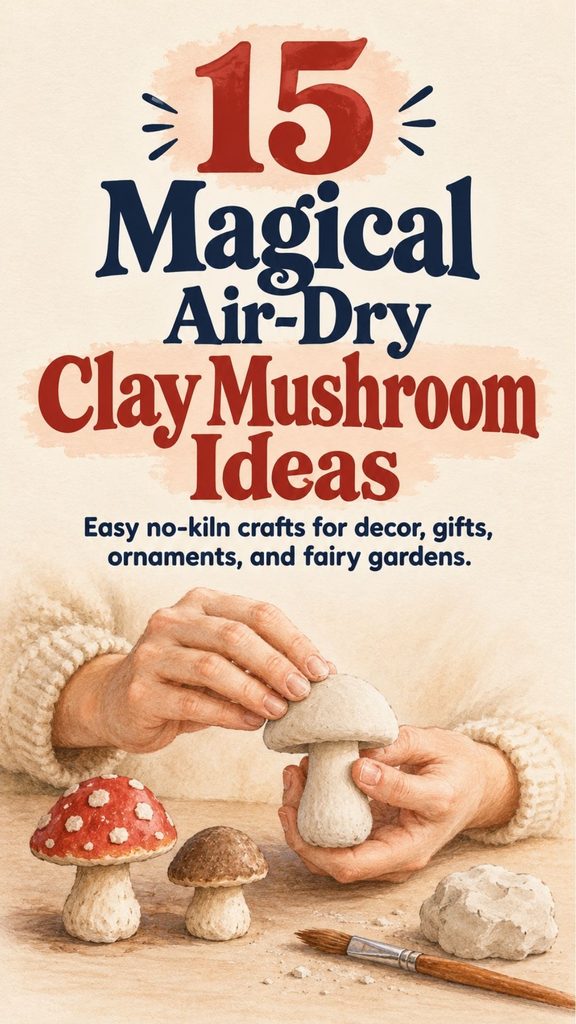
Air-dry clay mushrooms are one of those crafts that can be as simple or detailed as you want. A small lump of clay can become a classic red-and-white toadstool, a miniature decoration for a plant pot, a hanging ornament, a magnet, or even part of a whimsical mobile.
The original collection features 15 different mushroom projects, ranging from fairy-garden miniatures and garlands to ornaments, garden stakes, picture-frame decorations, and jewelry.
What makes air-dry clay especially convenient is that it does not require a kiln or oven curing. The basic material hardens simply by being left exposed to air, making it accessible for beginners and family craft projects.
You Might Also Like:
- Loading posts...
Air-dry clay does have limitations. It is usually more fragile and more sensitive to moisture than fired ceramic or polymer clay. That means the best projects are decorative indoor pieces, lightweight ornaments, and items that will not be repeatedly soaked, dropped, or handled roughly.
With those limitations in mind, there are plenty of charming things you can make.
What You Need to Make Air-Dry Clay Mushrooms
A basic mushroom project does not require specialized sculpting equipment.
Useful supplies include:
- Air-dry clay
- Acrylic craft paint
- Small paintbrushes
- Toothpicks or wooden skewers
- A rolling pin or smooth bottle
- Craft knife or clay tool
- Small cup of water for smoothing
- Fine sandpaper, if appropriate for your clay
- Clear craft sealer, optional
- String, ribbon, wire, magnets, or other hardware depending on the project
Always follow the instructions provided with your particular clay because drying times and finishing recommendations vary between brands.
How to Make the Basic Mushroom Shape
Most of the projects below begin with the same simple mushroom.
Take a piece of clay and roll it into a short cylinder or tapered cone for the stem.
Then roll a second piece into a ball.
Flatten that ball slightly and shape the edges downward to create a cap.
Press the cap gently onto the stem.
For a stronger connection, lightly score both joining surfaces and use the joining method recommended for your clay.
Smooth obvious cracks with a slightly damp fingertip.
Avoid soaking the clay. Too much water can make some air-dry clays sticky or weak.
Once you understand this basic shape, nearly every variation becomes easier.
1. Classic Red Toadstool
The red mushroom with white spots is the easiest place to begin.
Shape one stem and a slightly domed cap.
Allow the mushroom to dry completely before painting.
Paint the stem cream or white and the cap red.
Once the red paint dries, add small white dots with the end of a paintbrush, cotton swab, or another round tool.
You can make all the spots identical for a neat storybook appearance or vary their sizes for a more natural look.
A group of three in different heights makes a charming little shelf decoration.
2. Miniature Fairy-Garden Mushrooms
Mini mushrooms use exactly the same construction method on a much smaller scale.
Use pea-sized amounts of clay for the caps and tiny tapered pieces for the stems.
A toothpick is useful for shaping small details.
Create several mushrooms in different heights rather than trying to make every one identical.
Once dry, paint them in muted reds, creams, ochres, browns, or soft pastels.
They can be arranged around a miniature house, placed in a tabletop fairy garden, or displayed beside indoor plants.
If they will be used inside a terrarium, keep them away from constantly wet soil because ordinary air-dry clay is not designed for prolonged moisture exposure.
3. Glow-in-the-Dark Mushrooms
Glow-in-the-dark paint can turn simple mushrooms into nighttime decorations.
Instead of depending on the clay itself to glow, make and dry the mushrooms normally.
Then paint selected areas with glow-in-the-dark craft paint.
You might paint the entire cap, only the white spots, or thin lines underneath the mushroom.
Place the finished decorations where they receive enough light to charge the phosphorescent paint according to the paint manufacturer’s instructions.
These can be fun bedroom decorations, but they are decorative objects rather than true night lights and will not provide enough illumination to safely light a room.
4. Hanging Mushroom Garland
A mushroom garland is especially pretty for fall, cottagecore decorating, woodland-themed rooms, or Christmas.
The important step happens before the clay dries.
Create a small hole through the top of each mushroom using a skewer or other suitable tool.
Make the hole large enough for your chosen string or cord because the clay may shrink slightly while drying.
Once the mushrooms are fully dry, paint them.
Then thread them onto twine or decorative cord.
Alternate large and small mushrooms to keep the garland visually interesting.
You can also add wooden beads between them.
Keep the finished garland lightweight because air-dry clay decorations can crack if they repeatedly knock against one another.
5. Plant-Pot Mushroom Companions
Small mushroom decorations can make ordinary houseplant pots look like miniature woodland scenes.
Instead of pushing the clay itself into damp potting mix, create the mushroom around a suitable support or attach the dried mushroom to a wooden or metal stake afterward.
Paint and seal the mushroom before placing it near a plant.
Even with a craft sealer, try to keep the clay above the wet soil rather than burying it.
Sealant can improve moisture resistance, but most air-dry clay does not become truly waterproof.
These decorations work especially well with ferns, moss-like houseplants, and trailing foliage.
6. Mushroom Refrigerator Magnets
A tiny mushroom can become a useful refrigerator decoration.
Make a mushroom with a relatively flat back.
Allow it to dry completely.
Paint and seal it if desired.
Then attach a suitable craft magnet to the back using an adhesive designed for both the magnet and the clay surface.
Attaching the magnet after drying is usually simpler than embedding it in soft clay because air-dry clay can shrink as moisture leaves it.
Let the adhesive cure fully before testing the magnet.
A collection in several colors can make a fun handmade gift.
7. Mushroom Jewelry and Accessories
Small air-dry clay mushrooms can be turned into pendants, pins, earrings, or charms, but keep their limitations in mind.
Air-dry clay is generally more fragile and moisture-sensitive than polymer clay or metal jewelry.
Keep each mushroom very small and lightweight.
Insert an appropriate jewelry finding before the clay fully hardens if your clay and finding allow it, or attach hardware after drying using an appropriate method.
Paint with thin coats.
Finish with a compatible craft sealer.
These pieces should be kept dry and removed before showering, swimming, or sleeping.
For jewelry that will receive frequent wear, polymer clay may provide better long-term durability.
8. Seasonal Mushroom Ornaments
Mushroom ornaments are easy to customize for almost any season.
For Christmas, try deep red, evergreen, cream, or metallic gold.
For autumn, use rust, ochre, brown, burgundy, and warm orange.
For spring, try muted pink, sage, lavender, or pale blue.
Before drying, make a hanging hole or securely embed an appropriate hanging loop according to the clay manufacturer’s recommendations.
After drying, paint the mushroom and thread ribbon or twine through the opening.
Names, dates, or tiny messages can turn them into personal keepsakes.
9. Mushroom Candle Decorations
The source idea includes mushroom candle holders, but ordinary air-dry clay should be used cautiously around heat and open flames.
The safer version is to make a mushroom-shaped holder designed for a battery-operated LED tea light.
Create a larger hollow cap or mushroom structure with enough room for the LED light.
Allow every part to dry thoroughly before painting.
Never assume air-dry clay is heatproof, fireproof, or suitable for holding a real candle simply because it has hardened.
Using flameless lights gives you the warm effect without exposing the clay, paint, or sealant to an open flame.
The original source also recommends battery-operated tea lights as the safer alternative.
10. Decorative Mushroom Garden Stakes
Clay mushrooms can add a playful accent to pots or protected garden areas.
Attach a finished mushroom to a sturdy stake and seal the clay according to the product instructions.
However, ordinary air-dry clay is not ideal for permanent outdoor exposure.
Rain, irrigation, freezing temperatures, and repeated moisture can eventually damage it even after sealing.
For best results, use these stakes in covered porches, sheltered containers, or other locations protected from prolonged rain.
Bring them indoors during severe weather.
If you want mushrooms that can remain outdoors permanently, use a material specifically designed for exterior conditions.
11. Weighted Mushroom Door Decoration
A large mushroom can be made heavy enough to serve as a decorative door stop, but this project requires a sturdier approach than simply making a solid mass of air-dry clay.
Large solid clay forms dry very slowly and can crack internally.
Instead, build the clay around an appropriate weighted core so the clay remains a relatively thin decorative shell.
The base must be broad enough to remain stable.
Allow the project to dry slowly and completely before painting.
Because air-dry clay is breakable, this design works better for a lightly used interior door than for a heavy exterior door that repeatedly slams against it.
12. Mushroom Picture Frame
This is one of the easiest projects because the mushrooms do not need to support anything.
Make several tiny mushrooms and allow them to dry.
Paint them individually.
Then arrange them around a plain wooden or suitable craft frame.
You could cluster mushrooms in one lower corner and add smaller ones traveling upward along the side.
Dried moss, painted leaves, miniature clay acorns, or small flowers can be added if you want a woodland effect.
Attach everything using an adhesive appropriate for both surfaces.
A thrifted frame can be transformed into a very inexpensive handmade gift.
13. Mushroom Bookmark Toppers
For a simple reader’s gift, make a very small, flat-backed mushroom.
Let it dry completely and paint it.
Then attach it to the top of a sturdy bookmark made from cardstock, fabric ribbon, leather substitute, or another suitable material.
Keep the mushroom above the book rather than positioning a thick clay piece between the pages.
A bulky clay ornament inside a closed book could damage the binding or pages.
The mushroom should function as the decorative topper while a thin strip marks the actual page.
14. Mushroom Drink Charms
Tiny mushrooms can be made into identification charms for stemware or reusable drink markers.
Keep each mushroom extremely lightweight.
Create a small hole or insert an appropriate loop before drying.
Once the pieces are painted and sealed, attach each one to a removable wire ring.
Give every mushroom a different color or pattern so guests can recognize their glasses.
The clay charm should stay on the outside of the glass and should not contact the beverage.
Remove the charms before washing the glasses.
Do not put air-dry clay pieces through a dishwasher.
15. Hanging Mushroom Mobile
A group of lightweight mushrooms suspended at different heights can become beautiful woodland-style mobile art.
Make the mushrooms relatively small so the finished piece does not become excessively heavy.
Pierce hanging holes while the clay is still workable.
Once everything has dried and been painted, suspend the mushrooms from an embroidery hoop, branch, wooden ring, or another secure frame.
Test the balance before permanently tying everything in place.
If the mobile will be displayed in a nursery or child’s room, hang it securely and well out of reach. Small clay components, strings, and hardware are decorative items rather than toys.
How to Prevent Air-Dry Clay From Cracking
Cracking is one of the most common frustrations with air-dry clay.
Some shrinkage is normal because the material loses moisture while hardening.
Large differences in thickness make cracking more likely.
For example, a very thick mushroom cap attached to a paper-thin stem may dry unevenly.
Try to keep the thickness reasonably consistent.
Do not force pieces to dry rapidly with intense heat unless the clay manufacturer specifically recommends doing so.
Slow, even drying is generally safer.
If a small surface crack appears while the clay is still workable, smooth it carefully using the method recommended for your product.
Allow Enough Drying Time
Air-dry clay may feel dry on the outside while still containing moisture internally.
Thicker mushrooms need more time than tiny ones.
Do not paint simply because the surface has changed color.
Follow the clay manufacturer’s approximate drying recommendations and add extra time for thick pieces.
Turning loose pieces during drying can sometimes expose another surface to air, provided the clay is firm enough to move without distortion.
Patience produces stronger results than rushing to the painting stage.
Paint in Thin Coats
Acrylic craft paint works well for many air-dry clay projects.
Allow the clay to dry completely first.
Apply a thin base coat.
Let it dry.
Then build additional color gradually.
Thin layers usually create a smoother result than one thick coat.
Use small brushes for spots, gills, lines, and other details.
A nearly dry brush can create subtle texture on mushroom caps.
Add Texture Before the Clay Dries
Mushrooms do not have to be perfectly smooth.
Texture can make them far more interesting.
A toothpick can create fine lines.
A toothbrush can gently stipple the surface.
Crumpled foil can create irregular texture.
A sponge can produce a porous-looking finish.
Lines radiating from the center underneath the cap can suggest mushroom gills.
Do not worry about making every mushroom perfectly symmetrical.
Slight differences often make a handmade group more convincing.
Try Marbled Clay
For a more unusual finish, combine two colors of clay if your product is available in multiple shades.
Twist them together gently.
Stop mixing while visible streaks remain.
Then shape the mushroom.
If you knead too long, the colors will blend completely and the marbled effect will disappear.
This works especially well with cream and terracotta, white and gray, or several earthy neutral tones.
Combine Clay With Other Craft Materials
Once you are comfortable with basic mushrooms, combine them with other decorative materials.
A mushroom base might include preserved moss for indoor display.
Embroidery thread can wrap around a stem.
Small wooden beads can join mushrooms on a garland.
A miniature wooden base can turn several fungi into a tiny forest scene.
Just remember that each material has different moisture and durability limits.
Avoid trapping damp natural materials against air-dry clay.
Making Clay Mushrooms With Children
This can be an excellent family craft because perfect results are unnecessary.
Young children can roll balls and stems while older children add textures and paint details.
Adults should handle sharp tools, strong adhesives, small magnets, wires, sealers, and any hardware that requires careful installation.
Air-dry clay is a craft material rather than food.
Supervise young children and follow the manufacturer’s age recommendations.
Small clay pieces, magnets, beads, and jewelry findings can also present choking hazards.
The source specifically presents these mushrooms as a simple rainy-day or family craft that requires no kiln or specialized equipment.
Start With One Mushroom
You do not need to create all 15 projects at once.
Begin with one classic toadstool.
Shape a stem.
Add a cap.
Let it dry.
Paint it.
That first little mushroom teaches most of the basic skills you need: joining clay, smoothing, drying, painting, and finishing.
Then make another one slightly taller.
Make one with a flatter cap.
Try a brown woodland mushroom.
Create three tiny mushrooms for a plant pot.
Before long, the same basic form can become garlands, ornaments, magnets, frames, miniatures, and hanging decorations.
That versatility is what makes air-dry clay mushrooms such an enjoyable craft.
They begin with two very simple shapes, yet a change in size, color, texture, or purpose can turn each one into something completely different.
And because no kiln is required, you can start with nothing more complicated than a packet of clay, a little paint, and an afternoon to experiment.