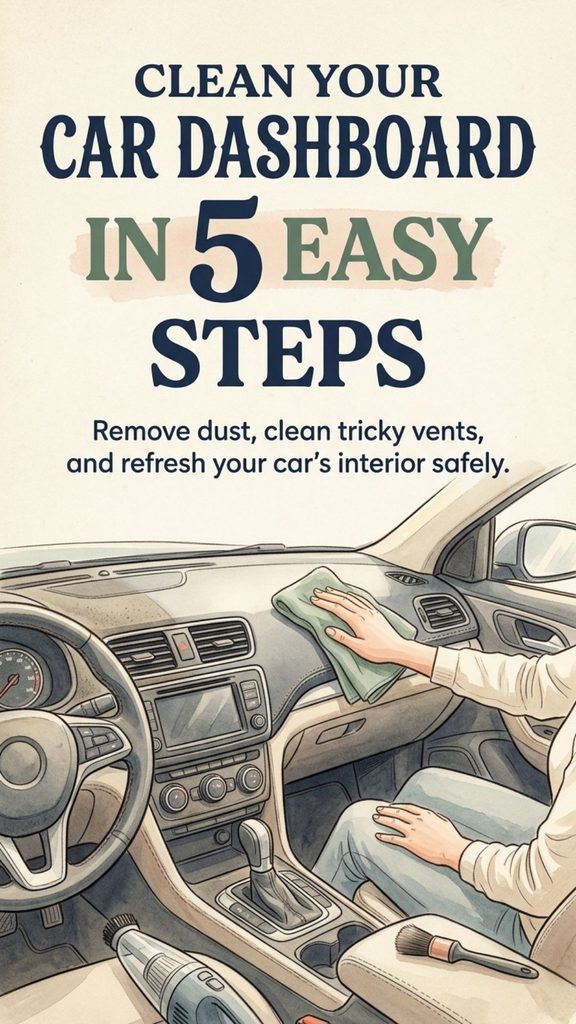
A clean car interior makes every drive feel a little more enjoyable. But even if you regularly wash the outside of your vehicle, it’s easy to overlook the dashboard, air vents, steering wheel, cup holders, and center console.
Over time, these surfaces collect dust, fingerprints, crumbs, skin oils, and everyday grime. Sunlight can also make dust more noticeable, while greasy cleaning products may leave distracting reflections on the windshield.
The good news is that you don’t need expensive detailing equipment or a collection of specialized products to keep your car’s front interior looking fresh.
You Might Also Like:
- Loading posts...
With a few microfiber cloths, a soft brush, a vacuum, and a suitable interior cleaner, you can give your dashboard and front cabin a thorough cleaning.
The secret is knowing which products are safe for different surfaces. Modern vehicles contain delicate touchscreen displays, coated plastics, leather, synthetic materials, and electronic controls that can be damaged by abrasive cleaners or excessive moisture.
This guide walks you through five simple steps for cleaning your dashboard and front cabin safely, including the best tools to use, mistakes to avoid, and easy maintenance tips that help keep your car looking great.
What You’ll Need to Clean Your Car Dashboard
Before getting started, gather a few basic cleaning supplies.
You probably already own some of them.
Basic Cleaning Supplies
- 3–5 clean, soft microfiber cloths
- A vacuum cleaner with a soft brush attachment
- A small, soft detailing brush
- Cotton swabs for certain tight spaces
- A bowl of clean lukewarm water
- A mild, vehicle-compatible interior cleaner
- A separate microfiber cloth for screens
- An optional matte-finish dashboard protectant approved for your vehicle
A compact handheld vacuum is convenient, but an ordinary household vacuum with appropriate attachments can also work.
Avoid rough scrubbers, stiff brushes, abrasive powders, and strong household chemicals.
Important: Before using any cleaner, check your vehicle owner’s manual. Different manufacturers may have specific instructions for touchscreens, dashboard coatings, leather, piano-black trim, and other interior materials.
Step 1: Remove Clutter and Vacuum Loose Dirt
The first step is clearing everything off the dashboard and out of the front cabin.
Remove sunglasses, receipts, charging cables, loose change, empty cups, and any other items that have accumulated.
Check the center console, door pockets, and cup holders.
Throw away rubbish and place anything you want to keep in a small container while you clean.
Once the area is clear, use a vacuum cleaner with a soft brush attachment to remove loose dust and debris.
Areas to Vacuum
Pay particular attention to:
- The top of the dashboard
- The area where the dashboard meets the windshield
- The center console
- Cup holders
- Storage compartments
- Around the gear selector
- Seat crevices
- Front floor mats and carpets
Use gentle pressure around delicate surfaces.
A vacuum’s hard plastic nozzle can scratch dashboard trim if it rubs directly against the surface.
A soft brush attachment helps reduce this risk.
For narrow gaps, use a suitable crevice tool carefully.
Don’t force vacuum attachments into switches, vents, or other fragile components.
Quick tip: Vacuum loose debris before wiping. Otherwise, small particles of dirt may be dragged across delicate surfaces and cause scratches.
Step 2: Dust the Dashboard, Air Vents, and Controls
Once loose crumbs and debris are removed, it’s time to tackle the finer dust.
A clean microfiber cloth is one of the best tools for this job.
Its soft fibers help collect dust without requiring aggressive rubbing.
Start at the top of the dashboard and work downward.
Wipe across the dash, around the instrument cluster, along the center console, and around climate-control buttons.
Use gentle movements and fold the cloth frequently to expose a clean section.
How to Clean Car Air Vents
Air vents can be frustrating because their narrow openings collect dust that ordinary cloths cannot reach.
Use a small, soft detailing brush to loosen the buildup.
Brush gently across the vent slats while holding a vacuum nozzle nearby to collect released dust.
A soft paintbrush reserved for vehicle cleaning can work if its bristles and metal parts cannot scratch the trim.
For accessible corners, a cotton swab may help.
Avoid pushing tools deeply into the ventilation system or forcing the adjustable slats.
Don’t spray cleaning products directly into the vents.
Excess liquid may reach components that aren’t intended to become wet.
Don’t Forget the Steering Column
Dust also collects behind the steering wheel and around the instrument panel.
Use a clean microfiber cloth to gently remove it.
Take care not to interfere with steering-column controls, switches, or airbag covers.
A little patience during this stage makes the final cleaning much easier.
Step 3: Wipe Away Fingerprints and Grime
After dusting, you’ll probably notice areas that still look dirty.
Fingerprints, sticky residue, and oily buildup are common around the center console, door handles, and dashboard controls.
These areas often need more than a dry cloth.
For many compatible interior surfaces, a microfiber cloth lightly dampened with water is a good starting point.
How to Wipe Your Dashboard Safely
- Dampen a clean microfiber cloth with a small amount of lukewarm water.
- Wring it out thoroughly so it isn’t dripping.
- Wipe a small section using gentle pressure.
- Fold the cloth to a clean side as it picks up dirt.
- Repeat until the area looks clean.
For stubborn buildup, use a mild automotive interior cleaner approved for the material.
Apply the product to the cloth according to its instructions, rather than spraying it directly onto the dashboard.
This helps prevent excess cleaner from entering buttons, seams, vents, or electrical components.
What About Dish Soap?
A very mild solution of water and a small amount of dishwashing liquid may be appropriate for some durable interior surfaces.
However, it shouldn’t be assumed safe for every dashboard material.
Certain finishes, coated surfaces, and sensitive trim require manufacturer-approved products.
If your vehicle manufacturer permits mild soap, use only a small amount and remove any residue with a separate, slightly damp cloth.
Avoid soaking the dashboard.
The goal is to remove grime without leaving moisture behind.
Step 4: Dry and Carefully Clean Delicate Surfaces
Drying is an important part of cleaning that many people skip.
Excess moisture can leave streaks, water marks, and residue.
It may also enter seams or openings around sensitive components.
After wiping the dashboard, take a clean, dry microfiber cloth and gently remove remaining moisture.
Pay attention to the edges of the center console and areas around buttons.
How to Clean Your Car’s Infotainment Screen
Touchscreens require special care.
Many modern displays have anti-glare, anti-reflective, or fingerprint-resistant coatings.
Harsh cleaners and abrasive materials can damage these surfaces.
Start by switching off the display and allowing it to cool.
Use a clean microfiber cloth to gently remove fingerprints and dust.
If the manufacturer permits it, lightly dampen the cloth with water or an approved screen-cleaning solution.
Never spray liquid directly onto the display.
Avoid excessive pressure, particularly near the corners and edges.
For stubborn marks, consult the manufacturer’s screen-cleaning instructions rather than trying stronger household chemicals.
Cleaning the Instrument Cluster
The clear plastic covering the speedometer and other gauges can scratch easily.
Use a dedicated, clean microfiber cloth and very light pressure.
Loose grit should be removed gently before wiping.
Do not use paper towels, toothpaste, abrasive polish, or rough brushes.
Never apply a shiny dashboard dressing to the instrument cluster lens.
Cleaning Glossy Black Trim
Glossy black interior trim, sometimes called piano-black trim, is especially prone to showing fine scratches.
Use a clean, soft microfiber cloth and a compatible cleaner.
Avoid dragging dust across the surface.
If necessary, remove loose particles first with a gentle brush or another manufacturer-approved method.
A clean cloth and minimal pressure are more important than aggressive polishing.
Step 5: Apply a Suitable Dashboard Protectant
Once your dashboard is clean and completely dry, you may want to apply an interior protectant.
This step is optional.
A good product designed for your vehicle’s dashboard material may help maintain the finish and provide protection against certain environmental effects, depending on its formulation.
Choose a product that leaves a natural, low-gloss or matte appearance.
Extremely shiny dashboards can create unwanted reflections on the windshield.
How to Apply Interior Protectant
First, confirm that the product is suitable for your dashboard material.
Apply a small amount to a clean applicator or microfiber cloth, following the label.
Spread it thinly over approved surfaces.
Wipe away any excess product.
Avoid applying dressings or protectants to screens, instrument lenses, and areas the manufacturer excludes.
Never use a slippery protectant on the steering wheel, pedals, gear selector, or other surfaces where maintaining a secure grip is essential.
Also avoid contaminating airbag covers or seams with products the vehicle manufacturer doesn’t approve.
The objective is a clean, comfortable interior—not an excessively glossy finish.
How to Clean the Steering Wheel Safely
The steering wheel is one of the most frequently touched surfaces inside a vehicle.
It can accumulate skin oils, sweat, sunscreen, and everyday dirt.
Cleaning methods depend on whether the wheel is covered in leather, synthetic leather, plastic, or another material.
For a compatible plastic or synthetic surface, use a soft microfiber cloth and a manufacturer-approved interior cleaner.
For genuine leather, use a suitable leather cleaner according to the vehicle manufacturer’s instructions.
Don’t saturate the material.
Gently wipe away grime, then remove any remaining moisture or residue.
Avoid household oils, greasy dressings, silicone-heavy products that leave slick finishes, and abrasive cleaners.
A steering wheel should feel clean and secure in your hands, never slippery.
How to Clean Cup Holders and the Center Console
Cup holders often become one of the dirtiest parts of a car.
Spilled coffee, sugary drinks, crumbs, and dust can collect in the bottom.
Start by removing any detachable rubber liners.
Check whether they are washable according to your vehicle’s instructions.
Use a vacuum to remove loose debris.
Then wipe the cup holder with a lightly dampened cloth and a suitable mild cleaner.
For narrow corners, wrap a microfiber cloth around a suitable blunt tool or use a cotton swab carefully.
Avoid introducing excess liquid around charging ports, buttons, and electronic controls.
Dry everything thoroughly before replacing removable liners.
Cleaning Sticky Residue
For sticky drink spills, use a cleaner compatible with the surrounding material.
Allow the lightly dampened cloth to soften the residue before wiping.
Don’t scrape aggressively with metal tools or sharp objects.
If the residue is close to electrical switches, apply the cleaner to the cloth rather than directly to the affected area.
Can You Use Olive Oil on a Car Dashboard?
Olive oil sometimes appears in homemade car-cleaning tips because it can temporarily make certain surfaces look darker or shinier.
However, it isn’t a recommended general-purpose dashboard treatment.
Cooking oils aren’t formulated or tested for modern automotive interior materials.
They can leave greasy residue, attract dust, transfer onto clothing, and create unwanted reflections.
They may also be difficult to remove from some textures.
For these reasons, a manufacturer-approved interior product is a safer choice than olive oil.
A clean dashboard doesn’t need to look wet or glossy.
A natural, matte finish is often more practical.
Is Coconut Oil Safe for Car Dashboards?
Coconut oil is another common recommendation in homemade detailing tutorials.
Although it may temporarily change the appearance of certain surfaces, it isn’t an ideal dashboard conditioner.
Coconut oil can leave an oily film and may attract more dust.
Its behavior also changes with temperature.
In a parked car exposed to sunlight, dashboard surfaces can become extremely hot.
Using a household oil not designed for automotive interiors may create unwanted residue or material compatibility problems.
Instead, choose a product specifically formulated for the type of plastic, vinyl, or other surface in your vehicle.
Should You Use Vinegar to Clean Your Car Interior?
Vinegar is useful for certain household cleaning jobs, but it isn’t universally safe for vehicle interiors.
Its acidity can be unsuitable for particular coatings, decorative finishes, leather treatments, and electronic displays.
Don’t use vinegar on infotainment screens or instrument-panel lenses unless the manufacturer explicitly permits it.
It’s also important to understand that ordinary household vinegar is not a reliable substitute for a tested disinfectant.
If a vehicle surface needs disinfection, use a compatible disinfectant with appropriate instructions for that material.
Follow the product’s required wet contact time and other safety directions.
Can You Clean a Car Dashboard With Baby Wipes?
Baby wipes may seem convenient because they’re soft and ready to use.
However, not every baby wipe is suitable for automotive surfaces.
Some contain fragrances, moisturizers, or other additives that may leave residue.
They aren’t necessarily tested for dashboard coatings or vehicle touchscreens.
For routine cleaning, a lightly dampened microfiber cloth is generally a more predictable option.
If you want to keep ready-to-use cleaning wipes in your vehicle, choose products specifically approved for the relevant automotive surfaces.
Why Toothpaste Is a Bad Dashboard Cleaner
Toothpaste is sometimes recommended online for removing interior stains.
However, many toothpastes contain abrasive particles designed to clean teeth.
Those particles may scratch soft plastic, glossy trim, clear instrument lenses, or delicate coatings.
Whitening formulations and other ingredients can introduce additional uncertainty.
For ordinary dashboard stains, use an appropriate interior cleaner and gentle technique.
If a mark doesn’t come off easily, identify the surface and type of stain before trying a stronger product.
Are Dryer Sheets Good for Dashboard Dust?
Dryer sheets are sometimes promoted as a quick way to remove dust and leave a fresh scent.
However, they can contain fragrances and fabric-conditioning ingredients that may transfer onto interior materials.
This residue isn’t necessary for cleaning and may leave streaks.
A clean microfiber cloth is usually a better choice.
If your car has an unpleasant smell, investigate the source instead of covering it with fragrance.
Old food, damp carpeting, spills, and dirty floor mats are common causes of lingering odors.
How to Make a Simple Dashboard Cleaning Kit
You don’t need a large collection of detailing accessories.
A small reusable kit can make regular interior cleaning much easier.
Keep the following supplies together:
| Cleaning Tool | Best Use |
|---|---|
| Soft microfiber cloth | Dusting and general wiping |
| Separate screen microfiber cloth | Displays and instrument lenses |
| Soft detailing brush | Air vents and narrow gaps |
| Compact vacuum | Crumbs and loose debris |
| Compatible interior cleaner | Fingerprints and grime |
| Clean, dry microfiber cloth | Final drying |
| Matte interior protectant | Optional protection on approved surfaces |
Store products according to their labels.
Avoid leaving chemicals in a vehicle where extreme heat or freezing temperatures may affect them.
A small kit kept in a suitable storage area at home or in the garage is often more practical.
How Often Should You Clean Your Car Dashboard?
The ideal cleaning schedule depends on how frequently you drive and how quickly dust and dirt accumulate.
If you use your car every day, a quick weekly wipe may be enough to prevent visible buildup.
For a more thorough clean, consider addressing the dashboard, center console, vents, and cup holders approximately once a month.
Vehicles used for family trips, commuting with food or drinks, or transporting pets may need more frequent attention.
A Simple Weekly Routine
Spend five minutes removing rubbish and unnecessary items.
Wipe visible dust with a clean microfiber cloth.
Check the cup holders and center console.
Remove fingerprints from compatible surfaces.
A Monthly Deep Clean
Vacuum the front cabin.
Clean the dashboard and controls.
Dust air vents.
Wipe and dry cup holders.
Clean screens according to manufacturer guidance.
Check floor mats and seat crevices.
Apply a suitable protectant to approved surfaces if needed.
Regular light cleaning often prevents the need for aggressive deep cleaning.
How to Keep Your Dashboard Dust-Free for Longer
You can’t eliminate dust completely, but a few habits can reduce how quickly the dashboard becomes dirty.
Keep the Cabin Filter Maintained
Your vehicle’s cabin air filter helps capture certain airborne particles entering through the ventilation system.
Replace it according to the manufacturer’s maintenance schedule or when conditions justify it.
A neglected filter may affect ventilation performance, although dashboard dust can also come from clothing, passengers, and other sources.
Avoid Leaving Unnecessary Items on the Dashboard
Loose items can collect dust and make cleaning more difficult.
They may also become dangerous projectiles during sudden stops or collisions.
Keep the dashboard clear, particularly around airbags and the driver’s field of view.
Clean Small Spills Promptly
Sticky residue becomes more difficult to remove after it dries.
Wipe suitable spills as soon as it’s safe to do so.
Never attempt cleaning while driving.
Use Appropriate Sun Protection
Sunshades may help reduce interior heat exposure when the car is parked.
Choose a properly fitting design and remove it completely before driving.
Sun protection can complement regular cleaning, but it doesn’t replace material care.
Avoid Heavy, Greasy Dressings
Products that leave oily residue can make dust more noticeable and complicate future cleaning.
A clean matte finish is often easier to maintain.
7 Common Car Dashboard Cleaning Mistakes
Avoiding a few simple mistakes can help protect delicate surfaces.
1. Spraying cleaner directly onto the dashboard. Liquid can run into buttons, seams, vents, and electronic components.
2. Using paper towels on screens. Certain papers and trapped grit can scratch delicate display coatings.
3. Applying household cooking oils. Greasy residues can attract dirt and create unwanted glare.
4. Using abrasive toothpaste or scrubbing powders. These products can scratch plastic and glossy trim.
5. Applying shiny products to controls. Slippery surfaces on the steering wheel and other driving controls can create safety problems.
6. Using too much water. Excess moisture may enter areas that aren’t designed to get wet.
7. Ignoring manufacturer instructions. Vehicle interior materials and coatings vary, so product compatibility matters.
The safest cleaning approach is usually gentle, controlled, and appropriate to the surface.
Frequently Asked Questions About Dashboard Cleaning
What Is the Best Thing to Clean a Car Dashboard With?
A clean microfiber cloth lightly dampened with water is a useful starting point for many compatible surfaces. For tougher grime, use a mild automotive interior cleaner approved by your vehicle manufacturer.
Can I Clean My Dashboard With Only Water?
Often, yes. Water on a lightly dampened microfiber cloth can remove ordinary dust and some surface dirt. Greasy or sticky residue may require a compatible cleaner.
How Do I Clean Dust Out of Car Air Vents?
Use a soft detailing brush to loosen accessible dust and a vacuum nearby to collect it. Avoid pushing tools deep into the ventilation system or spraying liquid into the openings.
How Do I Make My Dashboard Look New Again?
Start with thorough but gentle cleaning. Remove grime, dry the surface, and consider an appropriate matte interior protectant if approved for the material. Cleaning may improve its appearance, but it cannot reverse every type of fading, cracking, or permanent damage.
Is It Safe to Use Household Cleaning Products in My Car?
Some mild household products may be compatible with certain durable surfaces, but many cleaners are unsuitable for vehicle interiors. Check manufacturer instructions before using products not specifically formulated for automotive materials.
Can I Use Alcohol to Clean My Car Touchscreen?
Don’t assume alcohol is safe. Some manufacturers permit particular formulations, while others warn against them because of screen coatings. Follow your vehicle’s specific cleaning guidance.
How Can I Prevent Dust From Returning?
Maintain a clean cabin, remove clutter, replace cabin air filters as recommended, and wipe surfaces regularly with a clean microfiber cloth. Dust will still accumulate naturally over time.
Final Thoughts: A Clean Dashboard Makes Every Drive Feel Better
Cleaning your car dashboard doesn’t have to be complicated or expensive.
A few basic tools and a simple five-step routine can make a noticeable difference.
Begin by removing clutter and vacuuming loose debris. Next, dust the dashboard and air vents, wipe suitable surfaces with a lightly dampened microfiber cloth, and dry everything carefully.
If you want additional surface protection, choose a matte-finish product specifically approved for your vehicle’s interior materials.
The most important lesson is to avoid treating every surface the same way.
Touchscreens, glossy trim, steering wheels, leather, and plastic dashboards all have different care requirements.
Household shortcuts involving cooking oils, toothpaste, vinegar, or other unsuitable products can create more problems than they solve.
With gentle cleaning, appropriate supplies, and a few minutes of regular maintenance, you can keep your dashboard and front cabin looking clean, comfortable, and well cared for.
A beautiful car interior doesn’t need to be overly shiny. It just needs to be clean, safe, and properly maintained.