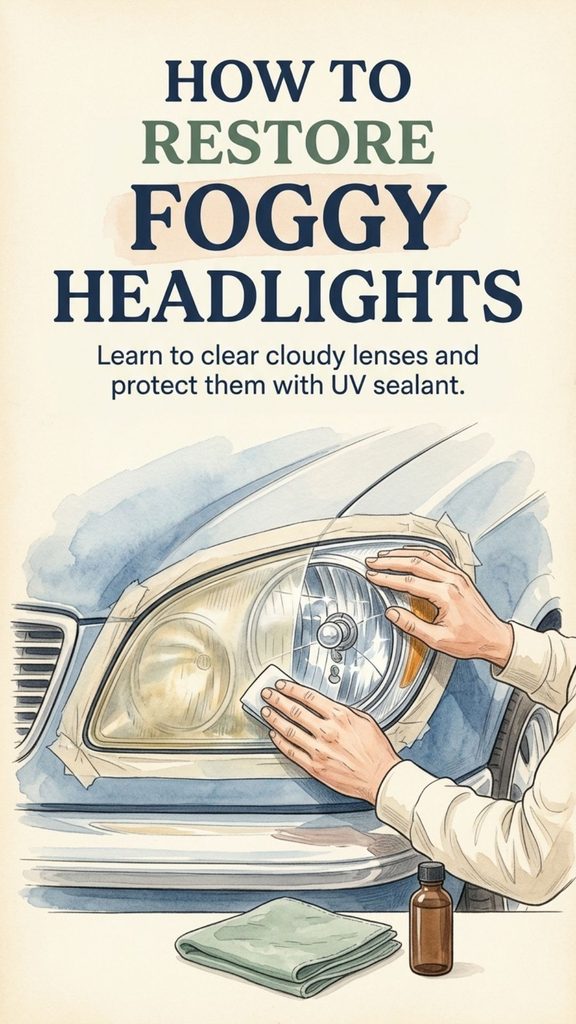
Have your car’s headlights started looking yellow, cloudy, or dull? Maybe you’ve noticed that they no longer shine as brightly as they used to, especially when driving at night.
Foggy headlights are a common problem, particularly on older vehicles that spend a lot of time parked outdoors.
Over time, sunlight, weather exposure, road debris, and ordinary wear can damage the protective coating on plastic headlight lenses. What once looked smooth and clear gradually develops a hazy, yellowish appearance.
You Might Also Like:
- Loading posts...
The good news is that many cases of exterior headlight oxidation can be improved without replacing the entire headlight assembly.
With the right cleaning supplies, a quality restoration kit, and careful application, you can often restore much of the original clarity of cloudy plastic lenses.
However, not every headlight problem can be fixed with polishing. Internal moisture, cracked lenses, damaged reflectors, and failing bulbs may require professional repair or replacement.
This guide explains how to identify the problem, clean your headlights correctly, restore oxidized plastic safely, and protect the finished surface so your work lasts longer.
Why Do Car Headlights Become Yellow and Foggy?
Most modern vehicle headlight lenses are made from polycarbonate plastic.
Polycarbonate is lightweight, impact-resistant, and suitable for automotive lighting applications.
However, the material can deteriorate after prolonged exposure to ultraviolet radiation and environmental conditions.
Manufacturers typically apply a protective coating to the lens during production.
Over time, that coating may degrade.
Once it begins to fail, the surface underneath becomes more vulnerable to oxidation, discoloration, and fine scratches.
Several factors contribute to cloudy headlights.
Sunlight and UV Exposure
Ultraviolet radiation is a major contributor to plastic lens deterioration.
Cars that spend years parked outside in strong sunlight may develop yellowing or haze as the protective coating ages.
Road Dirt and Debris
Dust, road grit, insects, and other debris can accumulate on headlight surfaces.
Repeated cleaning with abrasive materials can also leave small scratches.
Harsh Cleaning Chemicals
Certain household chemicals and solvents can damage plastic surfaces or their protective coatings.
Products that aren’t formulated for automotive headlight lenses may cause discoloration, surface deterioration, or additional haziness.
Natural Aging
Even well-maintained headlights can gradually lose clarity.
The rate of deterioration depends on the lens material, protective coating, climate, and driving conditions.
Understanding the cause helps you choose the correct restoration method.
How to Tell Whether Your Headlights Need Restoration
Before purchasing supplies, examine the headlights in daylight.
Look closely at the plastic lens.
Common signs of exterior oxidation include a yellow tint, cloudy patches, dullness, and a rough or weathered appearance.
You may also notice that the headlights look noticeably less clear than they did when the vehicle was new.
However, cloudy headlights can have different causes.
| Headlight Problem | Possible Cause | Best Next Step |
|---|---|---|
| Yellow exterior lens | UV-related coating deterioration | Consider an appropriate restoration kit |
| Dull, lightly hazy lens | Surface wear or mild oxidation | Try an approved mild polish or restoration product |
| Moisture inside the housing | Condensation, seal damage, or ventilation problem | Diagnose the underlying moisture issue |
| Deep cracks or cloudy internal material | Physical damage or material deterioration | Professional inspection or replacement |
| Clear lens but weak light | Bulb, electrical, reflector, or alignment issue | Inspect the lighting system |
If the lens appears clear but the road ahead remains poorly illuminated, polishing probably isn’t the solution.
The issue may involve the bulbs, internal reflectors, lighting electronics, or headlight alignment.
What You’ll Need for DIY Headlight Restoration
Restoring oxidized headlights doesn’t necessarily require expensive equipment.
For many vehicles, a purpose-made headlight restoration kit includes most of the necessary supplies.
Essential Materials
- Automotive shampoo or mild car-washing solution
- Clean water
- Several microfiber cloths
- Automotive-safe masking tape
- A suitable headlight restoration compound or complete kit
- A spray bottle of water, if required
- Protective gloves
- A manufacturer-compatible UV-protective finishing product
- Suitable eye protection when required
Some restoration kits also contain sanding pads or polishing applicators.
Others are designed for use with a drill or polishing machine.
For beginners, a hand-applied kit with clear instructions may be the simplest starting point.
Important: Choose products specifically intended for automotive headlight lenses. Follow the kit manufacturer’s instructions rather than combining products from unrelated methods.
How to Restore Foggy Headlights in 5 Easy Steps
The following method works as a general guide for restoring exterior oxidation on suitable plastic headlight lenses.
Exact procedures depend on the product you choose.
Step 1: Wash the Headlights Thoroughly
Begin by parking your car in a shaded, well-ventilated area.
Allow the headlight assemblies to cool if they’ve been operating recently.
Wash the lens surfaces using clean water and a suitable automotive shampoo.
This removes dirt, road grime, insects, and loose particles.
Use a clean microfiber cloth or soft washing mitt.
Avoid scrubbing dry dirt across the lens, since trapped grit can scratch the plastic.
Rinse thoroughly and dry the area.
Once the surface is clean, inspect the headlights again.
If the cloudiness disappears completely after washing, the problem may have been ordinary dirt rather than oxidation.
If the yellow or dull appearance remains, restoration may be appropriate.
Step 2: Protect the Surrounding Paint
Before applying polish or abrasive products, protect the painted areas around the headlights.
Use masking tape designed for automotive finishes.
Carefully apply the tape around the perimeter of each lens.
This reduces the chance of accidental contact between abrasive restoration materials and the surrounding paint.
Be especially cautious with older vehicles or paint that is already peeling, damaged, or poorly adhered.
Test the tape in an inconspicuous area if necessary.
Don’t place excessive pressure on fragile trim or rubber seals.
Protecting the surrounding surfaces takes only a few minutes and can prevent unnecessary damage.
Step 3: Remove Surface Oxidation
This is the main restoration stage.
For mildly cloudy lenses, a headlight-specific polishing compound may provide an improvement.
Apply the product according to its directions.
If hand polishing is recommended, use the supplied applicator or a compatible soft cloth.
Work evenly across the lens without pressing harder than necessary.
For more severe oxidation, a restoration kit may require progressive wet sanding.
Sanding removes deteriorated surface material and, in some cases, the remaining failed protective coating.
Because this process is abrasive and permanently removes material, it must be done carefully.
Never begin sanding with an arbitrary grit simply because it appeared in an online tutorial.
Some kits use relatively coarse abrasives to remove heavy oxidation, followed by progressively finer grades.
Others use gentler methods.
The appropriate sequence depends on the condition of the lens and the manufacturer’s system.
If wet sanding is required, keep the surface lubricated as instructed.
Use even, controlled movements.
Never concentrate aggressive sanding in one small area.
If you’re uncomfortable removing material from the lens, consider professional restoration.
Step 4: Polish the Lens Until It Becomes Clearer
After the oxidation-removal stage, the lens may still look hazy.
This can be normal when using a system that includes sanding.
Fine sanding marks need to be removed through the subsequent polishing stages.
Use the polishing compound supplied or recommended by the restoration kit manufacturer.
Apply it with the appropriate applicator.
Work evenly across the entire lens.
Continue according to the product instructions until the remaining haze is reduced and the surface becomes clearer.
Some kits use a sequence of increasingly fine abrasives before final polishing.
Avoid rushing this stage.
Uneven polishing may leave cloudy patches or visible scratch patterns.
Once finished, remove polishing residue with a clean, compatible cloth.
Follow the product directions for any final cleaning or surface preparation before applying protection.
Step 5: Apply UV Protection
This is one of the most important steps in a lasting headlight restoration.
Removing oxidation can leave the underlying polycarbonate vulnerable to renewed sunlight damage.
A compatible UV-protective coating or sealant helps protect the restored surface.
Choose a product designed specifically for headlights and compatible with the restoration method used.
Follow the directions carefully.
Some products require one thin coat, while others have a different application procedure.
Don’t assume that applying multiple coats always provides better results.
Use only the number of coats specified.
Allow the coating to cure for the recommended period.
Depending on the product, you may need to avoid moisture, car washing, or driving for a certain time.
Once fully cured, the lens should look clearer and have an appropriate protective finish.
Can Toothpaste Really Clean Foggy Headlights?
You’ve probably seen videos showing people rubbing toothpaste onto yellow headlights and wiping away the haze.
Toothpaste contains ingredients that may provide mild abrasive action.
As a result, some toothpaste formulations can temporarily improve the appearance of light surface haze.
However, toothpaste is not a complete headlight restoration system.
It isn’t formulated specifically for polycarbonate headlight coatings.
Its abrasive characteristics vary, and it generally doesn’t provide the durable UV protection needed after a deteriorated coating has been removed.
In some situations, improper use may introduce additional fine scratches.
If your headlights have significant yellowing or oxidation, a dedicated restoration product is usually a more dependable choice.
Does Baking Soda Restore Cloudy Headlights?
Baking soda is another popular household ingredient recommended for cleaning headlight lenses.
When mixed with water, it forms a mildly abrasive paste.
Although it may help remove certain surface deposits, it isn’t specifically designed to restore oxidized automotive polycarbonate.
Baking soda can leave fine scratches if used aggressively or if particles become trapped during rubbing.
It also doesn’t replace the need for UV protection.
For a lightly dirty lens, ordinary automotive washing supplies are a better starting point.
For genuine oxidation, choose a suitable headlight restoration system.
Should You Use WD-40 on Foggy Headlights?
Some online demonstrations suggest that applying WD-40 can make headlights appear clearer.
Certain oily products may temporarily fill or mask fine surface irregularities, changing how light passes through the damaged lens.
But a temporary visual improvement isn’t the same as restoring the protective surface.
Standard WD-40 isn’t a substitute for a purpose-made headlight restoration compound or UV coating.
It may also leave residue that needs to be cleaned away.
Avoid relying on general-purpose lubricants as a permanent headlight restoration solution.
A properly restored and protected lens is a better long-term goal.
Why Bug Spray Is a Bad Idea for Headlights
One of the riskier viral headlight-cleaning tricks involves insect repellent.
Some bug sprays contain solvents or other ingredients that can affect plastics.
These chemicals may temporarily change the surface appearance while also damaging the lens or its protective finish.
Certain formulations can soften, haze, or otherwise deteriorate plastic.
They may also damage adjacent painted or coated materials.
Don’t use insect repellent to restore headlight lenses.
A product that appears to improve clarity for a few minutes may create more expensive damage later.
Is Wet Sanding Safe for Headlights?
Wet sanding can be an effective part of professional-quality headlight restoration when performed correctly.
But it’s not a routine cleaning method.
It removes material from the lens surface.
This makes it useful for certain levels of oxidation, but also creates a risk of permanent scratches or uneven results.
When Wet Sanding May Be Appropriate
Wet sanding may be suitable when the outer lens surface has substantial oxidation and a compatible restoration system specifies abrasive preparation.
When to Avoid Wet Sanding
Don’t sand headlights simply because they’re dusty or slightly dirty.
Avoid sanding lenses with deep cracks, unusual coatings, extensive structural damage, or unknown construction without professional guidance.
Some headlight assemblies may require specialized procedures.
Should You Sand Headlights Regularly?
No.
Routine sanding every few months is unnecessary and can progressively remove protective material.
Once your headlights have been restored, maintain them through gentle washing and the care instructions for the UV coating.
Repeat restoration only when the lens condition actually requires it.
How Long Does Headlight Restoration Take?
The time required depends on how badly the lenses are oxidized and which restoration method you use.
A light polishing treatment may take approximately 15–30 minutes for a pair of headlights.
A more involved restoration that includes several abrasive stages can take considerably longer.
You must also account for the drying or curing time of the protective coating.
Some products are ready relatively quickly, while others require several hours or longer before exposure to moisture or normal use.
Read the directions before starting.
Choose a day when you’ll have enough time to finish the process properly.
Avoid beginning a coating application immediately before heavy rain or other conditions prohibited by the product instructions.
How to Clean Moisture Inside a Headlight
Sometimes the cloudiness isn’t on the outside at all.
If you see condensation, droplets, or a cloudy film behind the lens, exterior polishing won’t fix the problem.
Headlight housings are designed to manage moisture through their construction and ventilation systems.
A small amount of temporary condensation may occur under certain weather conditions and can sometimes clear naturally.
However, persistent moisture, standing water, or repeated heavy condensation may indicate a problem.
Possible causes include damaged seals, cracked housings, blocked vents, or improperly installed components.
What Should You Do?
Inspect the headlight for obvious exterior damage.
Check whether the moisture disappears after normal operation, according to your vehicle manufacturer’s guidance.
If the problem persists, have the assembly inspected.
Avoid drilling holes in the housing or attempting to reseal it with random household products.
Modern headlight assemblies may contain expensive electronics and precision optical components.
Opening a sealed housing with a heat gun can damage the lens, adhesives, wiring, or internal parts.
For many drivers, professional diagnosis or replacement is safer than attempting to separate the housing.
How to Keep Restored Headlights Clear for Longer
Once you’ve restored the appearance of your headlights, a few maintenance habits can help protect your work.
Park in the Shade When Practical
Sunlight contributes to deterioration of plastic headlight lenses.
Parking in a garage or shaded location may reduce UV exposure.
However, don’t prioritize shade over safe parking or local regulations.
Wash Headlights Regularly
Use a suitable automotive shampoo and soft washing materials.
Removing accumulated road grime can reduce the need for aggressive cleaning later.
Avoid Abrasive Household Cleaners
Don’t use scouring pads, harsh powders, or unknown solvents.
These may damage lens coatings or leave scratches.
Maintain the Protective Coating
Follow the maintenance recommendations for the UV-protective product applied during restoration.
Some coatings may eventually need renewal.
Don’t apply unrelated coatings without checking compatibility.
Clean With Microfiber Cloths
Use clean, soft microfiber towels.
Never wipe heavy road grit across a dry lens.
Rinse away loose dirt first.
Address Damage Early
Small cracks or persistent moisture problems can become more serious.
Inspect the headlights periodically and arrange repair when necessary.
Are Foggy Headlights Dangerous?
Cloudy headlights aren’t simply a cosmetic issue.
Severe lens deterioration can affect the amount and distribution of light reaching the road.
This may reduce nighttime visibility or interfere with the intended beam pattern.
Poor lighting becomes especially concerning in rain, fog, and other conditions where seeing the road clearly is already difficult.
However, lens oxidation is only one possible cause of inadequate headlights.
Bulb condition, internal reflectors, electrical problems, and alignment can also affect performance.
If you notice that your headlights illuminate the road poorly, inspect the entire system rather than assuming polishing alone will solve the issue.
Don’t compensate for weak low beams by routinely using high beams around other drivers.
High beams can cause dangerous glare.
When Should You Replace Headlights Instead of Restoring Them?
Restoration is often most useful when the main problem is deterioration on the outer surface of an otherwise sound plastic lens.
Replacement may be more appropriate when damage extends beyond the surface.
Consider professional inspection if your headlight has:
- Deep cracks or broken mounting points
- Persistent water inside the housing
- Extensive internal discoloration
- Damaged reflectors or projector components
- Failed LED modules or other electronic components
- Severe optical deterioration that remains after suitable restoration
Modern headlight assemblies can be expensive, so an accurate diagnosis is worthwhile before purchasing replacements.
A technician may also be able to determine whether the issue is repairable without replacing the entire unit.
DIY Headlight Restoration vs. Professional Detailing
Both approaches have advantages.
| Factor | DIY Restoration | Professional Restoration |
|---|---|---|
| Upfront cost | Often lower for basic supplies | Typically higher due to labor |
| Equipment | Limited to purchased kit | May include specialized polishing equipment |
| Experience required | Careful reading and technique | Experienced technician handles the process |
| Risk of mistakes | Depends on skill and product | Depends on service quality |
| UV protection | Must be applied correctly | May be included in service |
| Best suited for | Straightforward exterior oxidation | Heavy oxidation or more difficult cases |
If your headlights have mild to moderate surface oxidation and you’re comfortable following instructions, DIY restoration may be reasonable.
If the condition is severe or you aren’t confident sanding delicate plastic, professional help may be worthwhile.
Before paying for a service, ask whether a durable UV-protective finish is included.
Common Mistakes to Avoid When Restoring Headlights
Even a good restoration kit can produce disappointing results if the process is rushed.
1. Skipping the Initial Wash
Working abrasive polish over dirt can drag particles across the lens.
Always remove loose debris first.
2. Forgetting to Protect the Paint
Polishing compounds and sanding materials can damage surrounding finishes.
Mask the area carefully.
3. Starting With Sandpaper That’s Too Coarse
Not every cloudy lens requires aggressive sanding.
Use only the abrasive sequence recommended for the restoration system.
4. Applying Too Much Pressure
Aggressive rubbing or sanding may create uneven surfaces or deep scratches.
Use controlled pressure and follow the instructions.
5. Skipping the Final UV Coating
A polished lens may look much clearer initially but deteriorate again without suitable protection.
Don’t overlook the finishing stage.
6. Mixing Incompatible Products
A polish from one system may not be compatible with a coating from another.
Whenever possible, use a complete, compatible restoration system.
7. Ignoring Internal Problems
If moisture or discoloration is inside the assembly, exterior polishing may have little effect.
Identify the actual cause before starting.
How Much Money Can DIY Headlight Restoration Save?
Restoring headlights yourself may cost less than professional detailing or replacing an entire headlight assembly.
However, actual savings depend on the condition of the lenses, the materials required, and the type of vehicle.
A simple restoration kit may be relatively inexpensive.
A more advanced kit with polishing equipment or protective coatings may cost more.
Replacement headlight assemblies vary widely in price, particularly on modern vehicles with advanced LED or adaptive lighting systems.
DIY restoration provides the best value when the damage is limited to suitable exterior oxidation.
If the assembly has serious internal defects, spending money on repeated polishing products may not be worthwhile.
The smartest approach is to inspect the problem first and choose the least expensive method that can solve it safely and effectively.
Frequently Asked Questions About Foggy Headlights
What Is the Best Way to Restore Cloudy Headlights?
For exterior oxidation, a complete headlight restoration system that includes appropriate polishing or abrasive preparation and a compatible UV-protective finish is generally a sound choice.
Can You Restore Headlights Without Sanding?
Sometimes.
Mild surface haze may respond to a headlight-specific polishing compound.
More severe oxidation may require sanding as part of a suitable restoration procedure.
Does Toothpaste Permanently Fix Yellow Headlights?
No.
Toothpaste may temporarily improve certain types of surface haze, but it doesn’t provide a complete or durable restoration system.
Why Do Headlights Turn Yellow Again After Cleaning?
If the original protective coating has deteriorated and the restored lens isn’t properly protected, UV exposure can cause renewed oxidation.
Can You Use Rubbing Alcohol on Headlights?
Only when specifically permitted by the product or vehicle manufacturer.
Some restoration systems use approved surface-preparation wipes, but unsuitable solvents or repeated exposure may damage certain coatings and plastics.
How Often Should You Restore Headlights?
There is no fixed schedule.
Clean them regularly, maintain the protective coating, and restore them only when the lens condition requires it.
Routine abrasive sanding is not recommended.
Can Cloudy Headlights Fail a Vehicle Inspection?
Severely deteriorated headlights may fail vehicle inspection requirements in some jurisdictions if light output, beam pattern, or lens condition doesn’t meet applicable standards.
Rules vary by location.
Will Headlight Restoration Make Night Driving Safer?
Restoring a badly oxidized exterior lens may improve light transmission and visibility.
However, safe headlight performance also depends on bulbs or lighting modules, reflectors, alignment, and the condition of the entire assembly.
If nighttime visibility remains poor, arrange a complete inspection.
Final Thoughts: Restore Clearer Headlights the Right Way
Foggy headlights can make an otherwise well-maintained car look older, but their appearance isn’t the only concern.
Severe cloudiness may also reduce the effectiveness of your vehicle’s lighting.
Fortunately, many cases of exterior oxidation can be improved with careful cleaning, appropriate polishing, and a compatible UV-protective coating.
The process begins with identifying the cause.
Wash away dirt, inspect the lens, protect surrounding paint, and choose a restoration method that matches the level of deterioration.
Avoid household shortcuts involving insect repellent, cooking oils, aggressive abrasives, or other products that aren’t intended for headlight lenses.
And remember that polishing isn’t a solution for every headlight problem.
Persistent internal condensation, cracked housings, or faulty lighting components require a different approach.
With proper care and regular maintenance, you can help keep your headlights clearer and looking better for longer.
The best headlight restoration isn’t simply the one that makes the plastic shiny today. It’s the one that restores useful clarity while protecting the lens against further damage.