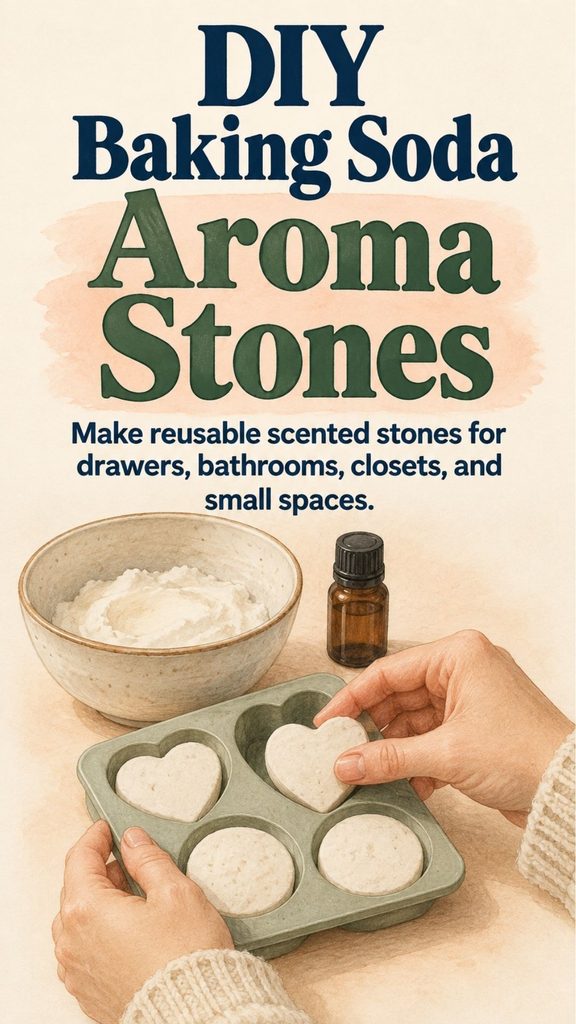
Baking soda aroma stones are a simple homemade way to add a gentle fragrance to small areas of the home without using an open flame.
They are made from just a few basic ingredients—baking soda, cornstarch, water, and essential oil—and shaped in silicone molds. Once completely dry, the little stones become firm enough to place in a dish, drawer, bathroom, entryway, linen cupboard, or other small space where you would like a light scent.
The nice thing about this project is that the stones themselves can be reused. When the fragrance begins to fade, you do not have to make another batch immediately. Simply add a few more drops of essential oil to the dried stone and allow it to absorb.
You Might Also Like:
- Loading posts...
They can also be made in almost any silicone mold, so hearts, flowers, leaves, circles, stars, and other simple shapes can turn an inexpensive mixture into something that looks decorative enough to give as a homemade gift.
No line-shape diagram is really necessary for this project because the process is straightforward and does not involve building a structure.
What Are Baking Soda Aroma Stones?
Aroma stones are small porous decorative pieces that hold fragrance.
The baking soda and cornstarch mixture dries into a chalky, absorbent material. Essential oil placed on the finished stone can soak slightly into the surface and gradually release its scent into the surrounding air.
They will not fragrance an entire home the way a powerful electric diffuser might.
Think of them as a subtle scent source for smaller spaces.
Good places to use them include:
- a bathroom shelf
- an entry table
- a bedside table
- a linen cupboard
- a desk
- a closet shelf
- a small decorative dish
- a guest room
- a home office
Because the fragrance is mild, you can refresh the stones whenever they become difficult to smell.
Baking Soda Aroma Stone Recipe
The recipe shown uses:
Ingredients
1 cup baking soda
½ cup cornstarch
½ cup water
20–30 drops essential oil
Silicone molds
You will also need a mixing bowl, whisk or spoon, and a flat place where the molds can remain undisturbed while the stones dry.
For the easiest results, choose silicone molds with fairly simple shapes.
Very delicate designs with thin stems, sharp points, or extremely detailed edges may be more likely to break when removed.
Step 1: Mix the Baking Soda and Cornstarch
Add 1 cup of baking soda and ½ cup of cornstarch to a mixing bowl.
Whisk the dry ingredients together until they are evenly combined.
Break apart any obvious lumps before adding the water.
Taking an extra minute here makes it easier to create smooth-looking stones later.
Baking soda gives the mixture much of its dry, chalk-like character, while the cornstarch helps bind and smooth the mixture as it dries.
Step 2: Slowly Add the Water
Pour in the ½ cup of water gradually while stirring.
Do not simply dump everything in and walk away.
Mix until the baking soda and cornstarch are evenly incorporated and you have a smooth mixture that can be poured or spooned into the molds.
The texture should be thick enough that the ingredients remain suspended rather than instantly separating, but loose enough to settle into the details of the mold.
If the mixture develops small lumps, press them against the side of the bowl with the spoon while stirring.
Should You Add the Essential Oil Now?
The image recipe includes essential oil in the ingredient list but also recommends adding essential oil after the stones have dried when a stronger scent is wanted.
Adding fragrance to the finished stone is particularly practical because essential oils are volatile—their scent gradually evaporates.
If some fragrance disappears during the drying period, you can simply replace it afterward.
For that reason, you can make the stones first and scent them after they are completely dry.
This also lets you make one plain batch and give different stones different fragrances.
Step 3: Fill the Silicone Molds
Place the silicone mold on a flat tray before filling it.
This is much easier than filling the mold first and then trying to carry a flexible mold full of wet mixture across the room.
Spoon or pour the mixture into each cavity.
Fill the molds evenly.
Tap the tray gently against the work surface a few times to help the mixture settle into small decorative details and release obvious air pockets.
If necessary, smooth the backs with the edge of a spoon.
The back does not need to be perfectly flat, but an even base will help the finished aroma stone sit nicely in a dish.
Step 4: Let the Stones Dry Completely
Leave the filled molds somewhere dry and undisturbed.
The image recommends approximately 24–48 hours of drying time.
That is a useful starting point, but actual drying time can vary.
A thin flower-shaped stone in a warm, dry room may harden fairly quickly.
A large, thick heart in humid weather may need longer.
Do not rush to remove the stones simply because 24 hours have passed.
Check the exposed surface.
It should feel dry and firm rather than cool, damp, or soft.
If there is any doubt, give them additional time.
Fully dried stones are much easier to remove without cracking.
Step 5: Remove Them Carefully
Once completely dry, gently peel the silicone mold away from each stone rather than aggressively pulling the stone itself.
Support the piece with your fingers as you work it free.
This is especially important with decorative flowers, leaves, and other shapes containing raised details.
If a stone feels soft while you are unmolding it, stop and let the remaining pieces dry longer.
A little patience here can prevent a beautiful batch from becoming a pile of broken pieces.
Step 6: Add Essential Oil
Place the dry aroma stone on a protected surface.
Add several drops of your chosen essential oil to the top.
Give the oil time to absorb before placing the stone against fabric, painted furniture, unfinished wood, or another surface that might be marked by concentrated oil.
The image recipe suggests a total of approximately 20–30 drops of essential oil.
You do not necessarily need to apply the entire amount to one small stone at once.
Fragrance preference varies enormously.
Start with fewer drops.
Let the stone sit.
Then smell it again after the oil has had time to absorb.
You can always add more.
It is much harder to remove an overpowering fragrance.
Essential Oil Combinations to Try
You can keep the fragrance very simple by using one essential oil.
Lavender is a classic choice for bedrooms and linen cupboards.
Sweet orange can make an entryway feel fresh.
Peppermint has a strong, crisp scent.
Lemon gives a bright citrus fragrance.
You can also combine compatible scents.
For example:
Lavender + sweet orange creates a soft floral-citrus scent.
Lemon + rosemary has a clean herbal character.
Orange + cinnamon-style fragrance can feel warm and seasonal, although skin-sensitizing oils require extra care when handling concentrated products.
Lavender + cedarwood creates a deeper, more woody fragrance.
You do not need complicated blends.
Two oils are often enough.
Start With Less Essential Oil
Essential oils are concentrated aromatic substances.
More drops do not automatically produce a better aroma stone.
A heavily saturated stone may become unpleasantly strong, particularly in a small bathroom or bedroom.
Start lightly.
You can refresh it later.
This also stretches a small bottle of essential oil much farther.
The fragrance will naturally fade over time because the aromatic compounds gradually evaporate into the air.
That is exactly what you want the stone to do.
How to Refresh the Aroma
When you can no longer smell much fragrance, add a few fresh drops to the dry stone.
Let them soak in before returning the stone to its usual place.
How often this is necessary depends on the oil, temperature, airflow, stone size, and number of drops used.
Rather than following an exact calendar schedule, simply refresh the stone when you notice the fragrance becoming weak.
You can also switch scents, although some aroma from the previous oil may remain.
If you want completely different fragrance families, it is better to dedicate different stones to different oils.
How to Store Extra Aroma Stones
Keep unused dry stones in an airtight container so they remain clean and protected from moisture.
If they are already scented, storing them sealed may also slow fragrance loss.
However, make sure the stones are completely dry before sealing them.
Trapping residual moisture in a closed container is unnecessary and may damage the stones.
Place paper between highly detailed pieces if you are worried about them rubbing together.
Store them in a cool, dry cupboard until needed.
Turn Them Into Homemade Gifts
A small set of baking soda aroma stones can make a charming handmade gift.
Make several matching flowers or hearts.
Allow them to dry completely.
Place them in a small box or jar along with a bottle of the fragrance you chose.
Add simple instructions:
“Add a few drops of essential oil to the stone whenever the fragrance fades.”
You could create different themed sets.
A lavender set for a bedroom.
A citrus set for a kitchen or entryway.
A pine or woody fragrance for winter.
A floral set for spring.
Because the aroma can be refreshed, the recipient does not have to throw the stone away after the original fragrance disappears.
Use Them in a Decorative Dish
One of the easiest ways to display aroma stones is in a small ceramic or glass dish.
Place two or three together instead of scattering them around the room.
This protects furniture and makes the arrangement look intentional.
A dish also catches any excess essential oil that might otherwise reach the surface underneath.
For decorative stones shaped like flowers, leaves, or hearts, a simple shallow bowl can make them look almost like carved plaster ornaments.
Don’t Use Them as Bath Bombs
Although the ingredients may resemble some homemade bath products, these stones are intended as home fragrance decorations.
Do not assume they should be dropped into bathwater or rubbed on skin.
Essential oils that are appropriate for room fragrance may not be appropriate for direct skin exposure, and safe topical dilution requirements vary by oil.
Keeping aroma stones as a household fragrance project avoids that confusion.
Keep Them Away From Small Children and Pets
The stones may look like cookies, candy, soap, or toys.
Keep them somewhere young children cannot mistake them for something edible.
Pets can also be sensitive to certain essential oils.
Essential-oil safety varies by species and oil, so do not place strongly scented stones where pets can chew or lick them.
If you have cats, dogs, birds, or other pets, check whether the specific essential oil you plan to use is appropriate for your household before using it extensively.
Keep Essential Oils Away From Eyes and Skin
Concentrated essential oils can irritate skin and eyes.
Wash your hands after handling them if necessary.
If you spill concentrated essential oil, clean the area according to the product directions.
Do not leave open essential-oil bottles where children can reach them.
“Natural” does not mean harmless in concentrated form.
A few drops can provide plenty of fragrance.
Don’t Place Aroma Stones Near Flames
Keep aroma stones and essential oils away from candles, open flames, stovetops, heaters, and other ignition or high-heat sources.
Essential oils can be combustible.
The stones do not need heat to release their scent.
Simply place them at room temperature and allow the fragrance to disperse naturally.
What If the Stones Crumble?
If your stones crumble during unmolding, the most likely explanations are that they have not dried completely or the mixture did not bind evenly.
Allow the remaining pieces more drying time.
For the next batch, make sure the baking soda and cornstarch are thoroughly mixed before adding water.
Also avoid extremely thin molds.
Thicker, simpler shapes are easier to handle.
Broken pieces do not necessarily need to be wasted.
If they are dry, place them in a small bowl and use them as scented fragments.
They may not look perfect, but they can still hold fragrance.
What If the Mixture Is Too Runny?
If the mixture seems unusually watery, allow it to sit briefly and stir again.
Make sure your measurements were accurate.
A very thin mixture may separate in the mold and take much longer to dry.
Add ingredients carefully rather than trying to correct the recipe with large random quantities of baking soda or cornstarch.
Consistency is one reason using proper measuring cups is worthwhile for this project.
What If It Is Too Thick?
If the mixture becomes so thick that it cannot settle into the molds, add water only a tiny amount at a time.
You are looking for a smooth moldable mixture, not soup.
A teaspoon of extra water can make a noticeable difference.
Add, mix thoroughly, and check before adding more.
Why Silicone Molds Work Best
Silicone is ideal because it flexes.
A rigid mold can make a fragile dried stone difficult to remove without breaking.
With silicone, you can bend the mold away from the object.
Simple soap molds, candy molds, and craft molds can all create attractive shapes provided they are an appropriate size.
If a mold has extremely deep, narrow decorative details, test one cavity before making a large batch.
An Easy Homemade Project With Plenty of Possibilities
The appeal of baking soda aroma stones is their simplicity.
You do not need wax, candle-making equipment, complicated molds, or electrical diffusers.
Mix:
1 cup baking soda
with:
½ cup cornstarch
and:
½ cup water.
Press or pour the smooth mixture into silicone molds.
Let the stones dry thoroughly for about 24–48 hours or longer if needed.
Then add your preferred essential oil.
When the fragrance fades, refresh the stone with a few more drops.
That is the entire idea.
The result is a small reusable home-fragrance project that can be made in flowers, hearts, leaves, or simple circles and customized for different rooms and seasons.
For something made from such ordinary ingredients, they can look surprisingly beautiful—and because the scent can be refreshed again and again, one little batch can remain useful for a long time.