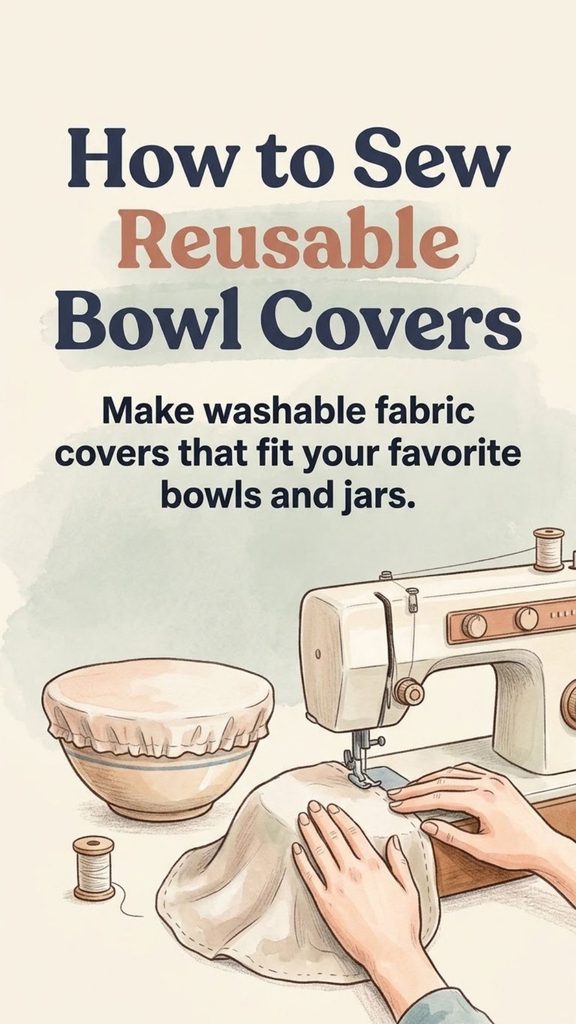
Reusable fabric bowl covers are one of those simple sewing projects that quickly become useful around the kitchen. They slip over mixing bowls, serving dishes, jars, sourdough bowls, and other containers, then go straight into the laundry when they need cleaning.
They are also an excellent project for leftover fabric. Old cotton tablecloths, linen scraps, unused napkins, and pieces left from larger sewing projects can often be turned into covers instead of being discarded.
The basic design is uncomplicated: cut a fabric circle larger than the bowl, create a casing around the edge, and thread elastic through it so the fabric gathers securely around the rim.
You Might Also Like:
- Loading posts...
You can make a simple single-layer version or a more finished reversible cover with two layers of fabric. Once you understand the method, you can customize covers for practically any round bowl or jar in your kitchen.
There is one limitation worth understanding from the beginning: ordinary fabric covers are not airtight or leakproof. They are excellent as dust covers, proofing covers, serving covers, and reusable covers for many short-term kitchen tasks, but they should not automatically replace sealed containers where food safety or moisture retention requires a secure closure.
Why Make Reusable Bowl Covers?
Reusable covers are useful because they can replace some of the disposable coverings used during ordinary kitchen work.
They are especially handy for:
- Covering bread dough while it rises
- Protecting bowls of dry ingredients
- Covering food briefly during preparation
- Keeping dust and insects away from food during serving
- Covering jars used for appropriate fermentation projects
- Covering a bowl while transporting dry or non-spillable items
- Protecting baked goods for short periods
- Covering bowls during meal preparation
- Using as attractive serving covers for gatherings
Unlike plastic wrap, a fabric cover can be washed and reused repeatedly.
You can also make each cover for a specific bowl rather than struggling with a one-size-fits-all product.
When a Fabric Cover Is Not the Best Choice
Reusable does not mean suitable for every food-storage situation.
Fabric is porous. Air and moisture can move through it, and ordinary woven fabric does not create a sanitary airtight seal.
For refrigerated leftovers and other perishable foods, FDA guidance recommends storing foods in covered containers or sealed storage bags and keeping the refrigerator at 40°F (4°C) or below.
For foods that require a reliable seal, use:
- A container with a fitted lid
- A suitable food-storage bag
- Another food-safe airtight covering
A decorative cloth cover can sometimes be placed over an already sealed container, but the fabric itself should not be assumed to provide the same protection.
Avoid relying on a simple fabric cover for raw meat, poultry, seafood, or foods that could leak and contaminate other surfaces.
Reusable bowl covers work best when you understand what they are: a washable fabric covering, not a replacement for every type of food-storage lid.
Choose the Right Fabric
Fabric choice affects how easy the cover is to sew, wash, and use.
Good choices include:
- Linen
- Cotton
- Cotton-linen blends
- Lightweight canvas
- Quilting cotton
- Repurposed cotton tablecloths
- Clean cotton napkins
- Suitable pieces of old bed linen
Choose a fabric that can tolerate regular washing.
For most kitchen covers, tightly woven cotton or linen is easier to work with than stretchy fabrics because it holds its shape while you measure and sew.
Lightweight fabrics gather more easily around small jars and bowls.
Medium-weight linen or cotton works nicely for larger bowls.
Very heavy fabric may become bulky when gathered with elastic.
Is Linen Better Than Cotton?
Linen is popular because it is strong, washable, attractive, and develops a soft, relaxed texture with repeated use.
Cotton is equally practical and often less expensive.
There is no need to choose linen because of claims that it will somehow sanitize food. A washable fabric should still be treated as a kitchen textile: keep it clean, allow it to dry thoroughly, and launder it whenever it becomes soiled.
Choose the fabric for durability, washability, appearance, and ease of sewing.
Prewash Your Fabric Before Measuring
Do not skip this step.
Natural fabrics can shrink when washed, especially cotton and linen.
If you cut and sew the cover first and then wash it, the finished piece may become too small for the bowl it was designed to fit.
Wash and dry the fabric using approximately the same method you expect to use for the finished covers.
Then iron it flat.
Pressing removes wrinkles that could interfere with accurate tracing and cutting.
If you are repurposing old fabric, inspect it carefully for weak areas, stains, holes, or thinning sections before deciding where to cut.
Supplies You Will Need
For a basic reusable bowl cover, gather:
- Washable fabric
- Elastic
- Coordinating or contrasting thread
- Fabric scissors
- Measuring tape or ruler
- Fabric marker or tailor’s chalk
- Straight pins or sewing clips
- Safety pin
- Iron and ironing board
- Sewing machine
Helpful but optional supplies include:
- Pinking shears
- Rotary cutter
- Cutting mat
- Seam gauge
- Bodkin or elastic-threading tool
You can sew these covers by hand, but a sewing machine makes the process considerably faster, especially if you plan to make several.
How to Measure a Bowl for a Fabric Cover
Turn the bowl upside down and place it on your pressed fabric.
Trace around the outer rim.
Now add enough fabric beyond the traced line to travel down the sides of the bowl and form the elastic casing.
For many medium bowls, adding around 2 inches beyond the rim is a useful starting point.
However, do not treat 2 inches as a universal measurement.
A bowl with a deep lip, thick rim, or unusual shape may require more.
A tiny jar may require less.
Before cutting, imagine where the elastic will sit once the cover is installed. It should grip below or around the outer rim rather than simply resting on top.
An Easy Fit Test
Before cutting valuable fabric, make a paper pattern.
Trace the bowl onto paper, add your planned allowance, cut it out, and drape it over the bowl.
This will not simulate the elastic perfectly, but it helps you see whether you have allowed enough depth.
Once you have made a cover that fits well, save the pattern and label it.
For example:
Large mixing bowl — 14-inch pattern
This makes replacement covers much faster.
Method 1: Simple Single-Layer Bowl Cover
A single-layer cover uses less fabric and works particularly well with medium-weight cotton or linen.
Step 1: Cut the Fabric Circle
Trace your bowl and add the required allowance around the entire circumference.
Cut along the outer line.
Pinking shears can help reduce fraying temporarily, although they are not a substitute for a properly finished edge when the fabric frays heavily.
Step 2: Prepare the Edge
Because you are working with a circle, creating the casing requires patience.
Fold the raw edge toward the wrong side of the fabric.
Press as you go.
Then fold again if your chosen finishing method requires the raw edge to be enclosed.
Small folds work better than trying to force a wide straight hem around a curved edge.
Pin or clip the fold at several points around the circle.
Step 3: Sew the Elastic Casing
Sew around the cover to create a channel wide enough for your elastic.
Keep the stitching distance reasonably consistent.
Leave an opening of approximately 2 inches so the elastic can be inserted.
Backstitch at both sides of the opening so the seam does not pull apart while you thread the elastic.
Step 4: Measure the Elastic
Place the elastic around the outside of the bowl where you want the finished cover to grip.
Pull it snug enough to hold the fabric in place but not so tight that removing the cover becomes difficult.
There is no universal elastic length because elastic products stretch differently.
Testing directly against the bowl is more reliable than using a fixed formula.
Cut the elastic with enough extra length to overlap and join the ends securely.
Step 5: Thread the Elastic
Attach a safety pin to one end of the elastic.
Insert it into the casing opening and begin feeding it through the channel.
Work the fabric backward over the safety pin a little at a time.
Keep hold of the other end of the elastic.
A common beginner mistake is accidentally allowing that end to disappear into the casing, which means you may have to pull the elastic back out and begin again.
Step 6: Join the Elastic
Once the safety pin returns to the opening, remove it.
Check that the elastic is not twisted inside the casing.
Overlap the ends and sew them together securely.
A small rectangle of stitching or several sturdy passes with a zigzag stitch can work well, depending on the elastic and your machine.
Step 7: Close the Opening
Pull the joined elastic into the casing.
Redistribute the gathered fabric evenly around the circle.
Then sew the opening closed.
Place the finished cover over the bowl and check the fit.
It should sit securely without requiring excessive force to stretch it into position.
Method 2: Reversible Double-Layer Bowl Cover
A double-layer version gives the cover a more finished appearance and allows you to combine two coordinating fabrics.
It works particularly well with lighter cottons.
Step 1: Cut Two Matching Circles
Use your bowl pattern to cut two identical circles.
You can use the same fabric for both sides or choose contrasting prints.
Step 2: Place the Right Sides Together
Lay the two circles on top of one another with their right sides facing inward.
Match the edges carefully and pin or clip them.
Step 3: Sew Around the Outer Edge
Sew around the circle using your chosen seam allowance.
Leave an opening of approximately 2 to 3 inches.
Do not close this opening yet.
It will allow you to turn the fabric right side out.
Step 4: Turn the Cover
Carefully pull the fabric through the opening.
Work around the entire edge with your fingers so the seam opens cleanly.
For stubborn areas, use a blunt tool such as a chopstick or the handle of a wooden spoon.
Do not use anything sharp enough to puncture the fabric.
Step 5: Press the Circle
Iron the entire piece flat.
Fold the raw edges of the turning opening inward so they match the surrounding seam.
Press them in place.
Good pressing can make the difference between a homemade project that looks rushed and one that looks neatly finished.
Step 6: Create the Elastic Channel
Sew another line around the entire circle, farther in from the outer edge.
This stitching forms the inner boundary of the elastic casing.
Make sure the channel is wide enough for the elastic to move through comfortably.
The original turning opening can remain accessible between the layers until the elastic is installed.
Step 7: Insert the Elastic
Use a safety pin or bodkin to feed the elastic through the channel.
Check the fit on the bowl before permanently joining the elastic ends.
If it slips, shorten the elastic slightly.
If you have to struggle to get it over the rim, allow more length.
Step 8: Finish the Cover
Sew the elastic ends together securely.
Distribute the gathers evenly.
Then close the remaining fabric opening by machine or with neat hand stitching.
Your reversible cover is ready to use.
Make Several Sizes at the Same Time
Once the sewing machine and ironing board are out, making one cover is not much faster than making several.
Look through the kitchen and identify the bowls and containers you use most often.
Useful sizes might include:
- Small jar cover
- Medium mixing bowl cover
- Large mixing bowl cover
- Bread-proofing bowl cover
- Serving-bowl cover
Trace each container and label the patterns.
Then cut all your fabric circles at once.
Batch sewing is particularly efficient:
- Cut every piece.
- Press every hem.
- Sew every casing.
- Cut every elastic length.
- Thread all the elastic.
- Finish all openings.
This prevents you from constantly switching between the sewing machine, ironing board, and cutting table.
How to Make the Elastic Easier to Replace
Elastic eventually loses some of its stretch.
If you want your covers to be easier to repair, do not permanently stitch the casing opening closed.
Instead, finish the opening neatly and leave a small hidden access point.
Then, when the elastic wears out, you can pull the old piece through and replace it without taking apart the cover.
This is particularly useful if you make the covers from good-quality fabric that may outlast several pieces of elastic.
Caring for Reusable Bowl Covers
Wash the covers whenever they become visibly soiled, touch messy food, or develop an odor.
Follow the washing requirements of your fabric and elastic.
Allow them to dry completely before storing them.
Damp fabric stored in a drawer can develop unpleasant odors or mildew.
Keep your covers in a clean, dry place near the bowls or food-storage supplies so they are easy to reach.
If you use covers for different purposes, you may find it helpful to keep certain ones dedicated to bread dough or dry food preparation.
Can You Use Them in the Refrigerator?
A fabric cover can physically be placed over a bowl in a refrigerator, but consider what is inside the bowl.
FDA guidance recommends keeping refrigerated foods covered and using containers or sealed storage bags for safe storage. Perishable foods should also be refrigerated promptly, generally within two hours, and the refrigerator should remain at 40°F (4°C) or below.
A loose woven cover is therefore better viewed as a light covering rather than a replacement for an airtight lid.
For leftovers, raw ingredients, strong-smelling foods, foods that can spill, or anything you intend to store for more than a very short period, use an appropriate fitted container.
Can You Use a Damp Bowl Cover for Bread Dough?
A lightly damp cloth has traditionally been used to reduce surface drying while dough rises.
An elastic bowl cover can perform a similar job because it stays in place better than a loose towel.
If you dampen the cover, make sure it is clean.
After use, wash it and dry it thoroughly rather than leaving damp fabric folded on the counter.
For very long fermentation periods, especially in the refrigerator, a fitted lid may retain moisture more reliably.
A Note About Fermentation Jars
Different ferments have different requirements.
Some require air exposure or gas release, while others need ingredients kept below brine and protected from contamination.
Do not assume that a fabric cover is suitable for every fermentation simply because it fits the jar.
Follow a tested recipe and use the type of lid, weight, airlock, or cover recommended for that particular process.
The bowl cover can still be useful for bread starters or certain short-term kitchen tasks, but food-preservation safety should determine the equipment rather than appearance or convenience.
Use Fabric Scraps to Make Matching Kitchen Sets
One of the nicest things about this project is how easily it uses leftover material.
After making curtains, aprons, napkins, or another kitchen project, save sufficiently large scraps.
You can turn them into:
- Bowl covers
- Jar covers
- Cloth napkins
- Bread-basket liners
- Reusable produce bags
- Simple potholders when made appropriately
- Small kitchen cloths
Using coordinated fabrics can make ordinary storage look intentional without buying another set of kitchen products.
Reusable Bowl Covers Make Practical Handmade Gifts
A set of fabric covers can also make a thoughtful housewarming or hostess gift.
Instead of guessing bowl measurements, make a graduated set in small, medium, and large sizes.
You could pair them with:
- A wooden spoon
- Tea towels
- Homemade bread
- A mixing bowl
- Recipe cards
Include simple washing instructions so the recipient knows how to care for them.
For gifts, double-layer covers tend to look especially polished.
Common Sewing Mistakes to Avoid
Cutting the Circle Too Small
Remember that the fabric must travel over the top and down beyond the rim.
Always add enough allowance before cutting.
Making the Elastic Too Tight
Tighter is not always better.
If the cover is difficult to put on, seams and elastic will experience unnecessary strain.
Making the Casing Too Narrow
Measure the width of your elastic before sewing the channel.
The elastic should slide through without folding or jamming.
Forgetting to Prewash Fabric
A perfectly fitted cover can shrink after its first trip through the laundry.
Prewash before measuring.
Pulling the Elastic Too Far Into the Casing
Pin or hold the free end before beginning to thread.
Expecting Fabric to Be Airtight
A normal fabric cover is breathable.
Use a proper sealed food-storage container when an airtight or leak-resistant cover is required.
A Small Sewing Project With Plenty of Everyday Use
Reusable bowl covers do not require advanced sewing skills, expensive materials, or a complicated pattern.
Start with one bowl.
Trace it, add enough fabric to reach beyond the rim, sew a casing, add elastic, and test the fit.
Once you have the basic measurements right, making additional covers is quick.
The single-layer method is simple and economical. The double-layer method creates a more polished reversible cover. Both can make use of fabric that might otherwise sit unused in a cupboard.
Just keep their limitations in mind. Fabric covers are wonderful for bread making, kitchen preparation, serving, dust protection, and many short-term uses, but they are not airtight food-storage containers.
Used for the jobs they handle well, they are a practical way to combine basic sewing skills, useful household craftsmanship, and a little less dependence on disposable kitchen products.