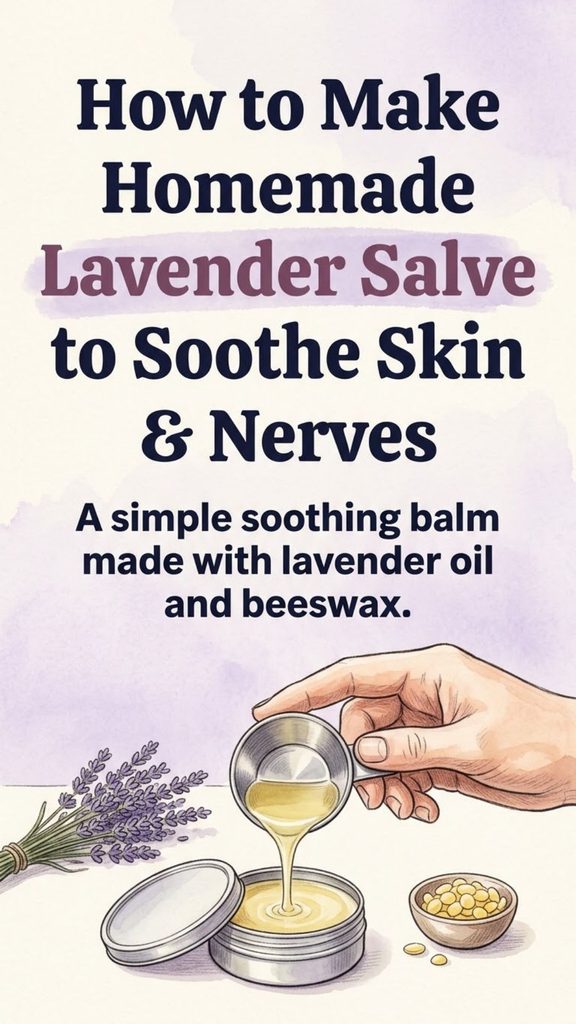
Homemade lavender salve is one of those simple projects that feels far more impressive than the work involved. A basic batch needs only a nourishing carrier oil, beeswax, and, if you like, a small amount of lavender essential oil. The finished balm is smooth, portable, and useful anywhere dry skin tends to appear—hands, cuticles, elbows, heels, and other rough patches.
Lavender also gives the salve its familiar herbal-floral fragrance. While lavender has a long history of use in aromatherapy and skin-care preparations, it is worth separating tradition from proven medical benefits. Research into lavender for anxiety, sleep, pain, and skin concerns is still developing, and many popular claims go further than the evidence supports. The National Center for Complementary and Integrative Health notes that more high-quality research is needed before firm conclusions can be made about many lavender uses.
That does not make lavender salve any less worthwhile. Used sensibly, it can be a lovely homemade moisturizer with a calming scent—and it makes an especially thoughtful handmade gift.
You Might Also Like:
- Loading posts...
What Is Lavender Salve?
A salve is a semi-solid, oil-based product made for external use on the skin. Unlike a lotion or cream, a traditional salve contains no water. Instead, it usually combines a liquid carrier oil with a wax or another firm ingredient.
The oil provides slip and helps soften dry skin, while the wax thickens the mixture and leaves a light protective layer on the skin.
For lavender salve, the liquid portion can be either:
- Lavender-infused carrier oil
- Plain carrier oil with diluted lavender essential oil
- A combination of both
Beeswax is commonly used because it produces a smooth, stable balm that softens easily when rubbed between the fingers.
A salve can feel rich, but it should not need to be greasy or rock-hard. The balance of oil and wax determines the final texture.
Lavender-Infused Oil and Lavender Essential Oil Are Not the Same
These two ingredients are sometimes treated as interchangeable, but they are very different products.
Lavender-Infused Oil
Lavender-infused oil is made by allowing dried lavender flowers to sit in a carrier oil for a period of time. The carrier oil takes on some of the plant’s aromatic and oil-soluble compounds before the flowers are strained away.
It is gentle compared with essential oil because the finished infusion is still primarily carrier oil.
Infused oil is also a useful way to preserve some of a homegrown lavender harvest.
Only fully dried lavender should be used for an oil infusion intended for longer storage. Fresh plant material contains water, which can introduce moisture into the oil and make homemade preparations more vulnerable to spoilage.
Lavender Essential Oil
Lavender essential oil is much more concentrated. It is generally produced by distillation rather than by simply soaking lavender flowers in another oil.
Because essential oils are concentrated, more is not necessarily better. They should be diluted appropriately before being applied to the skin.
Even lavender can cause irritation or allergic skin reactions in some people. Poison Control recommends diluting essential oils as directed, avoiding the eyes, and performing a patch test before broader skin use.
For a homemade salve, you can use infused oil alone if you prefer a very mild product. Essential oil is optional.
Choosing a Carrier Oil
The carrier oil makes up most of the recipe, so choose one that suits the texture and feel you want.
Olive Oil
Olive oil is widely available and works well in homemade salves. It produces a relatively rich balm and is a practical choice for very dry hands and feet.
Its natural aroma is stronger than that of some other oils, so it may still be noticeable underneath the lavender.
Jojoba
Jojoba has a lighter feel and excellent stability. Technically, it is a liquid wax rather than a conventional vegetable oil.
It can be a good option when you want a less heavy-feeling salve.
Sweet Almond Oil
Sweet almond oil creates a smooth, easy-to-spread balm. People with relevant nut allergies or sensitivities should choose an alternative rather than assuming every almond-based topical product will be suitable.
Sunflower Oil
Sunflower oil has a relatively light texture and works nicely in body-care preparations. Choose a fresh oil and store it properly, since different oils have different storage lives.
Coconut Oil
Coconut oil can also be incorporated, but remember that regular coconut oil is already solid or semi-solid at cooler room temperatures. Using a large proportion can noticeably change the final consistency of the salve.
You can also blend two carrier oils rather than choosing only one.
What Beeswax Does in a Salve
Beeswax transforms liquid oil into a scoopable balm.
More wax creates a firmer salve. Less wax creates a softer salve.
This is why weighing beeswax is more reliable than measuring pellets by the tablespoon. Pastilles, grated wax, and chopped beeswax occupy space differently, so equal spoonfuls do not necessarily contain exactly the same amount.
For approximately one cup of carrier oil, around one ounce of beeswax produces a useful starting consistency for an all-purpose balm.
If you add another solid ingredient such as shea butter, you can reduce the beeswax slightly to keep the finished salve from becoming excessively firm.
Should You Add Shea Butter?
Shea butter is optional, but it gives lavender salve a richer, creamier feel.
It works particularly well in balms intended for hands, heels, elbows, or cuticles. Cocoa butter is another possibility, although it is firmer and has its own noticeable aroma.
There is no need to load the recipe with many different oils and butters. A short ingredient list is easier to reproduce, and it also makes troubleshooting easier if the finished texture is not quite right.
A More Realistic Look at Lavender’s Benefits
Lavender is often described online as if it can treat an extraordinary list of medical problems, from eczema and acne to infections, insomnia, burns, migraines, scars, and anxiety.
Those claims deserve more caution.
Lavender has been studied for a number of possible uses, but evidence varies depending on the form of lavender, the condition studied, and how it is administered. NCCIH states that it remains unclear whether lavender aromatherapy provides meaningful benefits for anxiety, stress, sleep quality, insomnia, and several other conditions because stronger research is still needed.
The safest reason to make this salve is much simpler: it is an oil-and-wax balm that can soften and protect dry skin while providing lavender fragrance.
It should not be treated as a replacement for medication or medical care.
Persistent rashes, infected-looking wounds, severe burns, unexplained swelling, worsening eczema, or other significant skin problems deserve appropriate medical evaluation rather than repeated treatment with a homemade salve.
How to Make Lavender Salve
The process is straightforward, but gentle heating makes a better product.
First, prepare your tins or glass jars. Once the wax has melted, the mixture begins setting fairly quickly as it cools, so you do not want to be hunting for containers halfway through the process.
Place the lavender-infused oil and beeswax in the upper portion of a double boiler.
If you do not own a double boiler, a heat-safe bowl positioned over a saucepan containing gently simmering water works well. Keep water from splashing into the salve mixture.
Warm everything slowly, stirring occasionally, until the beeswax has completely melted.
If you are using shea butter, add it with the oil and wax so it can melt into the mixture.
Once everything is liquid and evenly combined, remove it from the heat.
Allow the mixture to cool slightly before stirring in lavender essential oil. There is no reason to expose essential oils to prolonged high heat because their aromatic compounds are volatile.
Pour the liquid salve carefully into clean, dry containers and leave them undisturbed until completely cool.
Once set, cover the containers with their lids.
Test the Texture Before Pouring the Entire Batch
There is an easy way to avoid ending up with five tins of salve that are harder or softer than you wanted.
Before pouring everything, place a small spoonful of the melted mixture onto a cool plate. Give it a minute or two to firm.
Then test it.
If it feels too soft, return the mixture to gentle heat and melt in a little more beeswax.
If it is much too firm, melt it again and add a small amount of carrier oil.
Small adjustments make a surprisingly large difference, so change the recipe gradually.
How to Use Homemade Lavender Salve
A little salve goes a long way.
Rub a small amount between clean fingertips until it begins to soften, then massage it into dry skin.
It is particularly convenient for:
- Dry hands
- Rough knuckles
- Cuticles
- Elbows
- Heels
- Other small patches of dry, intact skin
Some people also enjoy applying a little scented balm to the wrists simply because they find the aroma pleasant and relaxing.
That is different from claiming the salve will treat anxiety or insomnia. Enjoy the fragrance for what it is rather than relying on a cosmetic balm as medical treatment.
Where Lavender Salve Should Not Be Used
More caution is appropriate than many traditional salve recipes suggest.
Do not put essential-oil-containing salve in or around the eyes, mouth, or other sensitive areas. Avoid applying it to a serious burn, deep wound, or obviously infected skin unless a healthcare professional has told you otherwise.
Do not assume that because lavender is a plant it cannot cause an adverse reaction. Topical lavender products can cause allergic skin reactions in some people.
A patch test is sensible when trying a new essential-oil product.
If the area becomes red, itchy, swollen, painful, or increasingly irritated, wash the product off and stop using it.
Take Extra Care With Babies and Young Children
Homemade lavender salve is sometimes promoted online for diaper rash, cradle cap, colic, and routine use on babies.
That advice is too broad.
NCCIH notes that questions remain about topical lavender use in children, including reports of breast tissue swelling associated with lavender-containing products, although a cause-and-effect relationship has not been established.
Babies also have sensitive skin, and essential oils are highly concentrated substances.
For an infant or young child, it is better to use products specifically formulated for that age group and discuss essential-oil-containing products with the child’s pediatric healthcare professional when there is any uncertainty.
Keep Water Out of Your Salve
One of the advantages of a traditional salve is that it does not contain water.
That also means you should avoid accidentally introducing water while making or using it.
Use completely dry utensils, containers, and ingredients. Do not mix fresh lavender flowers directly into the finished balm for decoration. Fresh flowers contain moisture and can shorten the product’s usable life.
Use clean, dry fingers or a small clean spatula when scooping salve from a jar.
These small habits help keep a homemade oil-based product in better condition.
How to Store Homemade Lavender Salve
Store finished salve in tightly closed tins or jars in a cool, dry location away from direct sunlight and excessive heat.
There is no reliable reason to promise that every homemade salve will remain good for several years. Its useful life depends heavily on the freshness and stability of the oils, storage conditions, ingredient quality, and handling.
Check the salve before using it, especially if it has been stored for a long time.
If the smell becomes noticeably stale, sharp, or rancid, or if the appearance changes unexpectedly, discard it and make a fresh batch.
Making smaller batches can be more practical than preparing years’ worth at once.
A Simple Homemade Balm Worth Keeping Around
Lavender salve does not need a long list of miraculous claims to earn a place in the cupboard.
At its best, it is a straightforward homemade body balm: carrier oil softens dry skin, beeswax creates a protective semi-solid texture, optional shea butter adds richness, and lavender contributes its distinctive scent.
It is inexpensive to customize, easy to make in small batches, and attractive enough to give as a homemade gift.
Keep the formula simple, use essential oils conservatively, and treat the salve as skin care rather than medicine. That approach gives you a useful homemade product without asking lavender to do more than the evidence can support.
Homemade Lavender Salve Recipe Card
Yield: About 9–10 oz, enough for approximately four to five 2-oz containers
Prep time: 5 minutes
Heating time: About 10–15 minutes
Cooling time: 1–2 hours
Ingredients
- 1 cup (240 mL) lavender-infused carrier oil
- 1 oz (28 g) beeswax for a basic salve
- 20–25 drops lavender essential oil, optional
- 2 tablespoons shea butter, optional
If using the shea butter: Reduce the beeswax to about 3/4 oz (21 g) for a softer, easier-to-spread balm.
If you do not have lavender-infused oil, use a plain carrier oil such as olive, jojoba, sunflower, or sweet almond oil.
Equipment
- Double boiler or heat-safe bowl over a saucepan
- Spoon or small whisk
- Kitchen scale if available
- Clean, completely dry salve tins or glass jars
- Small plate for testing consistency
Instructions
- Prepare the containers. Set clean, dry tins or jars on a heat-safe work surface.
- Combine the base ingredients. Add the lavender-infused oil and beeswax to the upper part of a double boiler. Add the shea butter now if using it.
- Heat gently. Warm over low to medium-low heat, stirring occasionally, until the wax and shea butter have completely melted. Do not allow water from the lower pan to splash into the mixture.
- Check the consistency. Place a small spoonful on a cool plate and allow it to set briefly. If the balm is too soft, melt in a little more beeswax. If it is too firm, add a small amount of carrier oil.
- Remove from the heat. Once the texture is right and everything is fully combined, take the mixture off the heat.
- Add the lavender essential oil. Allow the mixture to cool slightly while remaining liquid, then stir in 20–25 drops of lavender essential oil if desired.
- Fill the containers. Carefully pour the warm salve into your prepared tins or jars.
- Cool completely. Leave the containers uncovered and undisturbed until the salve is completely firm and cool.
- Cover and store. Add the lids and keep the salve in a cool, dark, dry place.
How to Use
Scoop out a small amount with clean, dry fingers and massage it into dry, intact skin as needed. Start with less than you think you need—the balm spreads as it warms against the skin.
Storage
Keep tightly covered and protected from heat, moisture, and direct sunlight. Discard the salve if the oils develop a rancid odor or if the product changes unexpectedly in smell, texture, or appearance.
Safety
For external use only. Keep away from the eyes and do not swallow essential oils. Patch-test before broader use, especially if you have sensitive skin. Stop using the salve if irritation develops. Avoid using homemade essential-oil preparations on babies or significant wounds, burns, infections, or persistent skin conditions without appropriate professional guidance.