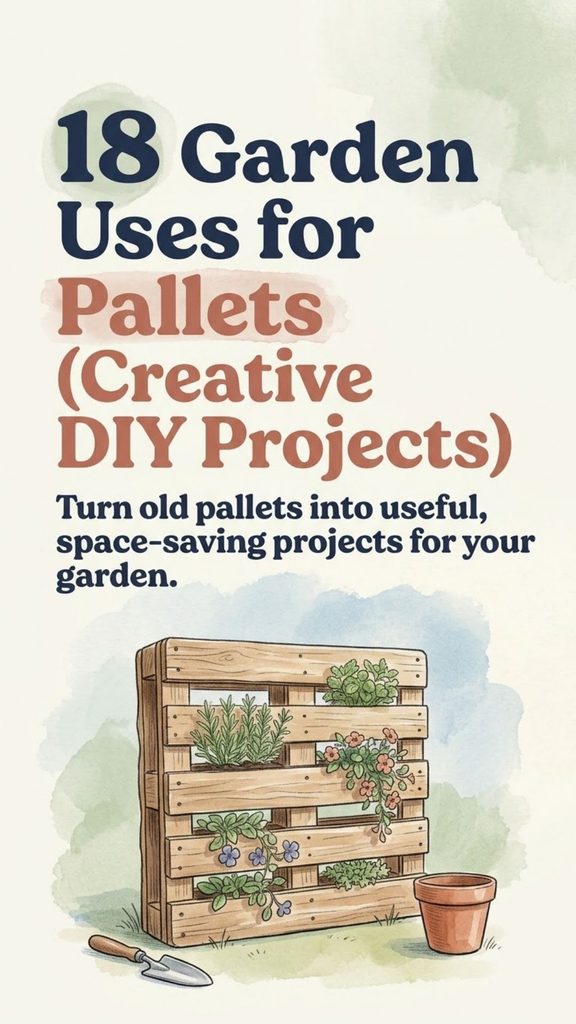
Wooden pallets can be useful raw material for garden projects, especially when you want to add growing space, storage, seating, or structure without buying large amounts of new lumber. A single pallet can become a herb planter or tool rack, while several can supply enough boards for a compost bin, potting bench, privacy screen, or raised bed.
The best pallet projects, however, start with the right wood. Shipping pallets have working histories that are not always obvious, and some have been exposed to chemicals, spills, moisture, or rough handling. They also contain stubborn nails and damaged boards that can make dismantling more difficult than it looks.
Choose carefully, build for outdoor conditions, and use pallet wood where it genuinely makes sense. With those basics covered, these 18 ideas can turn unwanted shipping materials into practical additions to the garden.
You Might Also Like:
- Loading posts...
Before You Build: Choose Pallets Carefully
Not every free pallet is worth bringing home.
Start by looking for the official treatment mark when one is present. Under the international ISPM 15 system, HT identifies heat-treated wood, while MB identifies wood treated with methyl bromide. USDA APHIS confirms that both markings are still recognized treatment codes for wood packaging material.
For household DIY projects, avoid pallets marked MB. Penn State Extension specifically recommends against using MB-marked pallets for home projects.
An HT mark tells you how the pallet was treated for pests; it does not provide a complete history of everything the pallet may have carried or contacted. For projects involving vegetables, herbs, or direct soil contact, choose pallets from a clean, known source whenever possible. Reject wood with chemical odors, oily patches, strange stains, mold, rot, insect damage, or obvious contamination.
Painted rental pallets should also be avoided unless you know you have permission to use them. Some belong to pallet-pooling companies and are intended to remain in their commercial systems.
Wear sturdy gloves and eye protection when dismantling pallets. Pallet nails can be difficult to remove, and old boards frequently contain hidden fasteners, splits, and sharp edges.
Once you have sound wood, the creative part can begin.
1. Build a Vertical Herb Garden
A pallet-style vertical planter is a useful option when floor space is limited but you have a sunny wall, fence, deck, or patio.
Rather than simply filling the entire pallet with loose soil, convert the spaces between the boards into individual planting pockets. Extra pallet boards can be attached underneath each opening to create shallow planter boxes.
Line the pockets with durable horticultural fabric where necessary, leaving drainage openings so excess water can escape.
Good candidates include compact herbs such as:
- thyme
- parsley
- chives
- oregano
- small basil varieties
Position herbs according to their individual light and moisture requirements rather than assuming they all want identical conditions.
A wall-mounted garden can become quite heavy after watering, so fasten the structure to something strong enough to support the loaded planter.
2. Turn Pallet Boards Into a Raised Garden Bed
Instead of stacking intact pallets and pouring soil through the openings, a more practical approach is to dismantle clean pallets and use the boards to construct a conventional raised-bed frame.
A simple rectangular bed gives plant roots one continuous growing area and makes it easier to add soil, compost, and mulch evenly.
Keep the bed narrow enough that you can reach its center without stepping into the soil. Reinforce the corners with sturdy posts or thicker pieces of lumber because thin pallet boards alone can bow outward once the bed is filled.
For edible beds, this is one project where knowing the history of the pallet wood matters particularly strongly. If its previous use is uncertain, new untreated lumber may be the better choice.
3. Make a Three-Sided Compost Bin
Compost bins are among the most practical uses for whole pallets because the spaces between the slats allow some airflow.
Stand three pallets upright to form the back and sides, then secure the corners firmly with exterior-rated screws, bolts, or strong wire.
A fourth pallet can become a removable or hinged front.
The front opening makes it easier to:
- turn the pile
- add bulky materials
- remove finished compost
- move a wheelbarrow close to the pile
If you add hinges, attach them to solid structural pieces rather than thin, cracked deck boards.
For gardeners who generate plenty of leaves and kitchen scraps, two or three adjacent pallet bays can also create a simple system for separating fresh material from compost that is further along.
4. Create a Vertical Succulent Display
Shallow-rooted succulents can make an attractive living pallet display, particularly in warm, dry locations.
Build planting pockets between the slats and fill them with a fast-draining growing medium appropriate for succulents. Choose plants suited to your local climate and the amount of sun the wall receives.
If the planter will eventually stand nearly vertical, allow newly planted specimens time to establish before moving it into its final position. Otherwise, loose soil and poorly rooted plants may fall from the openings.
Remember that a vertical planter dries differently from a normal container. Upper sections may dry quickly while water collects lower down, so check individual pockets rather than watering everything automatically.
5. Use a Pallet as a Vegetable Trellis
A sound pallet already has a grid-like structure that can support some climbing plants.
Stand it vertically or at a slight angle and anchor it securely. Simply leaning a pallet against a fence is risky once vines become heavy or summer winds arrive.
Pole beans, peas, and some cucumbers can be trained upward along the slats. You may need to add garden twine or netting where the gaps are too large for young tendrils.
Vertical training can free up ground space and keep much of the foliage away from the soil. It also makes many fruits easier to see at harvest time.
For particularly vigorous vines or heavy crops, use a purpose-built trellis rather than assuming every pallet will support the mature plant.
6. Build a Strawberry Planter From Pallet Boards
Pallet boards can be arranged into a narrow tiered planter for strawberries, allowing plants to cascade over several levels.
Give each tier enough soil volume for the roots and include unrestricted drainage at the bottom. A lining can help keep potting mix from escaping through wide cracks, but it should not trap water.
Strawberries grown above ground may have less fruit resting directly on damp soil, but elevation does not eliminate pests. Birds, insects, slugs, and diseases can still be problems.
Tiered containers also dry more quickly than garden soil, so monitor moisture carefully during warm weather.
7. Make a Pallet Garden Swing—With Extra Caution
A rustic garden swing is possible using reclaimed pallet lumber, but this is not a project where a pallet should simply be tied to a tree and trusted to hold someone’s weight.
Human-supporting furniture needs sound lumber, secure joinery, properly rated hanging hardware, and a support structure capable of carrying the expected load.
Inspect every board for cracks, decay, loose knots, and hidden damage. Reinforce the seat with structural lumber where necessary and use hardware specifically intended for swings or suspended loads.
The branch, beam, or pergola supporting the swing is just as important as the seat.
If you are uncertain about the structural side of the project, use pallet wood for a stationary bench instead.
8. Build a Potting Bench
A pallet potting bench gives you a dedicated place for transplanting seedlings, filling containers, and keeping frequently used supplies within reach.
Use sturdier pallet components for the legs and frame and create a flat worktop from closely spaced boards. Sand the surface thoroughly so soil and splinters do not collect in rough edges.
A raised back can hold:
- hand tools
- small shelves
- plant labels
- empty pots
- garden twine
Add a lower shelf for potting mix or watering cans.
Place the finished bench on level ground and use exterior-grade fasteners. If it remains outdoors year-round, raising the wooden legs slightly above wet soil will help reduce prolonged moisture exposure.
9. Make Rustic Flower Planter Boxes
Dismantled pallet boards are well suited to decorative planters for annual flowers and trailing ornamentals.
You can make long window-box shapes, small square containers, or narrow planters sized to fit a railing or patio corner.
Whatever the design, provide drainage holes and avoid relying on wood alone to contain constantly wet potting mix for years. Reclaimed pallet lumber is generally not naturally rot-proof.
For flowers, you can also use pallets with less-than-perfect cosmetic boards, provided the wood is structurally sound and free of questionable contamination.
Sand exposed edges carefully, especially around patios where children or pets may brush against the planter.
10. Organize Garden Tools
One of the easiest pallet projects requires almost no dismantling.
Mount a sturdy pallet vertically inside a shed, garage, or covered work area. The spaces between the boards can hold long-handled tools, while hooks can be added for smaller equipment.
Arrange items so heavy tools cannot fall when something beside them is removed.
A good layout might provide separate places for:
- rakes
- shovels
- hoes
- hand trowels
- gloves
- pruning tools
- garden twine
Keeping tools off the floor makes the space easier to clean and makes it much easier to see what you already own.
11. Create a Multi-Tier Plant Stand
A tiered stand lets you display several containers while using relatively little floor space.
Build steps or shelves at increasing heights from pallet boards and support each level with a solid frame.
Before choosing plant positions, watch how sunlight moves through the area. A tiered stand does not guarantee equal light—the upper plants can shade those below.
Use the sunniest levels for plants that need strong light and reserve protected lower shelves for plants that prefer some shade.
Wide feet or a sturdy base are important because a collection of wet flowerpots can become surprisingly heavy.
12. Construct Garden Fence Panels
Whole pallets can form rustic fence sections around composting areas, utility corners, or informal garden beds.
Support the pallets with properly installed posts rather than expecting individual pallets to remain upright on their own.
They can be installed vertically for more height or horizontally for a lower boundary. Additional boards can cover large openings where greater screening is needed.
A pallet fence may discourage casual foot traffic or some animals, but it should not automatically be considered secure livestock, pool, child-safety, or wildlife fencing.
For those jobs, use fencing designed for the specific purpose.
13. Build a Simple Cold Frame
Pallet boards can supply the wooden walls of a cold frame used to protect cool-season seedlings and extend growing time around the edges of the season.
Build a low box and cover it with a transparent lid such as a salvaged window in good condition or a suitable clear panel.
Angle the top slightly toward the sun and place the cold frame where it receives useful winter or early-spring light.
The biggest mistake with a cold frame is forgetting ventilation. Even on a cool day, sunshine can raise the temperature inside substantially. The lid needs to be opened or vented when conditions become too warm.
A cold frame can protect plants from light cold and harsh weather, but it is not a heated greenhouse and cannot protect every crop from severe freezing temperatures.
14. Make a Stationary Garden Bench
A fixed bench is one of the more approachable pallet furniture projects.
Pallet boards can provide the seat, back, and decorative surfaces, while stronger structural pieces support the frame.
Do not simply stack loose pallets and assume their weight will keep them together. Secure the components firmly and make sure the finished bench cannot rack, tip, or separate when someone sits down.
Sand every surface that may contact skin or clothing. Round sharp corners where practical and replace cracked boards instead of trying to hide them under cushions.
Weather-resistant cushions can make the finished seat far more comfortable.
15. Add Shelves for Potted Plants
For a quick garden display, pallet wood can become a narrow shelf unit for herbs, flowers, or houseplants spending the summer outdoors.
A freestanding version is often safer and more useful than simply balancing pots on the narrow boards of a pallet leaned against a wall.
Build shelves wide enough to support the entire base of each pot and include a lip where containers could be knocked forward.
If you attach the unit to a wall or fence, use appropriate fixings and allow a little airflow behind it so damp wood does not remain pressed against the structure.
16. Create a Garden Privacy Screen
Pallets can form an effective visual screen around a patio, seating area, compost station, or unattractive utility corner.
Mount the pallets to strong posts and arrange them so the boards interrupt the direct line of sight. If the original slat spacing leaves the screen too open, add reclaimed boards over some of the gaps.
The finished structure can also support lightweight decorations or climbing plants.
Keep wind exposure in mind. A tall privacy screen catches considerably more wind than a low garden divider, especially after extra boards or vines close the openings.
That means the posts and foundations need to be strong enough for the completed design.
17. Build a Pallet Wall Garden
A wall garden differs from a simple herb planter because it can combine several kinds of plants in one vertical display.
Create individual planting troughs across the pallet rather than attempting to hold a large unsupported mass of soil behind fabric.
You might combine:
- compact flowers
- trailing annuals
- small herbs
- strawberries
- foliage plants
Group plants with similar watering requirements together. A drought-tolerant herb placed beside a moisture-loving plant usually creates unnecessary work.
Attach the finished garden securely and consider installing a simple drip line if the planter contains many separate pockets.
18. Make a Rustic Garden Walkway
Pallet boards can create an attractive boardwalk-style path through a low-traffic garden area, but they should not simply be scattered over damp soil.
Remove the pallets carefully and inspect every plank for nails, splits, and decay. Prepare a firm, well-drained base using materials such as compacted gravel, then attach the boards to stable sleepers or another supporting structure.
Leave small drainage gaps between the boards.
Wooden paths can become slippery when wet or covered with algae, and reclaimed pallet boards eventually deteriorate outdoors. Inspect the walkway regularly and replace loose, soft, or cracked boards promptly.
This type of path works best as a rustic garden feature rather than a permanent high-traffic walkway where maximum slip resistance and accessibility are required.
Help Pallet Projects Last Longer Outdoors
Pallet lumber was designed for shipping rather than permanent garden construction, so outdoor life can be hard on it.
A few building habits make a noticeable difference.
Keep wooden legs and frames out of constantly wet soil wherever possible. Use exterior-rated screws instead of ordinary indoor fasteners. Smooth rough edges before assembly. Leave room for water to drain rather than creating places where moisture sits against the boards.
If you want to apply a finish, choose an outdoor product suited to the project and follow its label directions. Be more selective with coatings on planters used for edible crops, especially on surfaces that will contact the soil.
Most importantly, inspect pallet projects occasionally. Reclaimed wood that looked strong during construction can eventually loosen, split, or rot.
Common Pallet DIY Mistakes to Avoid
Free lumber can encourage people to start building before examining what they actually have. That is where many pallet projects go wrong.
Avoid using badly stained or foul-smelling wood simply because it is free. Do not use MB-marked pallets for home projects. Do not burn pallet wood of uncertain treatment or history. Penn State also warns that dismantling pallets is a significant source of injuries because of difficult nails, broken boards, and unsafe attempts to kick or smash pallets apart.
Also remember that an HT stamp should not be interpreted as a universal “food-safe” certification. ISPM 15 treatment marks exist to show that wood packaging has received an approved phytosanitary treatment intended to control wood pests. They do not document everything that may have happened to a pallet during shipping and reuse.
For vegetables and herbs, clean pallet wood with a known history is the sensible choice. If you cannot determine where the pallet came from or what it carried, save it for an appropriate non-food project—or use different lumber.
Make the Pallet Fit the Project
Pallets are most useful in the garden when they are treated as a source of reusable material rather than a ready-made solution for everything.
Whole pallets make excellent starting points for compost bins, tool organizers, trellises, and screens. Dismantled boards give you more control when building planters, benches, raised beds, shelves, cold frames, and pathways. Smaller leftover pieces can become braces, pot shelves, signs, or planting-box components.
Start with clean, sound wood, design the project around the conditions it will face outdoors, and reinforce anything that will carry significant weight. A discarded pallet may look ordinary at first, but with thoughtful construction it can become one of the most useful—and distinctive—materials in the garden.