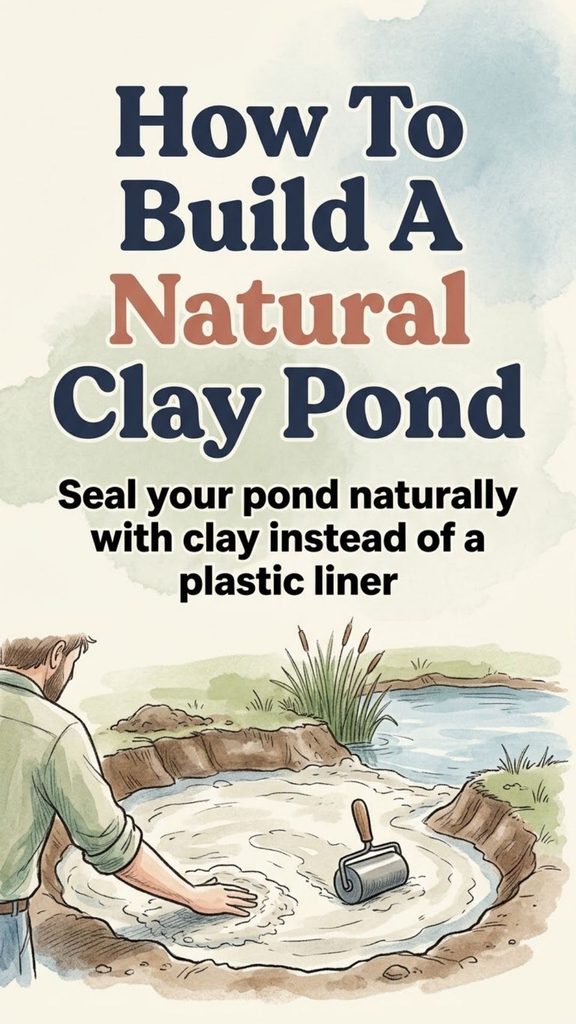
A pond does not need a synthetic liner to hold water. Where the soil is suitable, a carefully constructed layer of compacted clay-rich earth can reduce seepage enough to create a dependable pond. Where the native soil is too sandy or otherwise too permeable, sodium bentonite can sometimes be mixed into the soil to improve the seal.
The important word is carefully.
A clay pond is not made watertight simply by digging a hole and throwing clay into it. Soil composition, moisture content, layer thickness, mixing and compaction all matter. In fact, USDA Natural Resources Conservation Service guidance treats compacted soil liners as engineered systems whose design should be based on soil investigation, amendment requirements and specified compaction—not guesswork.
You Might Also Like:
- Loading posts...
For a small ornamental pond, some of this work may be manageable on a modest scale. A farm pond, irrigation reservoir or pond created by constructing an embankment is a different matter. Hydrology, spillways, dam stability and local regulations can become just as important as the clay seal itself.
Here is how to approach the project realistically.
What Is a Natural Clay Pond?
A natural clay pond holds water through low-permeability soil rather than through an exposed sheet liner.
There are two common ways to achieve this.
The first is to use naturally clay-rich soil, placed and compacted into a dense liner. If suitable material already exists at the pond site, this can be an efficient approach.
The second is to improve more permeable soil by mixing in an amendment such as sodium bentonite. Bentonite contains very fine clay minerals that swell when hydrated. When the correct amount is thoroughly mixed with suitable soil, compacted and saturated, it can fill pore spaces and greatly reduce the movement of water through the soil.
This does not make bentonite a magical universal solution. The amount required varies with the soil, and some sites are poor candidates for bentonite treatment.
Start With the Site, Not the Excavator
One of the most expensive pond-building mistakes is excavating first and investigating later.
Before moving earth, determine how the pond will receive water and where excess water will safely go. A pond fed primarily by runoff needs a watershed capable of supplying enough water without delivering excessive sediment or contaminated runoff.
For an embankment pond, adequate spillway design is especially important. NRCS pond standards require provisions for safely handling excess runoff so that water does not simply overtop and erode the dam.
For anything beyond a very small backyard excavation, investigate:
- watershed size and runoff
- seasonal groundwater conditions
- soil depth and composition
- buried utilities
- wetlands or protected waterways
- nearby property boundaries
- the location of the emergency overflow
- local excavation, water and dam-safety requirements
Oklahoma State University Extension recommends consulting NRCS or a qualified civil engineer for larger pond projects because proper design involves soil suitability, storage volume, hydrology, structural safety and spillway capacity.
A clay liner cannot compensate for a badly designed pond.
Test the Soil Before Choosing a Sealing Method
Soil texture provides the first clue as to whether a site may hold water.
Sand has relatively large particles and usually allows water to move readily through its pore spaces. Clay particles are extremely small and can produce much lower permeability when the soil is correctly compacted.
A simple home soil-texture test can help you understand what you have.
The Jar Test
Collect representative soil from the depth where the pond liner will actually be constructed, not just from the topsoil.
Colorado State University Extension recommends drying and breaking up the sample, placing it in a straight-sided jar, adding water and a small amount of non-foaming detergent, and shaking thoroughly. The particles then settle according to size: sand first, followed by silt and finally clay. Measuring the settled layers gives an estimate of the soil’s texture.
The jar test is useful for screening, but do not use a homemade test to calculate a large bentonite purchase. Laboratory analysis is far more appropriate for determining amendment rates.
The Ribbon Test
You can also estimate texture by feel.
Moisten a small amount of soil until it has a putty-like consistency, then press it between your thumb and finger to form a ribbon.
Soils that make little or no ribbon tend to be coarser. Soils capable of producing a long, stable ribbon generally contain more clay. Colorado State notes that ribbons extending more than about two inches before breaking are characteristic of fine-textured, clayey soil.
Again, this is a field indicator rather than an engineering permeability test.
Do You Even Need Bentonite?
Not every natural pond needs imported clay.
If the site contains enough suitable clayey soil, proper moisture conditioning and compaction may be sufficient. Missouri Extension notes that soil containing suitable amounts of clay is an important part of constructing a pond capable of retaining water.
Bentonite becomes useful where the available soil has insufficient fine material or otherwise remains too permeable after normal compaction.
It is particularly effective when mixed with coarse-grained soils that lack enough active clay. NRCS engineering guidance specifically describes bentonite as an amendment for certain sands and slightly plastic silts rather than something that should automatically be added to every clay soil.
Adding expensive bentonite to soil that does not need it wastes money and may complicate construction.
Use Sodium Bentonite for Pond Sealing
If testing indicates that bentonite treatment is appropriate, the type matters.
Bentonite products are not all interchangeable. Missouri Extension distinguishes between sodium bentonite, which has a high swelling capacity in water, and calcium bentonite, which swells much less. For pond sealing, its guidance specifies sodium bentonite.
Buy material intended for soil or pond-sealing applications rather than assuming that any product labeled “bentonite” will perform the same way.
How Much Bentonite Will You Need?
This is one area where oversimplified online formulas can become very expensive.
There is no responsible universal rate such as “four pounds per square foot for every sandy pond.”
NRCS engineering guidance states that a laboratory analysis should determine the application rate. General rates may fall around 1 to 3 pounds per square foot, depending on site conditions, but the correct amount varies with the soil and treatment thickness.
Missouri Extension similarly gives approximate rates ranging from about one pound per square foot in soil that already contains some clay to three pounds per square foot in very coarse sand-and-gravel material, while emphasizing that rates should ideally be based on laboratory testing.
Once you have a recommended rate, the basic material calculation is straightforward:
Area to be treated × required pounds per square foot = total pounds of bentonite
Remember to calculate the actual treated surface, including pond sides where the seal must extend, rather than using only the horizontal surface area of the water.
For a large pond, even a small error in the assumed rate can mean purchasing several additional tons of material. That is another good reason to test first.
The Most Reliable Installation Method: Mix and Compact
For new construction or an empty pond, incorporating bentonite into the soil is usually much more dependable than tossing it onto the surface of a filled pond.
Missouri Extension recommends mixing bentonite into the existing soil and compacting the treated material. Penn State Extension describes a similar approach: spread bentonite over an empty pond bottom, incorporate it several inches into the soil and compact the mixture at suitable moisture.
A practical sequence looks like this.
1. Remove unsuitable material
Clear the treatment area of vegetation, roots, organic debris, sharp rocks and obvious gravel pockets.
Roots and woody material should not be buried in the sealing layer. As organic material decays, it can leave channels and weak areas.
NRCS guidance calls for vegetation to be cleared and exposed gravel, holes and crevices to be filled with suitable compacted material before bentonite treatment.
2. Shape the pond before sealing it
Complete the main excavation and establish stable slopes before installing the final liner.
Trying to reshape the basin afterward can disturb or completely remove the seal.
Make the slopes gentle enough that equipment can safely work them and the compacted material will remain stable. The exact slope depends on the project, soil and intended use rather than on one universal number.
3. Spread the bentonite evenly
Apply the calculated quantity of dry sodium bentonite as evenly as possible.
Uneven distribution creates weak areas. Doubling the application in one spot does not make up for leaving another section untreated.
For a substantial project, measure and mark the basin into manageable sections so you can track the quantity used in each area.
4. Mix it thoroughly into the soil
A disk, rotary tiller, pulverizer or similar machine can be used depending on the size of the project.
Missouri Extension recommends mixing in more than one direction to achieve better distribution.
The goal is not simply to hide the powder. Bentonite needs to be distributed through the designed thickness of the soil so the finished compacted layer behaves as a relatively uniform barrier.
Moisture Is Critical for Good Compaction
Dry soil does not compact properly, but saturated mud does not compact properly either.
The soil should be close to the moisture level at which it can be densified effectively.
A simple field check is to squeeze the prepared soil in your hand. Missouri Extension notes that moisture is often near a useful compaction range when the soil forms a durable ball when compressed.
If the mixture falls apart immediately, it may be too dry.
If water squeezes out or the material smears like wet mud, it may be too wet.
For engineered or large pond projects, however, the desired moisture and compaction should be established through proper soil testing rather than a hand test alone.
Compaction Is What Makes the Seal Work
Bentonite cannot compensate for loose construction.
Compaction reduces the amount and size of connected pore spaces through which water can travel. In a soil-bentonite liner, it also confines the swelling clay within a dense soil matrix.
Compaction equipment can include rollers or suitable rubber-tired machinery. The correct machine and number of passes depend on soil type, layer thickness and project specifications. On professionally designed ponds, density is often verified rather than judged simply by appearance.
Work systematically over the entire treated bottom and sides. Small uncompacted strips along edges, around pipes or beside equipment tracks can become leakage paths.
NRCS standards for compacted pond liners specifically require project plans to address compaction and liner construction rather than treating it as an optional finishing step.
Protect the Finished Liner
A successfully compacted seal can still be damaged.
Heavy livestock, excavation equipment, deep-rooted woody vegetation and severe erosion can penetrate or disrupt the treated layer. NRCS maintenance guidance recommends excluding animals and equipment that may damage compacted liners and repairing damaged sections to restore the liner’s original condition.
Pay special attention to places where water flows into the pond. Concentrated runoff can scour soil from the basin. Inlet areas may need rock or another erosion-control treatment designed to dissipate the incoming water’s energy.
If livestock will use the pond, consider fencing the dam and sensitive banks and supplying water through a designated access or watering system instead of allowing uncontrolled trampling.
Refill the Pond Before Bentonite Dries Excessively
Bentonite has an important limitation that is often missing from enthusiastic descriptions of “self-healing” ponds.
It swells when wet, but it also shrinks when it dries.
NRCS guidance warns that bentonite can return toward its original volume upon drying and leave cracks. For that reason, it may not be well suited to ponds expected to undergo wide, repeated fluctuations in water level.
Penn State likewise recommends refilling a treated pond promptly because drying bentonite can crack.
A clay-sealed pond therefore should not be described as permanently self-repairing under every condition. It can perform extremely well when properly designed and kept in appropriate moisture conditions, but it still needs management.
What About Sprinkling Bentonite Into a Full Pond?
This method appears frequently in pond advice because it sounds easy: scatter bentonite over the water and allow it to sink into leaking areas.
Unfortunately, results are much less predictable.
Oklahoma State University notes that powdered bentonite is recommended for an empty pond where it can be tilled into the soil. Granular material may be used when attempting treatment through standing water, but the university cautions that bentonite repairs are not guaranteed.
Missouri Extension is even more conservative, advising that bentonite should not simply be broadcast over the water surface and recommending treatment when the pool is dry.
If an existing pond develops a serious leak, first determine where the water is escaping. A leaking dam, failed pipe, gravel seam, animal burrow and generally porous pond bottom are very different problems and may require different repairs.
Clay Blanket Versus Bentonite-Amended Soil
Bentonite is only one way to create a soil liner.
If suitable clay-rich material is available nearby, it may be possible to haul it into the basin and construct a compacted clay blanket. This can be economical when good material is close to the site because there is no need to purchase large quantities of manufactured amendment.
Bentonite treatment may make more sense where the existing soil is close to suitable but needs additional fine clay to reduce permeability.
A geomembrane or geosynthetic clay liner can also be the better engineering choice at difficult sites. NRCS maintains standards for both compacted soil treatments and manufactured liner systems, which is a useful reminder that there is no single liner material that is automatically best for every pond.
The decision should be based on soil, water conditions, pond use, construction equipment and cost—not on the idea that one material is “natural” and therefore always superior.
Do Not Ignore the Dam and Spillway
For an excavated garden pond, sealing the basin may be the main construction challenge.
For an embankment pond, it is only one part of the project.
A dam must safely hold both soil and water, and the pond needs a controlled way to release normal and extreme runoff. NRCS standards include requirements for principal and auxiliary spillways because overtopping can rapidly erode an earthen dam.
This is where DIY experimentation should stop. If failure of your pond could send water toward a home, road, neighboring property or other infrastructure, obtain professional design assistance.
Monitor a New Pond Before Assuming It Leaks
A falling water level does not automatically mean the clay liner failed.
New ponds can lose water as previously dry soil becomes saturated. Evaporation also varies dramatically with weather, temperature, wind and location.
Missouri Extension recommends monitoring the change in water level during a period without rainfall or inflow and accounting for evaporation before concluding that the pond has an unacceptable seepage problem.
Installing a marked stake or staff gauge makes this much easier.
Record:
- date
- water level
- rainfall
- inflow
- unusual weather
- obvious wet spots below the pond
A consistent wet area on the downstream side of a dam deserves much more attention than a modest water-level drop during hot, dry weather.
Common Clay Pond Mistakes
Several failures occur repeatedly because builders concentrate on the bentonite itself instead of the entire liner system.
The most common are:
- purchasing bentonite before testing the soil
- applying too little material
- spreading bentonite unevenly
- failing to mix it thoroughly
- compacting soil that is far too dry or too wet
- leaving roots and gravel pockets in the liner
- disturbing the seal after compaction
- allowing livestock to churn up the pond bottom
- ignoring inlet erosion
- letting a bentonite liner repeatedly dry and crack
- trying to repair an unknown leak by blindly throwing material into the water
Avoiding these errors usually matters more than finding a secret pond-sealing trick.
Is a Natural Clay Pond Right for Your Property?
A compacted clay or soil-bentonite pond can be an excellent choice when the site, soil and water regime suit the method.
Its main advantages are straightforward: local soil may provide much of the liner material, the finished basin can have a natural earthen bottom, and properly compacted soil liners are established engineering methods for controlling seepage.
But clay is not automatically better than a membrane, and bentonite is not a guarantee against leaks.
A difficult sandy site may require so much imported clay or bentonite that another liner system becomes more practical. A pond that routinely drains down may develop shrinkage cracks. A large embankment pond may need engineering, permits and specialized compaction equipment far beyond what makes sense for a casual DIY project.
The best approach is to begin small: understand your soil, investigate the site, determine how the pond will fill and overflow, and choose the sealing system only after you know those answers.
A successful natural pond is built less by adding extraordinary materials than by doing ordinary earthwork exceptionally well. Good soil, correct moisture, thorough mixing, careful compaction and protection of the finished liner are what turn an excavation into a pond that can reliably hold water.