
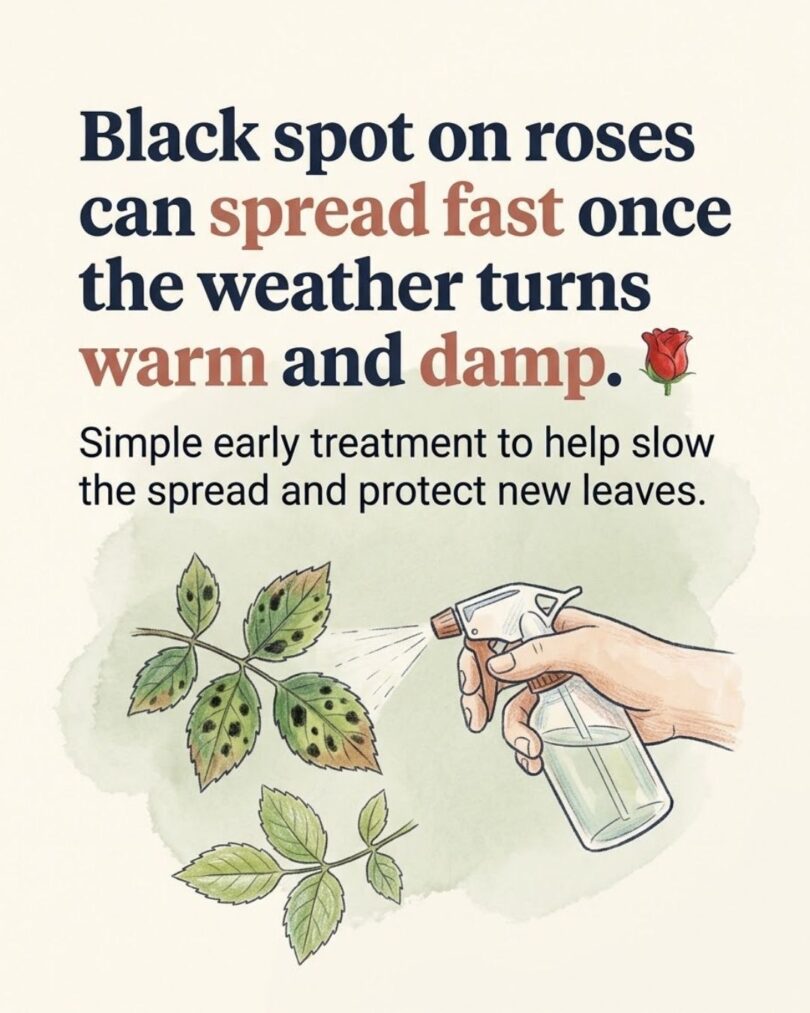
Black spot can turn a healthy-looking rose bush into a spotted, thinning plant surprisingly quickly during warm, wet weather. The first signs are usually dark spots on the leaves, often followed by yellowing and premature leaf drop. Once the disease becomes established, repeatedly losing foliage can weaken the plant and reduce its overall vigor.
The most useful approach is not trying to erase spots that are already there. Damaged leaves will not turn green again. Instead, focus on slowing new infections, removing sources of fungal spores, and creating conditions that help the foliage dry more quickly.
A homemade baking-soda spray is often suggested for rose diseases, but it should be treated as an optional preventive measure rather than a guaranteed cure. Good sanitation, airflow, careful watering, resistant varieties, and properly labeled fungicides are more dependable parts of a black-spot management plan. Illinois Extension notes that preventive fungicide applications may be necessary for highly susceptible roses and that measures that improve airflow can reduce disease severity.
You Might Also Like:
- Loading posts...
What Black Spot Looks Like
Black spot is a fungal disease of roses. The symptoms are fairly distinctive: dark circular or irregular spots develop on leaves, and the surrounding tissue may turn yellow.
As the infection progresses, affected leaves can fall from the plant. A severe case may leave a rose with noticeably fewer leaves even while the stems remain alive.
That leaf loss matters because leaves manufacture the carbohydrates a plant needs for growth and flowering. A rose that repeatedly loses large amounts of foliage has fewer healthy leaves available to support the rest of the plant.
Black spot should not be confused with every dark mark that appears on a rose. Insect damage, environmental stress, other diseases, and physical injury can produce discoloration as well. If the symptoms do not resemble typical black spot, identifying the problem before treating it can prevent unnecessary spraying.
Why Warm, Wet Conditions Make the Problem Worse
Moisture plays a major role in black spot development.
Rain, overhead irrigation, crowded foliage, and humid conditions can keep leaves wet long enough for infection to occur. Once infected material is present, splashing water can contribute to movement of fungal spores onto other foliage.
That is why disease management is not just about what you spray on the plant.
A rose growing in dense shade with tightly packed branches and constantly wet foliage is much harder to keep healthy than one with good light and airflow.
Improving the environment around the rose can therefore be just as important as choosing a treatment.
Start by Removing Infected Leaves
One of the simplest things you can do is remove badly affected foliage.
Pick off heavily spotted leaves that are still attached, provided removing them will not strip an already weakened plant almost bare. Fallen infected leaves should also be collected from beneath the rose.
Illinois Extension specifically recommends removing fallen leaves and infected canes because the black spot fungus can survive on infected plant material.
Do not simply leave a layer of diseased rose leaves sitting around the base of the bush.
Place infected debris in household or municipal waste according to local recommendations rather than deliberately spreading it around the garden as mulch.
Keeping the ground beneath the plant cleaner reduces one potential source of future infection.
Can Baking Soda Help With Black Spot?
One popular home treatment combines baking soda, water, and a very small amount of mild liquid soap.
A commonly suggested mixture is:
- 2 tablespoons baking soda
- A few drops of mild liquid soap
- 1 gallon of water
The soap is generally included to help the liquid spread over the leaf surface rather than immediately beading up and running off.
However, gardeners should be cautious about treating homemade baking-soda mixtures as equivalent to registered fungicides.
Home remedies can vary greatly in effectiveness, and household dish soaps are not formulated specifically for use on plant tissue. Concentrations that are too strong may damage foliage, particularly during hot, sunny weather or on sensitive cultivars.
If you decide to experiment with a homemade spray, test a small portion of the plant first and wait to see whether any leaf injury develops.
Do not assume that doubling the baking soda or soap will improve control. Stronger mixtures can simply increase the risk of plant damage.
How to Apply a Homemade Spray More Carefully
If you choose to use the mixture, preparation and timing matter.
Mix the ingredients thoroughly in a clean garden sprayer. Apply only enough to wet the foliage lightly rather than soaking the entire bush until liquid runs onto the ground.
Try to reach both the upper and lower leaf surfaces.
Those hidden undersides are easy to miss when spraying a dense rose.
Avoid applying homemade soap-based mixtures during intense midday heat. Early morning can be a practical time because temperatures are usually cooler and the foliage then has time to dry.
Evening spraying is sometimes recommended, but keeping foliage wet overnight can be undesirable where fungal disease is already a problem. If evenings in your area are humid and leaves dry slowly, morning application is generally the better choice.
Also avoid spraying drought-stressed plants or roses suffering from extreme heat.
Do Not Expect Existing Spots to Disappear
This is one of the most important expectations to set.
Once a leaf has developed black spot lesions, spraying it will not restore the damaged tissue.
A treatment is intended to protect healthy foliage or reduce further disease development, depending on the product being used.
That is why early action is much more useful than waiting until nearly every leaf is affected.
If you notice a handful of infected leaves, remove them and begin improving your management immediately.
If half the bush is already yellowing and defoliating, the goal becomes protecting whatever healthy growth remains and helping the plant recover.
Improve Airflow Around the Rose
Dense rose bushes can trap humid air and remain wet longer after rain.
Selective pruning can open the center of a crowded plant and allow better air movement. Illinois Extension identifies improved airflow as a way to reduce black spot severity by encouraging foliage to dry faster.
This does not mean aggressively cutting the rose back every time you see a spot.
Remove dead, damaged, crossing, or excessively crowded growth according to the normal pruning needs of your rose type.
Plants should also have enough spacing from neighboring shrubs that their branches are not permanently tangled together.
The objective is a rose that receives adequate light and air without unnecessarily removing productive stems.
Water the Soil, Not the Leaves
How you irrigate roses can make a noticeable difference.
Whenever practical, direct water toward the soil around the root zone rather than spraying the entire plant from above.
A watering wand, drip irrigation line, or soaker hose can help keep the foliage drier.
If overhead watering is unavoidable, watering earlier in the day gives the leaves more time to dry than watering late at night.
Try to water deeply enough to moisten the root zone instead of repeatedly giving the surface a light sprinkle.
Mulch can help conserve soil moisture and reduce soil splash, but do not pile it directly against the rose canes. Leave a little breathing room around the base.
Keep Up With Garden Sanitation
Black spot management works better when sanitation becomes routine rather than something done once after an outbreak.
During the growing season, check roses regularly for new symptoms.
Remove fallen diseased leaves as they accumulate. At the end of the season, clean up infected foliage rather than leaving it beneath the plant through winter.
Illinois Extension notes that the fungus can survive in fallen leaves and infected canes, which is why cleanup before the following growing season can be valuable.
Cleaning does not guarantee that black spot will never return, but it reduces the amount of infected material remaining immediately around the plant.
Resistant Roses Can Save a Lot of Work
Some rose cultivars are far more susceptible to black spot than others.
Disease resistance varies substantially among varieties, and Illinois Extension recommends resistant cultivars as an important management option.
If you live in a humid climate where black spot appears year after year, choosing resistant roses can make more difference than constantly trying new homemade sprays.
Resistance does not necessarily mean immunity. A resistant plant can still show symptoms under strong disease pressure, but it may remain healthier and require less intervention than a highly susceptible variety.
When buying new roses, look beyond flower color and fragrance. Disease resistance is worth considering as part of the selection process.
When a Commercial Fungicide Makes More Sense
A homemade spray may appeal to gardeners dealing with a small, early problem, but severe or recurring black spot may require a more reliable approach.
Illinois Extension states that fungicides can be used to control black spot, particularly on susceptible roses, and that repeated preventive applications may be necessary.
If you decide to use a fungicide, choose one specifically labeled for black spot on roses.
Read the entire label before use.
The label will tell you:
- which plants the product can be used on
- which diseases it controls
- how much to apply
- how frequently it may be reapplied
- what protective equipment is required
- environmental precautions
- any restrictions related to weather or application timing
More product is not better. Use the labeled rate exactly.
Many fungicides work best preventively, which means waiting for a rose to become heavily diseased before starting treatment may produce disappointing results.
Common Mistakes That Make Black Spot Harder to Control
One mistake is concentrating entirely on spraying while ignoring the conditions that allowed the disease to flourish.
Another is leaving infected leaves underneath the bush.
A third is using excessive amounts of homemade soap or baking soda in the belief that a stronger solution will work faster.
Gardeners also sometimes continue spraying damaged leaves while paying little attention to the new growth that actually needs protection.
Finally, overhead watering late in the day can keep foliage wet for extended periods, creating conditions favorable to leaf diseases.
A better strategy combines several small improvements rather than relying on one miracle treatment.
A Practical Black Spot Routine
If you discover black spot on your roses, a simple routine can keep the problem from becoming overwhelming.
Start by removing heavily infected and fallen leaves. Thin obviously crowded growth if the plant needs better airflow. Water the soil rather than routinely wetting the foliage.
Watch new leaves carefully over the following weeks.
If you use a homemade baking-soda spray, treat it as a cautious experiment rather than a proven cure, test it on a small area first, and discontinue use if the foliage shows burning or discoloration.
For roses that suffer serious black spot every season, consider a labeled fungicide program or replacing particularly troublesome varieties with roses bred for better disease resistance.
The goal is not to make old spots disappear. It is to keep as much healthy foliage on the plant as possible and reduce the conditions that allow new infections to spread.
Black spot can be persistent, especially during wet summers, but early sanitation, dry foliage, good airflow, appropriate plant selection, and preventive treatment where necessary give roses a much better chance of staying vigorous through the season.




Leave a Comment