Imagine buying one small mint plant and turning it into several healthy, thriving plants without purchasing another packet of seeds or spending money on expensive gardening supplies.
It sounds almost too easy, but mint is one of the simplest herbs to propagate at home.
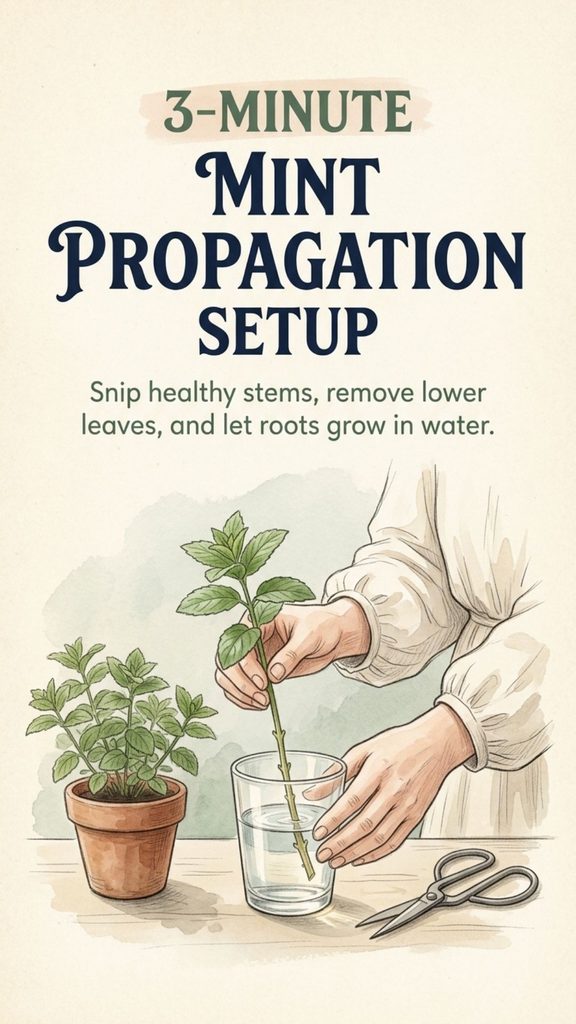
With just a healthy stem, a clean pair of scissors, and a glass of water, you can begin growing new mint plants in about three minutes.
You Might Also Like:
- Loading posts...
This old-fashioned gardening method has been passed down through generations because it’s inexpensive, beginner-friendly, and surprisingly effective.
The secret is something called water propagation.
Instead of growing mint from seeds, you take a small cutting from an established plant and encourage it to develop roots in water.
Once those roots are strong enough, the cutting can be transferred into soil, where it can grow into another mint plant.
The preparation takes only a few minutes, although the roots usually need one to three weeks to develop, depending on growing conditions.
With a little patience, one healthy mint plant can provide many new plants over time.
Here’s exactly how to do it, including the mistakes to avoid, when to transplant your cuttings, and how to encourage your mint to grow thick and bushy.
Why Mint Is One of the Easiest Herbs to Propagate
Mint is naturally vigorous.
In a garden, it can spread through underground stems and establish new growth beyond its original planting area.
That same ability to grow readily makes it an excellent candidate for propagation from stem cuttings.
Many mint varieties can develop new roots from nodes along their stems when provided with favorable conditions.
A node is the point where leaves attach to the stem.
Under suitable conditions, cells near these nodes can contribute to the formation of adventitious roots, allowing a detached stem to establish itself as a new plant.
This means you don’t need seeds or complicated equipment.
A healthy cutting can be enough to start another mint plant.
Peppermint, spearmint, chocolate mint, and several other cultivated mints are commonly propagated this way.
And because the new plant develops from part of an existing plant, it generally retains the characteristics of its parent variety.
What You Need to Grow Mint From Cuttings
One of the nicest things about this propagation technique is how little equipment it requires.
You probably already have everything you need at home.
Materials
- One healthy, established mint plant
- Clean, sharp scissors or pruning snips
- A small glass or jar
- Fresh water
- A bright location with indirect sunlight
- A small plant pot with drainage holes
- Quality potting mix for transplanting
That’s it.
You don’t need rooting hormone, special plant fertilizer, or an expensive propagation station.
A clean drinking glass or reused jar is usually sufficient.
Choose a container that can support the stems without completely submerging the leaves.
If you’re propagating several cuttings, use a wider jar or multiple small containers so the stems aren’t tightly crowded.
How to Grow Mint From Cuttings in Water: 5 Easy Steps
<text color=”secondary” weight=”medium” size=”sm”>Preparation time: About 3 minutes · Rooting time: Usually 1–3 weeks</text>
Step 1: Choose a Healthy Mint Stem
Start by examining your mint plant.
Look for a healthy stem with several sets of leaves.
A cutting approximately 4–6 inches long is a practical size.
Choose fresh, vigorous growth rather than an old, woody, damaged, or heavily flowering stem.
The cutting should have at least two or three nodes.
Healthy stems usually establish roots more readily than cuttings taken from stressed or diseased plants.
If your mint plant has several suitable stems, you can take multiple cuttings at once.
However, avoid removing too much growth from a young or struggling plant.
Step 2: Cut Just Below a Leaf Node
Using clean, sharp scissors, cut the stem just below a node.
Make a smooth, clean cut.
Avoid crushing or tearing the stem.
The nodes are important because they are common sites where roots develop during propagation.
A cutting containing several healthy nodes has multiple potential rooting points.
If you’re preparing more than one cutting, repeat the process with other suitable stems.
Always clean pruning tools when moving between plants, especially if there is any sign of disease.
Step 3: Remove the Lower Leaves
This step is simple but important.
Look at the bottom half of your cutting.
Carefully remove any leaves that would sit below the waterline.
Keep several healthy leaves at the top.
Leaves submerged in water can decay, encouraging microbial growth and making the container unpleasant.
Removing them also leaves the lower stem and nodes available for root development.
Don’t strip away every leaf.
The remaining foliage supports the cutting while new roots develop.
Step 4: Place the Cutting in Water
Fill a clean glass or small jar with fresh water.
Lower the cutting into the container so that one or two nodes are submerged.
The leaves should remain above the water.
Make sure the stem stays upright and doesn’t rest against the bottom in a way that damages the cut end.
Room-temperature water is suitable in most cases.
You don’t need to add honey, sugar, fertilizer, or other homemade rooting mixtures.
Plain water is usually enough.
Step 5: Place the Jar in Bright, Indirect Light
Position the jar in a location that receives plenty of bright, indirect daylight.
A bright windowsill can be a good choice, provided the cutting isn’t exposed to prolonged intense sunshine.
Direct sunlight through glass can heat the water and stress tender cuttings.
Keep the jar away from heating vents, cold drafts, and extreme temperature fluctuations.
Check the water regularly and replace it every few days, or sooner if it becomes cloudy.
Within approximately one to three weeks, you may notice small white roots developing along the submerged portion of the stem.
Some cuttings root faster, while others take longer.
The important thing is to keep the cutting healthy while allowing enough time for roots to develop.
What Happens During the First Two Weeks?
Watching roots develop is one of the most satisfying parts of propagating mint.
Although every cutting responds differently, here’s a general idea of what you might see.
| Time | What May Happen |
|---|---|
| Days 1–3 | Cutting adjusts to water; little visible change |
| Days 4–7 | Early root growth may begin under favorable conditions |
| Days 7–14 | Small white roots often become visible |
| Days 14–21 | Root systems may become developed enough for transplanting |
| After transplanting | The cutting gradually establishes itself in potting soil |
These are approximate timeframes rather than guaranteed results.
Mint variety, stem maturity, water temperature, lighting, and plant health all influence rooting speed.
A cutting that hasn’t produced visible roots after seven days isn’t necessarily a failure.
Be patient and continue checking its condition.
When Should You Transfer Mint Cuttings Into Soil?
Once your cutting has several healthy roots approximately 1–2 inches long, it’s usually ready for a small pot.
You don’t need to wait until the jar is filled with a tangled mass of roots.
In fact, transplanting before the roots become excessively long may make them easier to handle.
How to Transplant Rooted Mint
- Choose a small pot with drainage holes.
- Fill it with a good-quality potting mix.
- Make a small planting hole in the center.
- Carefully lift the rooted cutting from the water.
- Position the roots inside the hole without forcing or breaking them.
- Gently bring the soil around the roots.
- Water thoroughly and allow excess moisture to drain.
During the first few days, keep the soil consistently moist but not waterlogged.
Place the plant in bright, indirect light while it adjusts.
Once new growth appears and the plant is established, gradually introduce the light conditions appropriate for its variety and climate.
Water-grown roots may need time to adjust to growing in soil.
A little temporary wilting can occur, but prolonged severe wilting may indicate a problem with moisture, root condition, or transplant stress.
The Secret to Growing Thick, Bushy Mint Plants
One of the most common complaints about homegrown mint is that it becomes tall, thin, and leggy.
Instead of developing a full, attractive shape, it produces a few long stems with widely spaced leaves.
Fortunately, regular pruning can encourage bushier growth.
Pinch Back the Growing Tips
Once your new mint plant is established and actively growing, look for the soft growing tip at the end of a stem.
Using clean scissors or your fingertips, remove the tip just above a healthy pair of leaves.
This encourages growth from buds lower on the stem.
Over time, regular pinching can produce a fuller plant with more branching.
Harvest Regularly
Mint generally responds well to moderate harvesting during active growth.
Instead of picking individual leaves from random locations, cut healthy stems just above a node.
This can encourage new shoots.
Avoid harvesting excessively from a small or recently transplanted cutting.
Allow the plant to establish a strong root system before taking large amounts.
Provide Suitable Light
Mint grows well in a range of conditions, depending on the variety and climate.
Many varieties appreciate several hours of sunlight, although afternoon shade can be helpful in hot regions.
Insufficient light can contribute to stretched, weak-looking stems.
Move the plant gradually if it needs more light, rather than placing a shade-grown plant immediately into harsh sunshine.
Why You Should Grow Mint in a Container
Mint has a reputation for taking over garden beds.
And that reputation is well deserved.
Many mint varieties spread aggressively through underground stems called rhizomes.
Once established in open soil, mint can expand beyond its original planting area and compete with neighboring plants.
This is one reason container growing is often a smart choice.
A pot allows you to enjoy fresh mint while managing its spread.
Choosing the Right Pot
Select a container with drainage holes and enough root space for the plant to develop.
A pot approximately 8–12 inches wide is a useful starting point for an established mint plant, although you may need a larger container as it grows.
Use suitable potting mix and water according to the soil’s moisture level.
Mint often prefers consistently moist soil, but it doesn’t thrive when its roots remain waterlogged.
If the container sits directly on garden soil, check that roots aren’t escaping through the drainage holes.
Mint can sometimes establish itself outside a pot if escaping growth isn’t controlled.
7 Common Mistakes When Propagating Mint
Mint is forgiving, but a few common mistakes can reduce your chances of success.
1. Using Weak or Damaged Stems
Cuttings from unhealthy plants may struggle to develop roots.
Choose vigorous, pest-free growth whenever possible.
2. Leaving Leaves Below the Waterline
Submerged leaves can decay and cloud the water.
Remove the lower leaves before placing the cutting in a jar.
3. Placing Cuttings in Harsh Direct Sunlight
Too much direct sunlight can heat the water and increase stress.
Bright, indirect light is often a better choice during rooting.
4. Forgetting to Refresh the Water
Water can become cloudy or develop unpleasant odors.
Replace it regularly and clean the container when necessary.
5. Cutting Stems Without Nodes
Nodes are common sites for root development.
Make sure each cutting includes suitable nodes near the submerged section.
6. Transplanting Before Roots Are Established
A cutting with little or no root development may struggle when transferred to soil.
Wait until several healthy roots have formed.
7. Overwatering After Transplanting
Newly planted cuttings need moisture, but constantly saturated soil can deprive roots of oxygen.
Use containers with drainage and keep the mix moist rather than soggy.
Can You Root Mint Directly in Soil?
Yes!
Although water propagation is enjoyable because you can watch the roots develop, mint can also be propagated directly in potting mix.
This method eliminates the step of moving water-grown roots into soil.
How to Do It
Take a healthy cutting approximately 4–6 inches long.
Remove the lower leaves.
Fill a small pot with moistened potting mix.
Insert the lower stem into the mix, ensuring at least one node is buried.
Gently firm the soil around the cutting.
Place the pot in bright, indirect light.
Keep the growing medium evenly moist without saturating it.
After a couple of weeks, you may begin to notice new growth.
A gentle tug may indicate that roots have developed, but avoid repeatedly pulling at the stem, which can damage young roots.
Both water and soil propagation can work well.
Water is particularly appealing for beginners because root growth is visible.
Can You Propagate Store-Bought Mint?
Sometimes.
Fresh mint sold in grocery stores may contain stems capable of producing roots.
However, success depends on how fresh the stems are, whether they have intact nodes, how they’ve been stored, and whether they’re still healthy.
Choose fresh, firm stems with several leaf nodes.
Trim the stem below a node and remove the lower leaves.
Place the cutting in clean water and follow the same propagation method.
Avoid stems that are slimy, discolored, badly wilted, or visibly deteriorating.
Not every store-bought cutting will survive, but it’s a simple experiment worth trying with suitable fresh mint.
If you’re growing mint for culinary use, make sure the plant has been correctly identified as an edible mint variety and hasn’t been treated with products unsuitable for edible crops.
How to Keep Mint Healthy After Propagation
Once you’ve successfully grown new mint plants, the next step is keeping them healthy.
Water Consistently
Mint generally appreciates evenly moist soil.
Check the soil with your finger before watering.
If the surface begins to dry, water thoroughly and allow excess water to drain.
Avoid leaving the pot standing in water for long periods.
Give It Enough Light
Provide suitable daylight while protecting the plant from excessive heat.
In cooler climates, mint may tolerate more direct sun.
In hotter regions, morning sun with some afternoon shade can be beneficial.
Avoid Excessive Fertilizer
Mint usually doesn’t need heavy feeding when grown in a suitable potting mix.
Too much fertilizer can encourage overly soft growth and isn’t necessarily beneficial.
Use a balanced fertilizer only when needed and according to the label.
Watch for Pests
Mint may occasionally attract aphids, spider mites, or other pests.
Inspect the undersides of leaves and new growth.
If you notice a problem, identify the pest before choosing a treatment.
A gentle stream of water may help remove certain small pests from sturdy plants.
For more serious infestations, use a treatment approved for edible herbs and follow all application and harvest instructions.
Refresh the Potting Mix When Needed
Container-grown mint may eventually become rootbound.
If growth slows significantly and roots crowd the pot, consider dividing the plant or moving part of it into another suitable container.
This also provides an opportunity to share mint with friends.
How to Multiply One Mint Plant Into Many
Once your first propagated cutting becomes established, it can eventually provide more cuttings.
That’s what makes mint propagation so rewarding.
You don’t have to buy a new plant every time you want to expand your herb garden.
A simple cycle looks like this:
- Grow one healthy mint plant.
- Allow it to develop several strong stems.
- Take a few suitable cuttings.
- Root those cuttings in water.
- Transfer them into separate pots.
- Allow the new plants to establish and grow.
- Repeat when they’re mature enough.
With favorable conditions and consistent care, one mint plant can become the foundation of a much larger collection.
Of course, “endless mint” doesn’t mean growth happens instantly or without maintenance.
Healthy propagation depends on allowing parent plants enough time to recover between harvests.
10 Delicious Ways to Use Fresh Homegrown Mint
Once your mint plants begin producing plenty of leaves, you’ll have lots of opportunities to use them.
1. Fresh Mint Tea
Rinse several clean mint leaves and steep them in hot water for approximately five to ten minutes.
Strain and enjoy.
2. Mint-Infused Water
Add washed mint leaves to a pitcher of drinking water along with lemon slices or cucumber.
Refrigerate and enjoy chilled.
3. Homemade Mint Lemonade
Add fresh mint to lemonade for a refreshing herbal flavor.
Lightly bruise the leaves to release some aroma.
4. Fresh Summer Salads
Chopped mint works beautifully in salads containing cucumber, tomatoes, citrus, or other fresh produce.
5. Yogurt and Mint Sauce
Mix finely chopped mint into plain yogurt with lemon juice and suitable seasonings.
Serve with vegetables or grilled dishes.
6. Mint and Pea Soup
Fresh mint pairs especially well with sweet green peas.
Add chopped leaves near the end of cooking to preserve their fresh flavor.
7. Fruit Salad
Finely sliced mint can brighten a bowl of seasonal fruit.
It pairs particularly well with watermelon, berries, and citrus.
8. Homemade Herb Dressing
Blend mint with olive oil, lemon juice, and other herbs for a fresh dressing.
9. Frozen Mint Ice Cubes
Place washed mint leaves in ice cube trays, fill with drinking water, and freeze.
Use them to flavor suitable cold beverages.
10. Dried Mint for Cooking
Harvest healthy mint, wash it if needed, and dry it thoroughly using an appropriate food-drying method.
Store completely dried leaves in airtight containers away from heat and light.
Use dried mint in tea blends, marinades, and savory recipes.
How to Harvest Mint Without Damaging the Plant
Harvesting correctly can encourage healthy regrowth.
Wait until your mint plant is established and producing several healthy stems.
Use clean scissors to cut stems just above a pair of leaves.
Avoid stripping every leaf from the plant.
For small or newly rooted mint plants, take only modest amounts until they grow stronger.
During active growth, regular light harvesting can help maintain a compact appearance.
If flowers begin forming, you may choose to remove flowering tips to encourage more leafy growth, although flowering mint can also attract pollinators outdoors.
The best approach depends on whether you’re growing mint primarily for harvest, appearance, or garden wildlife.
Frequently Asked Questions About Growing Mint From Cuttings
How Long Does Mint Take to Root in Water?
Mint cuttings often begin developing visible roots within approximately one to three weeks.
Actual rooting time depends on variety, light, temperature, and cutting health.
Can You Grow Mint in Water Forever?
Mint can survive in water for an extended period under suitable conditions, but long-term water culture requires proper nutrients and maintenance.
For ordinary propagation, transferring rooted cuttings into potting soil is generally the simplest approach.
Does Mint Need Rooting Hormone?
Usually not.
Many mint varieties root readily from healthy stem cuttings without rooting hormone.
Can You Grow Mint Indoors?
Yes.
Mint can grow indoors when provided with sufficient light, suitable temperatures, water, and root space.
A bright window may work, although some indoor locations require supplemental grow lighting.
Why Are My Mint Cuttings Turning Black?
Dark, mushy stems may indicate decay.
Poor cutting health, prolonged submersion of leaves, or unsuitable conditions can contribute.
Discard severely rotting cuttings, clean the container, and start again with healthy stems.
Can You Use Any Type of Mint?
Many cultivated mint varieties can be propagated from cuttings.
However, rooting speed and success can vary.
Use accurately identified, healthy plants, especially when growing herbs for consumption.
Will Mint Grow Back After Cutting?
Healthy, established mint commonly produces new shoots after moderate pruning.
Avoid removing excessive foliage from weak or newly established plants.
Final Thoughts: One Mint Plant Can Start an Entire Herb Garden
Growing mint from cuttings is one of the simplest and most satisfying gardening skills you can learn.
It doesn’t require a greenhouse, expensive propagation supplies, or advanced knowledge.
All you need is a healthy stem, clean scissors, fresh water, and a little patience.
The entire setup takes about three minutes, making it a wonderful project for beginners and experienced gardeners alike.
Within a few weeks, your cutting may develop enough roots to begin growing in its own pot.
As that plant matures, it can provide more cuttings, allowing you to expand your herb collection or share new plants with friends and family.
Keep your mint in a suitable container, water consistently, give it appropriate light, and harvest regularly once established.
You’ll have fresh leaves available for teas, salads, sauces, and countless homemade recipes throughout the growing season.
Sometimes the smartest gardening tricks are also the simplest. One small mint cutting today can become a thriving new plant in just a few weeks—and the beginning of many more.