
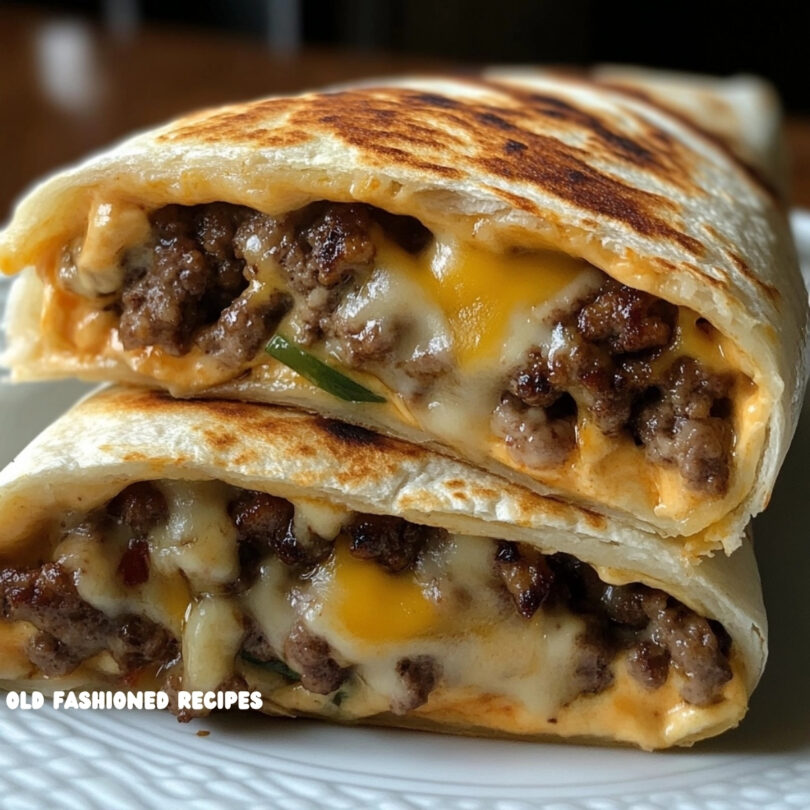
If you’ve ever wanted the juicy satisfaction of a cheeseburger with the convenience of a wrap, then say hello to Grilled Cheeseburger Wraps—a mouthwatering twist that wraps up all the flavors you love in one crispy, handheld bite.
Whether it’s a busy weeknight, a backyard BBQ, or a fun way to switch up lunch, these wraps bring the cheeseburger flavor without the mess. From sizzling beef and gooey cheese to crisp lettuce and tangy ketchup-mustard punch, each wrap is grilled to golden perfection.
And the best part? You don’t need a grill pan or fancy tools—just a skillet, tortillas, and a craving for something downright irresistible.
You Might Also Like:
- Loading posts...
🧡 Why You’ll Love These Wraps
- All the Burger Flavors: Ketchup, mustard, beef, cheese, lettuce, tomato—it’s all here!
- Quick & Easy: Ready in 30 minutes or less.
- Grilled to Perfection: Crispy on the outside, warm and cheesy inside.
- Portable: Perfect for lunchboxes, tailgating, or dinner on the go.
- Customizable: Add bacon, jalapeños, or pickles to make it your own.
🛒 Ingredient Breakdown
Let’s look at what makes these cheeseburger wraps sizzle:
🍔 Beef Mixture:
- 1 lb Ground Beef: Lean ground beef (85/15 or 90/10) works best for flavor and less grease.
- 1 tsp Dried Minced Onion: Gives that classic burger flavor. Use fresh if you prefer.
- 2 tbsp Ketchup + 1 tbsp Worcestershire Sauce: Adds savory sweetness and umami depth.
- Salt & Pepper: To season the beef just right.
🌯 Wrap Ingredients:
- 5 Large Tortillas (10–12 inches): Burrito-size for easy rolling.
- Cheese: Sliced American or shredded cheddar both melt beautifully.
- Lettuce: Add at the end to keep it crisp!
- Tomato Slices: Thin slices work best to avoid sogginess.
- Mustard: Optional, but adds that authentic cheeseburger zing.
👨🍳 Step-by-Step Instructions
🔥 FIRST STEP: Brown the Beef
In a skillet over medium heat, crumble and brown the ground beef, stirring until no pink remains. Drain the grease.
Return to heat and add:
- 2 tbsp Ketchup
- 1 tbsp Worcestershire Sauce
- 1 tsp Dried Minced Onion
- Salt & Pepper, to taste
Simmer for 2–3 minutes to combine flavors. Set aside.
🔥 SECOND STEP: Prep the Tortillas
Lightly grill or warm your tortillas to make them pliable. You can do this in a dry skillet for 20–30 seconds per side or microwave wrapped in a damp paper towel for 30 seconds.
Lay each tortilla flat and:
- Add a strip of cheese (sliced or shredded) down the center.
- Spoon 2–3 heaping tablespoons of the beef mixture over the cheese.
🔥 THIRD STEP: Build the Burger Layers
Top the beef with:
- A drizzle of mustard
- A couple of tomato slices
Roll up the tortilla burrito-style: fold in the sides, then roll tightly from the bottom.
Wrap Tip: Don’t overstuff or the wrap may burst when grilling.
🔥 FOURTH STEP: Grill the Wrap
Place each rolled tortilla seam-side down onto a skillet or grill pan. Cook over medium-high heat, turning every 1–2 minutes, until all sides are crispy and golden.
This seals the wrap and melts the cheese perfectly.
🔥 FIFTH STEP: Add Lettuce & Serve
Carefully unroll the wrap just enough to tuck in some shredded lettuce, then roll it back up. Serve immediately while hot and gooey!
🍽️ What to Serve With Cheeseburger Wraps
These wraps are hearty enough on their own but shine with simple sides:
- Potato Wedges or Fries
- Pickle Spears
- Side Salad
- Coleslaw
- Sweet Potato Chips
Or offer a dipping station with:
- Ranch dressing
- Garlic aioli
- Extra ketchup or mustard
🔁 Storage & Reheating Tips
- Fridge: Store leftover wraps in foil or an airtight container for up to 3 days.
- Reheat: For best results, reheat in a skillet or toaster oven. Microwave is fine but may lose crispness.
- Make-Ahead: Prep the beef mixture in advance and assemble wraps when ready to grill.
🔄 Variations to Try
| Add-In | Flavor Boost |
|---|---|
| Crispy Bacon | Adds crunch and smoky depth |
| Diced Pickles | Tangy contrast |
| Jalapeños | Bring on the heat |
| Avocado Slices | Creamy coolness |
| Sautéed Onions or Mushrooms | Gourmet burger vibes |
These wraps are super versatile—feel free to get creative!
🤔 Frequently Asked Questions
Can I make this low-carb or keto-friendly?
Yes! Use low-carb tortillas or lettuce wraps instead of flour tortillas.
What’s the best cheese to use?
American cheese melts smoothly, but shredded cheddar, mozzarella, or pepper jack all work well.
Can I bake them instead of grilling?
Absolutely. Bake seam-side down at 375°F for about 12–15 minutes until crisp.
Can I use ground turkey or chicken?
Yes! Just make sure to season well, as leaner meats can be milder in flavor.

🔥 Grilled Cheeseburger Wraps – Your Favorite Burger in a Handheld, Crispy Wrap!
Grilled Cheeseburger Wraps 😋😋
A cheesy, juicy twist on the classic cheeseburger—rolled into a crisp, grilled tortilla! Perfect for quick dinners, game night, or anytime you’re craving something bold and satisfying.
Ingredients
-
2 tbsp Ketchup
-
1 tbsp Worcestershire Sauce
-
1 lb Ground Beef
-
1 tsp Dried Minced Onion
-
Salt and Pepper, to taste
-
5 Large Tortillas (10–12 inches)
-
Cheese (sliced American or shredded)
-
Tomato slices
-
Mustard
-
Shredded Lettuce
Instructions
FIRST STEP:
Brown and drain the ground beef. Stir in ketchup, Worcestershire, minced onion, salt, and pepper.
SECOND STEP:
Grill or warm tortillas. Add cheese down the center and spoon on beef.
THIRD STEP:
Top with mustard and tomato slices. Roll up tightly burrito-style.
FOURTH STEP:
Grill wraps in a hot skillet, turning every minute until golden on all sides.
FIFTH STEP:
Remove from grill, gently unroll, add shredded lettuce, roll back up, and enjoy hot!
Notes
Prep Time: 15 min
Cook Time: 10 min
Total Time: 25 min
Servings: 5 wraps
Calories: ~450–500 kcal per serving (varies by tortilla and cheese)


Leave a Comment