
If you’re looking for a dessert that screams indulgence without a minute in the oven, these Banana Cream Cheesecake Bars are the answer. Creamy, dreamy, and layered with nostalgic banana pudding flavor, this no-bake treat combines the rich tang of cheesecake with the comfort of banana cream pie—plus a crumbly vanilla wafer crust that pulls it all together in the most delightful way.
Whether you’re making a dessert for a special occasion, a summer barbecue, or just a late-night sweet fix, this recipe delivers on every level. In this post, we’ll break down what makes this dessert so magical, explore each ingredient’s purpose, and share tips for preparation, presentation, and storage.
Let’s dive into this slice of banana heaven.
🍰 Why Banana Cream Cheesecake Bars?
This dessert is a beautiful mashup between a cheesecake and a banana cream pie. It’s rich but refreshing, luscious but light enough to enjoy after a meal. What makes it especially appealing is the no-bake format—perfect for summer days when turning on the oven just isn’t an option.
Here’s why you’ll fall in love:
- Texture galore: A crunchy vanilla cookie crust gives way to silky, mousse-like cheesecake filling.
- Banana flavor: Thanks to instant banana pudding mix, the flavor is spot-on without needing ripe bananas.
- Effortless elegance: Easy to assemble, yet impressive enough to serve at parties and events.
- Make-ahead friendly: These bars need to chill for several hours, making them ideal for prepping the night before.
🧾 Ingredient Breakdown
Each component in this dessert plays a key role. Let’s take a closer look:
- 3 cups Nilla Wafer cookie crumbs: These iconic vanilla cookies make the perfect crust—sweet, fragrant, and with just the right crunch.
- 1/2 cup butter, melted: Helps bind the crust and adds richness.
- 1 pint heavy whipping cream: Whipped to stiff peaks, it gives the filling a light, airy texture.
- 3/4 cup sugar: Sweetens the cream just enough without overpowering the banana flavor.
- 24 ounces cream cheese (3 8-ounce packages), softened: The base of the cheesecake layer—make sure it’s softened for the smoothest texture.
- 2 packages instant banana cream pudding mix (3.4 ounces each): The banana essence of the dessert. Instant pudding also helps the filling set without baking.
- Optional garnish: whipped topping and banana slices: These add a fresh and pretty finish just before serving.
👩🍳 The Original Recipe: Banana Cream Cheesecake Bars
Below is the original, unchanged recipe as you requested:
Ingredients
• 3 cups Nilla Wafer (approximately one 11-ounce box) cookie crumbs
• 1/2 cup butter melted
• 1 pint heavy whipping cream
• 3/4 cup sugar
• 24 ounces cream cheese (3 8-ounce packages) softened
• 2 packages instant banana cream pudding mix (3.4 ounces each)
• optional garnish: whipped topping and banana slices
INSTRUCTIONS
- In a medium mixing bowl, combine the Nilla Wafer crumbs and the melted butter. Press the mixture into the bottom of a square 8×8-inch baking pan (a 9×9-inch pan will also work well) lined with a sheet of parchment paper with extra paper sticking up from the edges. Chill the crust in the refrigerator or freezer while you move on to the next steps.
- In a large mixing bowl, with an electric mixer or stand mixer on medium speed, whip the heavy whipping cream and sugar together until stiff peaks form; set aside.
- In a large mixing bowl, with an electric mixer or stand mixer on medium speed, beat the cream cheese until smooth. Add the pudding mixes a little at a time, beating well between each addition. Add the whipped cream and mix until smooth.
- Spread the cheesecake filling evenly over the chilled crust. Cover the pan with plastic wrap and refrigerate the cheesecake for 8 hours, or overnight.
- Cut the chilled cheesecake into 9 squares and garnish with whipped topping and banana slices if desired. Serve chilled.
🍌 Tips for Success
Want to make your bars picture-perfect and extra delicious? Here are a few helpful tips:
- Use room temperature cream cheese: This prevents lumps and makes mixing smoother.
- Chill the crust firmly: A well-chilled crust ensures a strong base that won’t fall apart when sliced.
- Whip cream properly: Stiff peaks should stand upright when you lift the beater. Don’t overwhip or it may become grainy.
- Beat pudding mix in slowly: Adding it gradually prevents clumps and ensures even distribution.
🔄 Customization Ideas
This recipe is delicious as-is, but you can tweak it to suit your tastes or dietary needs:
- Swap the crust: Graham crackers, Golden Oreos, or shortbread cookies can offer a different twist.
- Add bananas inside: Layer thin banana slices on the crust before adding the filling for more banana flavor (just know this can shorten shelf life).
- Drizzle with caramel or chocolate sauce for a richer dessert.
- Make mini bars: Use a muffin tin with cupcake liners for easy-to-serve mini cheesecakes.
🍽️ Serving & Storage
These bars shine best when they’re well-chilled and carefully sliced. Here’s how to present and preserve them:
- Serving suggestions:
- Add a dollop of whipped cream and a single banana slice on each bar just before serving.
- Sprinkle with crushed Nilla Wafers or crushed nuts for texture.
- Serve with a cup of coffee or a glass of cold milk for ultimate comfort.
- Storage tips:
- Store in an airtight container in the fridge for up to 4 days.
- Due to the dairy and banana content, they’re not ideal for freezing if banana slices are added.
- Without banana garnish, they freeze well for up to 1 month; thaw in fridge overnight.
🌟 When to Serve Banana Cream Cheesecake Bars
These bars are a hit for nearly any occasion:
- Birthday parties
- Baby showers
- Summer potlucks
- Holiday dessert tables
- Just-because weekend treats
They’re sweet enough to be a centerpiece dessert and simple enough for any home baker to make. Plus, they travel well and can be made ahead of time, which makes them ideal for events and gatherings.
📝 Final Thoughts
If you’re looking for a no-fuss, no-bake dessert that will impress everyone who takes a bite, Banana Cream Cheesecake Bars are the perfect choice. With a rich, creamy filling, a perfectly sweet crust, and a nostalgic banana flavor that hits all the right notes, these bars are bound to become a favorite in your recipe rotation.
They’re simple, satisfying, and guaranteed to disappear from the table faster than you can say “banana cream.”
Print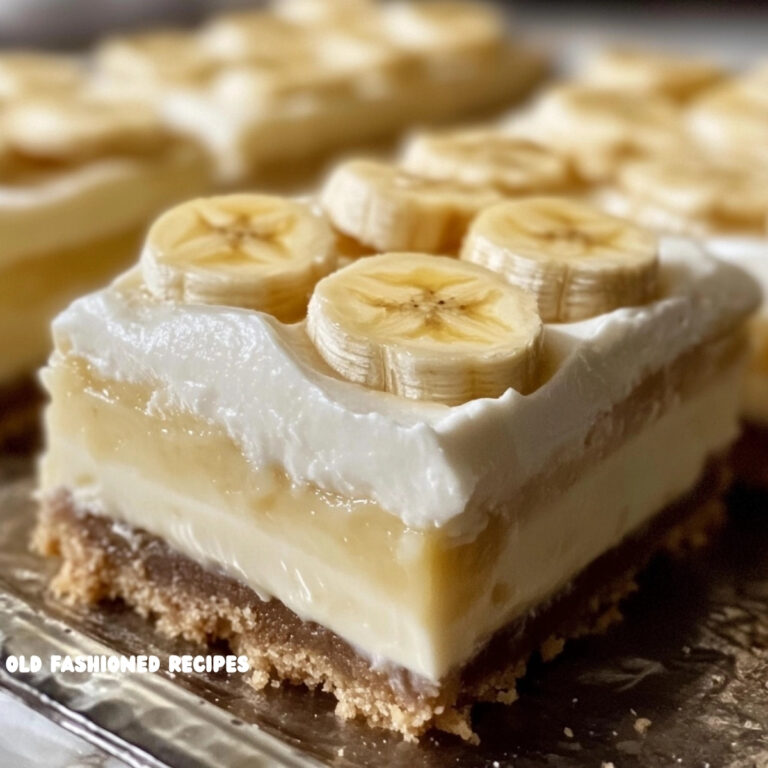
🍌 Banana Cream Cheesecake Bars: A No-Bake Dream Dessert
Each component in this dessert plays a key role. Let’s take a closer look
Ingredients
• 3 cups Nilla Wafer (approximately one 11-ounce box) cookie crumbs
• 1/2 cup butter melted
• 1 pint heavy whipping cream
• 3/4 cup sugar
• 24 ounces cream cheese (3 8-ounce packages) softened
• 2 packages instant banana cream pudding mix (3.4 ounces each)
• optional garnish: whipped topping and banana slices
Instructions
-
In a medium mixing bowl, combine the Nilla Wafer crumbs and the melted butter. Press the mixture into the bottom of a square 8×8-inch baking pan (a 9×9-inch pan will also work well) lined with a sheet of parchment paper with extra paper sticking up from the edges. Chill the crust in the refrigerator or freezer while you move on to the next steps.
-
In a large mixing bowl, with an electric mixer or stand mixer on medium speed, whip the heavy whipping cream and sugar together until stiff peaks form; set aside.
-
In a large mixing bowl, with an electric mixer or stand mixer on medium speed, beat the cream cheese until smooth. Add the pudding mixes a little at a time, beating well between each addition. Add the whipped cream and mix until smooth.
-
Spread the cheesecake filling evenly over the chilled crust. Cover the pan with plastic wrap and refrigerate the cheesecake for 8 hours, or overnight.
-
Cut the chilled cheesecake into 9 squares and garnish with whipped topping and banana slices if desired. Serve chilled.
Notes
🍌 Tips for Success
Want to make your bars picture-perfect and extra delicious? Here are a few helpful tips:
-
Use room temperature cream cheese: This prevents lumps and makes mixing smoother.
-
Chill the crust firmly: A well-chilled crust ensures a strong base that won’t fall apart when sliced.
-
Whip cream properly: Stiff peaks should stand upright when you lift the beater. Don’t overwhip or it may become grainy.
-
Beat pudding mix in slowly: Adding it gradually prevents clumps and ensures even distribution.