

Here’s a friendly, detailed article surpassing 1000 words about Red Velvet Cheesecake Bites—a real, beloved recipe that’s won over hearts (and taste buds) across kitchens everywhere.
Red Velvet Cheesecake Bites: A Miniature Dessert with Maximum Charm
There’s something undeniably magical about the combination of red velvet cake and creamy cheesecake. The richness of cocoa, the tang of cream cheese, and that iconic red hue—it’s a classic duo that’s been celebrated in kitchens, bakeries, and holiday tables for generations. Now, imagine all of that decadence wrapped into a single, delightful bite-sized dessert: Red Velvet Cheesecake Bites.
These little treats are more than just adorable—they’re a total crowd-pleaser. Whether you’re preparing for a party, a special celebration, or just want to indulge in something indulgent and sweet, these bites deliver a gourmet experience in just one or two mouthfuls. Not only are they delicious, but their vibrant red and white layers make them a visual showstopper.
You Might Also Like:
- Loading posts...
Let’s take a closer look at why Red Velvet Cheesecake Bites are so loved—and how you can make them in your own kitchen.
Why Everyone Loves Red Velvet Cheesecake Bites
These mini desserts have become a staple at weddings, holiday events, potlucks, and more, and it’s not hard to see why:
1. Portion-Controlled Indulgence
There’s something satisfying about dessert you can eat in just a few bites. You get all the flavor and richness without feeling weighed down. These bites are perfect for those who want just a little taste of something sweet.
2. Perfect Balance of Flavors
Red velvet cake has a light cocoa flavor, and when paired with creamy cheesecake, it creates a perfect balance of richness, tanginess, and sweetness. The two layers complement each other rather than compete, making every bite harmonious.
3. Great for Any Occasion
Whether you’re throwing a Valentine’s Day party, serving a holiday dessert tray, or surprising a friend on their birthday, these bites fit right in. They’re elegant, fun, and incredibly versatile.
The Real Deal: A Tried-and-True Recipe
Red Velvet Cheesecake Bites aren’t a fad—they’ve been tried, tested, and loved by countless home bakers and dessert lovers across the globe. A simple internet search brings up dozens of glowing reviews, recipe blog posts, and videos showing just how fun (and rewarding) these are to make.
Many people adapt this dessert from their favorite red velvet cupcake and cheesecake recipes. You’ll find recipes that use a red velvet cookie base, others that stick with traditional cake, and some that even get creative with red velvet brownies. The cheesecake layer is typically the classic cream cheese, sugar, egg, and vanilla mixture, ensuring a velvety, smooth topping.
Ingredients You’ll Need
Here’s a standard, well-loved ingredient list for Red Velvet Cheesecake Bites:
For the Red Velvet Base:
- 1 box of red velvet cake mix (or use a homemade recipe)
- 2 eggs
- 1/2 cup vegetable oil
For the Cheesecake Layer:
- 2 (8 oz) packages cream cheese, softened
- 1/2 cup granulated sugar
- 2 eggs
- 1 tsp vanilla extract
Optional Toppings:
- Red velvet crumbs (from extra cake)
- Whipped cream
- Chocolate drizzle
- A square of red velvet fudge or brownie for garnish (as shown in the image)
How to Make Red Velvet Cheesecake Bites
Step 1: Prepare the Red Velvet Base
Start by preheating your oven to 350°F (175°C). In a mixing bowl, combine the red velvet cake mix with eggs and oil. Mix until a thick batter forms. Press this mixture into the bottom of a greased mini muffin tin or silicone mold. Bake for about 10 minutes, then let it cool slightly while you prepare the cheesecake layer.
Step 2: Mix the Cheesecake Layer
In a separate bowl, beat the softened cream cheese until smooth. Add the sugar, eggs, and vanilla extract. Beat until well-combined and silky. Spoon the cheesecake mixture over the red velvet base in each cavity, filling just to the top.
Step 3: Bake to Perfection
Bake for another 15–18 minutes, or until the centers are set but slightly jiggly. Let them cool in the tin, then transfer to the fridge to chill for at least 2 hours. This step is key for achieving that classic cheesecake texture.
Step 4: Garnish and Serve
Once chilled, carefully remove the bites from the mold. Top with crumbled red velvet cake, a dollop of whipped cream, or a square of red velvet brownie. Arrange on a serving platter and get ready for compliments!
Tips from the Pros
- Use Silicone Molds: For easy removal and a perfectly round shape, silicone muffin molds work wonders.
- Customize Your Topping: Go simple or extravagant—add ganache, fresh berries, or even a swirl of cream cheese frosting.
- Make Ahead: These bites store beautifully in the fridge and can even be frozen for future enjoyment.
- Mini Cheesecake Pans: If you want a slightly larger bite, mini cheesecake pans with removable bottoms provide an elegant shape and easy release.
Red Velvet Cheesecake Bites Across the Internet
A quick glance at baking communities, food blogs, and Pinterest will show just how popular Red Velvet Cheesecake Bites have become. From Southern home kitchens to trendy bakeries in New York, this dessert is making waves everywhere. They often go viral thanks to their stunning look and satisfying texture.
Fans love sharing their variations—some add chocolate chips to the red velvet base, others infuse the cheesecake layer with a touch of lemon zest. It’s a recipe that invites creativity, but never fails to impress.
Perfect Pairings
Wondering what to serve with your Red Velvet Cheesecake Bites? Here are a few ideas:
- Coffee or Espresso: The bitterness balances the sweetness perfectly.
- Champagne or Sparkling Wine: Great for a celebration.
- Milk or Hot Chocolate: A cozy option for colder months.
- Strawberry Sauce or Raspberry Coulis: Adds a fruity contrast.
Why You’ll Love Making These
- Easy Yet Impressive: You don’t need to be a professional baker to make these look stunning.
- Great for Gifting: Box them up in cupcake liners for homemade gifts.
- Kid-Friendly: Both in making and eating, these are a hit with kids.
- Perfect for Freezing: Make a batch, freeze, and defrost when needed.
Final Thoughts
Red Velvet Cheesecake Bites offer everything you could want in a dessert: bold flavor, smooth texture, and eye-catching appeal. They’re small but mighty, and people just can’t get enough of them.
Whether you’re new to baking or a seasoned pro, these bites are the kind of recipe that will have your family and friends asking for more. With a simple red velvet base and creamy cheesecake topping, they bring together two dessert classics in a way that’s fun, festive, and unforgettable.
So, next time you’re looking for a recipe that’s guaranteed to please, give these a try. One bite, and you’ll understand why everyone who’s tried them has fallen in love.
Print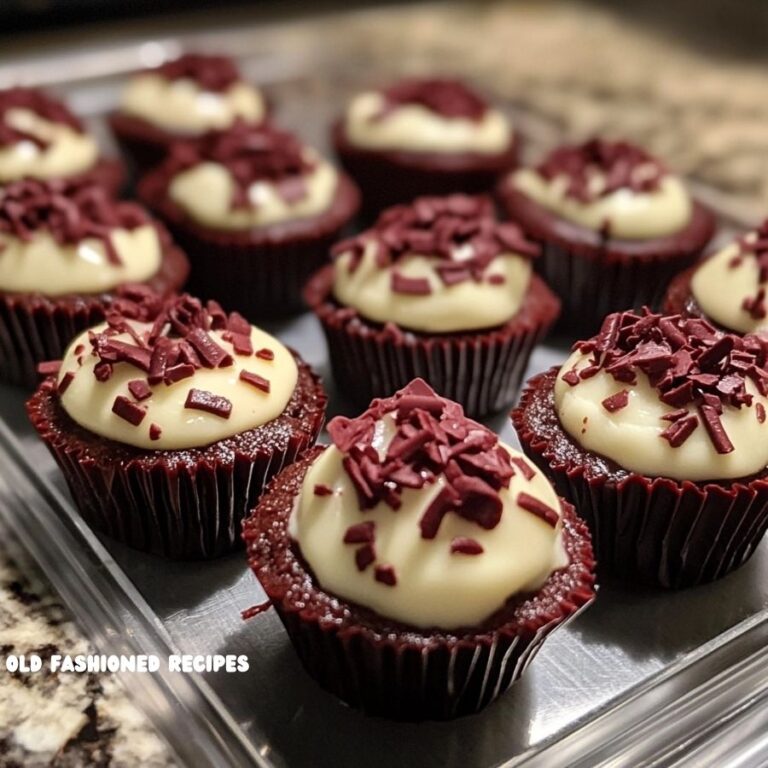
Red Velvet Cheesecake Bites
Here’s a standard, well-loved ingredient list for Red Velvet Cheesecake Bites:
Ingredients
For the Red Velvet Base:
- 1 box of red velvet cake mix (or use a homemade recipe)
- 2 eggs
- 1/2 cup vegetable oil
For the Cheesecake Layer:
- 2 (8 oz) packages cream cheese, softened
- 1/2 cup granulated sugar
- 2 eggs
- 1 tsp vanilla extract
Optional Toppings:
- Red velvet crumbs (from extra cake)
- Whipped cream
- Chocolate drizzle
- A square of red velvet fudge or brownie for garnish (as shown in the image)
Instructions
Start by preheating your oven to 350°F (175°C). In a mixing bowl, combine the red velvet cake mix with eggs and oil. Mix until a thick batter forms. Press this mixture into the bottom of a greased mini muffin tin or silicone mold. Bake for about 10 minutes, then let it cool slightly while you prepare the cheesecake layer.
Step 2: Mix the Cheesecake LayerIn a separate bowl, beat the softened cream cheese until smooth. Add the sugar, eggs, and vanilla extract. Beat until well-combined and silky. Spoon the cheesecake mixture over the red velvet base in each cavity, filling just to the top.
Step 3: Bake to PerfectionBake for another 15–18 minutes, or until the centers are set but slightly jiggly. Let them cool in the tin, then transfer to the fridge to chill for at least 2 hours. This step is key for achieving that classic cheesecake texture.
Step 4: Garnish and ServeOnce chilled, carefully remove the bites from the mold. Top with crumbled red velvet cake, a dollop of whipped cream, or a square of red velvet brownie. Arrange on a serving platter and get ready for compliments!
Notes
Tips from the Pros
- Use Silicone Molds: For easy removal and a perfectly round shape, silicone muffin molds work wonders.
- Customize Your Topping: Go simple or extravagant—add ganache, fresh berries, or even a swirl of cream cheese frosting.
- Make Ahead: These bites store beautifully in the fridge and can even be frozen for future enjoyment.
- Mini Cheesecake Pans: If you want a slightly larger bite, mini cheesecake pans with removable bottoms provide an elegant shape and easy release.


Leave a Comment