
No-Bake Chocolate Oat Bars: A Quick & Easy Sweet Treat
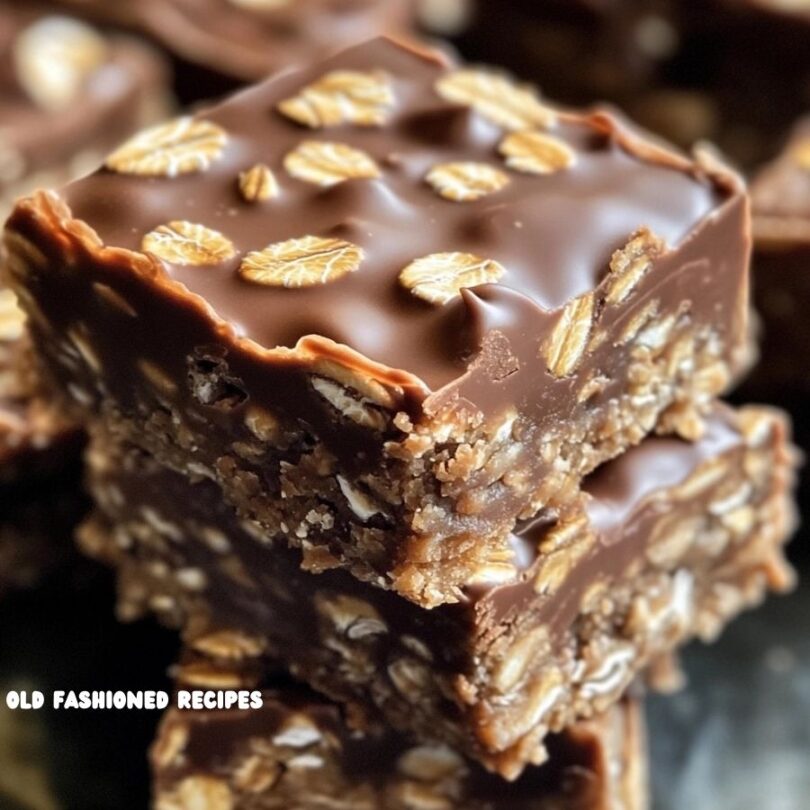
Looking for a simple, delicious, and chocolatey treat that requires no oven? These No-Bake Chocolate Oat Bars are the perfect solution! Made with buttery oats, brown sugar, and rich chocolate, these bars are chewy, decadent, and incredibly satisfying.
Perfect for snacking, meal prep, potlucks, or even dessert, these bars come together in just a few minutes with minimal effort. Plus, they’re customizable—add nuts, peanut butter, or coconut for an extra twist!
Let’s dive into the recipe, step-by-step instructions, and pro tips to make these irresistible no-bake bars!
You Might Also Like:
- Loading posts...
Why You’ll Love These No-Bake Chocolate Oat Bars
✅ Super Quick & Easy – Ready in just 10 minutes of prep time!
✅ No Oven Needed – Perfect for hot days or quick desserts.
✅ Made with Simple Ingredients – Pantry staples like oats, chocolate, and butter.
✅ Chewy, Chocolatey, & Irresistible – A perfect balance of sweet, rich, and crunchy.
✅ Easily Customizable – Add peanut butter, nuts, coconut, or caramel for variety!
Ingredients You’ll Need
For the Oat Base
- 1 cup butter
- ½ cup brown sugar, packed
- 1 teaspoon pure vanilla extract
- 3 cups rolled oats
For the Chocolate Layer
- 1 cup chocolate chips (semi-sweet or milk chocolate)
- ½ cup peanut butter (optional, for extra creaminess)
Step-by-Step Instructions
Step 1: Prepare the Oat Mixture
- In a medium saucepan, melt the butter over medium heat.
- Stir in the brown sugar and vanilla extract, mixing until the sugar dissolves.
- Add the rolled oats, stirring continuously for 2-3 minutes until well coated.
Step 2: Press the Oats Into a Pan
- Line an 8×8-inch or 9×9-inch baking dish with parchment paper.
- Press half of the oat mixture firmly into the bottom of the dish.
- Reserve the other half for topping.
Step 3: Melt the Chocolate Layer
- In a microwave-safe bowl, combine the chocolate chips and peanut butter.
- Microwave in 30-second intervals, stirring each time, until smooth and fully melted.
- Pour the melted chocolate mixture over the oat layer, spreading evenly.
Step 4: Add the Final Oat Layer
- Sprinkle the remaining oat mixture over the chocolate, pressing it down gently.
- (Optional) Add extra chocolate chips or oats on top for decoration.
Step 5: Chill Until Set
- Refrigerate for at least 2 hours (or freeze for 30 minutes) until firm.
- Once set, lift the bars from the pan and cut them into squares.
Step 6: Serve & Enjoy!
- Serve cold or at room temperature.
- Store leftovers in an airtight container in the fridge for up to 1 week.
Serving Ideas & Pairings
🍓 With Fresh Fruit – Serve alongside strawberries, bananas, or raspberries.
☕ With Coffee or Tea – A perfect snack with a cup of coffee or chai tea.
🥜 With Extra Nut Butter – Drizzle peanut or almond butter on top before serving.
🍨 With Ice Cream – Serve warm with a scoop of vanilla ice cream for dessert.
Tips for the Best No-Bake Chocolate Oat Bars
🔹 Use Old-Fashioned Oats – They hold up better than quick oats, giving a chewy texture.
🔹 Press the Oats Firmly – This helps the bars hold their shape when slicing.
🔹 Refrigerate Long Enough – Let them set for at least 2 hours to prevent crumbling.
🔹 Use High-Quality Chocolate – Better chocolate = richer flavor!
🔹 Make It Healthier – Swap butter for coconut oil and brown sugar for honey or maple syrup.
Fun Variations to Try
🥜 Peanut Butter Chocolate Oat Bars – Add ½ cup peanut butter to the oat mixture.
🌰 Nutty Crunch Bars – Stir in ½ cup chopped almonds, pecans, or walnuts.
🥥 Coconut Chocolate Oat Bars – Add ½ cup shredded coconut for a tropical twist.
🍫 Double Chocolate Oat Bars – Mix in cocoa powder with the oat base for extra richness.
🍯 Salted Caramel Oat Bars – Drizzle caramel sauce and a pinch of sea salt on top.
Frequently Asked Questions
Can I Make These Vegan?
Yes! Use vegan butter or coconut oil and dairy-free chocolate chips.
How Do I Store These Bars?
Store in an airtight container in the fridge for up to 1 week. For longer storage, freeze for up to 3 months.
Can I Use Quick Oats Instead of Rolled Oats?
Yes, but the texture will be softer. Rolled oats give a better chewy consistency.
Do These Bars Need to Stay Refrigerated?
They can sit at room temperature for a few hours, but they hold their shape best when chilled.
Can I Make These Without Peanut Butter?
Yes! Just omit the peanut butter or replace it with almond butter or Nutella.
Final Thoughts
No-Bake Chocolate Oat Bars are the perfect quick and easy treat—chewy, chocolatey, and packed with flavor! With minimal prep, no baking required, and endless customizations, these bars are great for snacks, desserts, or even a grab-and-go breakfast.
Try this simple homemade recipe today and enjoy a sweet, chocolatey delight in every bite!
Print
No Bake Chocolate Oat Bars
Let’s dive into the recipe, step-by-step instructions, and pro tips to make these irresistible no-bake bars!
Ingredients
For the Oat Base
- 1 cup butter
- ½ cup brown sugar, packed
- 1 teaspoon pure vanilla extract
- 3 cups rolled oats
For the Chocolate Layer
- 1 cup chocolate chips (semi-sweet or milk chocolate)
- ½ cup peanut butter (optional, for extra creaminess)
Instructions
Step 1: Prepare the Oat Mixture
- In a medium saucepan, melt the butter over medium heat.
- Stir in the brown sugar and vanilla extract, mixing until the sugar dissolves.
- Add the rolled oats, stirring continuously for 2-3 minutes until well coated.
Step 2: Press the Oats Into a Pan
- Line an 8×8-inch or 9×9-inch baking dish with parchment paper.
- Press half of the oat mixture firmly into the bottom of the dish.
- Reserve the other half for topping.
Step 3: Melt the Chocolate Layer
- In a microwave-safe bowl, combine the chocolate chips and peanut butter.
- Microwave in 30-second intervals, stirring each time, until smooth and fully melted.
- Pour the melted chocolate mixture over the oat layer, spreading evenly.
Step 4: Add the Final Oat Layer
- Sprinkle the remaining oat mixture over the chocolate, pressing it down gently.
- (Optional) Add extra chocolate chips or oats on top for decoration.
Step 5: Chill Until Set
- Refrigerate for at least 2 hours (or freeze for 30 minutes) until firm.
- Once set, lift the bars from the pan and cut them into squares.
Step 6: Serve & Enjoy!
- Serve cold or at room temperature.
- Store leftovers in an airtight container in the fridge for up to 1 week.
Notes
Serving Ideas & Pairings
🍓 With Fresh Fruit – Serve alongside strawberries, bananas, or raspberries.
☕ With Coffee or Tea – A perfect snack with a cup of coffee or chai tea.
🥜 With Extra Nut Butter – Drizzle peanut or almond butter on top before serving.
🍨 With Ice Cream – Serve warm with a scoop of vanilla ice cream for dessert.


Leave a Comment