

If you’re searching for a dessert that’s as stunning as it is simple, look no further than Strawberry Cheesecake Lush. This no-bake layered treat is creamy, cool, bursting with berry goodness, and 100% guaranteed to wow a crowd.
Also known as a “dessert lasagna,” this dish stacks layers of cookie crust, sweetened cream cheese, cheesecake pudding, fresh strawberries, and fluffy whipped topping into one unforgettable bite. It’s rich and refreshing, making it perfect for summer picnics, spring potlucks, holiday tables, or any time you want to impress without turning on the oven.
🍓 Why You’ll Love Strawberry Cheesecake Lush
✅ No baking required
✅ Quick to assemble with minimal prep
✅ Light and creamy texture that everyone loves
✅ Customizable with different fruits or crusts
✅ Great make-ahead dessert for holidays and gatherings
You Might Also Like:
- Loading posts...
This is the kind of dessert that disappears fast and has people going back for seconds—even after they’ve declared they’re full.
🛒 Ingredients – Simple Pantry Staples, Big Flavor
This luscious dessert starts with humble ingredients you likely already have on hand or can grab at any grocery store.
STRAWBERRY CHEESECAKE LUSH
- 1 package Golden Oreos (36 cookies)
- 6 tablespoons butter, melted
- 8 ounces softened cream cheese
- 1 cup powdered sugar
- 1 (16-ounce) container Cool Whip, divided
- 2 packages (3.4 ounces each) instant cheesecake pudding mix
- 3 cups milk
- 3½ cups sliced strawberries
🍪 Pro Tip: You can swap Golden Oreos with graham crackers or shortbread cookies for a different crust flavor.
👩🍳 Instructions – Layer by Layer Bliss
The beauty of this dessert is that each layer builds flavor and texture, resulting in a decadent and refreshing slice of heaven. Let’s walk through each layer.
Step 1: Make the Cookie Crust
Crush the entire package of Golden Oreos.
You can use a food processor for finely ground crumbs, or do it the old-fashioned way: place the cookies in a gallon-sized Ziplock bag and crush them with a rolling pin.
Transfer the crushed cookies to a large mixing bowl and stir in:
- 6 tablespoons of melted butter
Once well combined, press the cookie mixture firmly into a 9×13-inch pan to form a crust. Refrigerate while you prepare the rest.
🧊 Tip: Chilling the crust helps it firm up and hold its shape when serving.
Step 2: Prepare the Cream Cheese Layer
In a mixing bowl, beat together:
- 8 ounces softened cream cheese
- 1 cup powdered sugar
- 1 cup Cool Whip
Once smooth and creamy, spread this mixture over the chilled cookie crust using a spatula or offset knife.
Step 3: Make the Cheesecake Pudding Layer
In a separate bowl, whisk together:
- 2 packages of cheesecake pudding mix
- 3 cups cold milk
- 1 cup Cool Whip
Whisk until smooth and thickened (about 2–3 minutes), then spread over the cream cheese layer.
🥄 Note: Be sure the pudding is instant—not cook & serve—or it won’t set properly.
Step 4: Add the Strawberries
Layer 3½ cups of sliced strawberries evenly across the pudding layer.
You can arrange them decoratively or scatter them freely—either way, they add a bright, fresh burst of fruitiness to each bite.
Step 5: Top with Cool Whip
Spread the remaining Cool Whip (about 2½–3 cups) evenly over the strawberries to seal in all the layers. Smooth it out for a pretty presentation.
Step 6: Chill and Serve
Cover and refrigerate for at least 4 hours, or ideally overnight, to allow the layers to set.
Slice, serve chilled, and watch it disappear!
🕒 Recipe Summary
- Prep Time: 20 minutes
- Chill Time: 4+ hours
- Total Time: 4 hours 20 minutes
- Servings: 12–16 slices
- Difficulty Level: Easy
🍰 Serving Suggestions
This cake is delicious straight from the fridge, but you can also jazz it up with:
- A drizzle of strawberry or chocolate sauce
- Extra cookie crumbs sprinkled on top
- Fresh mint for a pop of color
- White chocolate shavings for a fancy twist
🔁 Make-Ahead & Storage
To Make Ahead:
This dessert is ideal for making a day in advance—the layers firm up beautifully and the flavors meld together.
To Store:
- Cover tightly with foil or plastic wrap.
- Store in the refrigerator for up to 4 days.
To Freeze:
Not recommended. The texture of the cream layers and pudding may become watery or grainy once thawed.
🔄 Flavor Variations
Switch things up by trying these fun twists:
- Blueberry Cheesecake Lush: Swap strawberries with blueberries or use a mix.
- Oreo Delight: Use chocolate Oreos and chocolate pudding for a chocolate lover’s dream.
- Lemon Berry Lush: Use lemon pudding mix and add raspberries or blackberries.
- Graham Cracker Base: Replace Oreos with crushed graham crackers for a tangier contrast.
🧁 The options are endless once you master the base layers.
💬 Real Reader Reviews
“This was gone in 10 minutes at our church potluck—everyone asked for the recipe!”
— Angela T.
“I make this every Easter with fresh-picked strawberries. So light, yet indulgent.”
— Kathy D.
“Kids and adults both loved it. I added a white chocolate drizzle on top—perfection!”
— Brian P.
📌 Final Thoughts – A No-Bake Wonder You’ll Make Again and Again
Strawberry Cheesecake Lush is everything a great dessert should be: quick to make, easy to serve, and impossible to resist. It’s the kind of treat that brings smiles, satisfies cravings, and adds a special touch to any meal or celebration.
Whether you’re making it for Mother’s Day, a backyard barbecue, or just a Wednesday night sweet fix, this dessert is a keeper.
So grab a package of Oreos and a basket of berries—you’re about to become everyone’s favorite dessert chef.
Print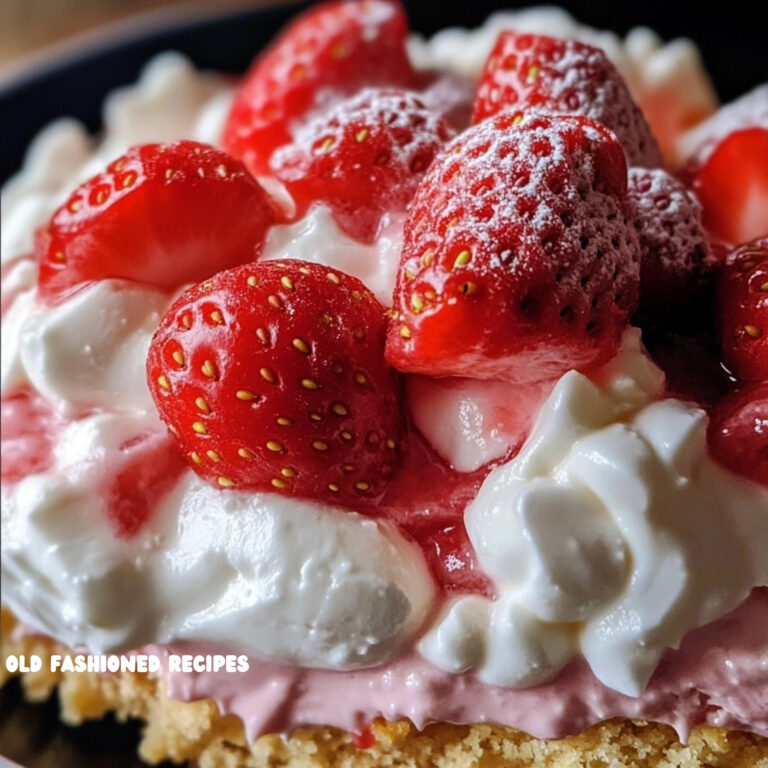
🍓 Strawberry Cheesecake Lush – A No-Bake Dream Dessert
This luscious dessert starts with humble ingredients you likely already have on hand or can grab at any grocery store.
Ingredients
STRAWBERRY CHEESECAKE LUSH
-
1 package Golden Oreos (36 cookies)
-
6 tablespoons butter, melted
-
8 ounces softened cream cheese
-
1 cup powdered sugar
-
1 (16-ounce) container Cool Whip, divided
-
2 packages (3.4 ounces each) instant cheesecake pudding mix
-
3 cups milk
-
3½ cups sliced strawberries
🍪 Pro Tip: You can swap Golden Oreos with graham crackers or shortbread cookies for a different crust flavor.
Instructions
Step 1: Make the Cookie Crust
Crush the entire package of Golden Oreos.
You can use a food processor for finely ground crumbs, or do it the old-fashioned way: place the cookies in a gallon-sized Ziplock bag and crush them with a rolling pin.
Transfer the crushed cookies to a large mixing bowl and stir in:
-
6 tablespoons of melted butter
Once well combined, press the cookie mixture firmly into a 9×13-inch pan to form a crust. Refrigerate while you prepare the rest.
🧊 Tip: Chilling the crust helps it firm up and hold its shape when serving.
Step 2: Prepare the Cream Cheese Layer
In a mixing bowl, beat together:
-
8 ounces softened cream cheese
-
1 cup powdered sugar
-
1 cup Cool Whip
Once smooth and creamy, spread this mixture over the chilled cookie crust using a spatula or offset knife.
Step 3: Make the Cheesecake Pudding Layer
In a separate bowl, whisk together:
-
2 packages of cheesecake pudding mix
-
3 cups cold milk
-
1 cup Cool Whip
Whisk until smooth and thickened (about 2–3 minutes), then spread over the cream cheese layer.
🥄 Note: Be sure the pudding is instant—not cook & serve—or it won’t set properly.
Step 4: Add the Strawberries
Layer 3½ cups of sliced strawberries evenly across the pudding layer.
You can arrange them decoratively or scatter them freely—either way, they add a bright, fresh burst of fruitiness to each bite.
Step 5: Top with Cool Whip
Spread the remaining Cool Whip (about 2½–3 cups) evenly over the strawberries to seal in all the layers. Smooth it out for a pretty presentation.
Step 6: Chill and Serve
Cover and refrigerate for at least 4 hours, or ideally overnight, to allow the layers to set.
Slice, serve chilled, and watch it disappear!
Notes
🕒 Recipe Summary
-
Prep Time: 20 minutes
-
Chill Time: 4+ hours
-
Total Time: 4 hours 20 minutes
-
Servings: 12–16 slices
-
Difficulty Level: Easy


Leave a Comment