
Soft, Chewy, Chocolate-Coated Little Squares of Happiness
There’s something undeniably special about homemade caramels. They feel like old-fashioned candy shop treasures: soft, chewy, buttery, and sweet, with just the right amount of richness. Wrap them in chocolate, sprinkle a little sea salt on top, and suddenly they go from simple treat to gourmet dessert-worthy candy. That’s exactly what you get with these Homemade Chocolate Caramels—and the best part? You don’t even need a candy thermometer. 🙌
This recipe uses the microwave to cook the caramel mixture, making the process much faster and more approachable than traditional stovetop caramel. You still get that deep, buttery caramel flavor, but without standing over a pot, nervously checking temperatures. Once the caramel is set, you dip each little square in silky melted chocolate and add a pinch of coarse sea salt for that trendy (and completely delicious) sweet–salty finish.
They’re perfect for:
You Might Also Like:
- Loading posts...
- Holiday candy platters 🎄
- Dessert boxes and edible gifts 🎁
- Party trays
- A little treat stash in the fridge for yourself 😏
Let’s take a closer look at what makes this recipe work so beautifully and walk through each step with extra details that help you nail it on the first try.
🧈 Ingredient Breakdown: What Each One Does
¼ cup butter
Butter is the soul of caramel. It adds richness, flavor, and that smooth, melt-in-your-mouth quality. Unsalted is usually best so you can control the salt with the topping.
½ cup sugar + ½ cup brown sugar
Using both white and brown sugar gives you the best of both worlds:
- Granulated sugar helps with structure and sweetness.
- Brown sugar adds deeper flavor and a subtle molasses note that makes the caramel taste extra cozy and rich.
½ cup light corn syrup
Corn syrup helps prevent the caramel from crystallizing and gives it that glossy, chewy texture instead of turning grainy. It’s a classic candy-making helper.
½ cup sweetened condensed milk
This is caramel gold. Sweetened condensed milk adds sweetness, thickness, and creaminess, helping you get that soft, chewy, true caramel texture.
For the coating:
3 cups milk chocolate chips
Milk chocolate keeps the coating sweet, creamy, and super snackable. It pairs perfectly with caramel. You could technically use dark chocolate for contrast in another batch, but your milk chocolate version is classic and widely loved.
2 teaspoons vegetable oil
This helps the chocolate melt smoothly and set with a slight sheen. It thins the chocolate a bit, making dipping easier and preventing thick, clumpy coating.
1 teaspoon coarse sea salt (for topping)
Totally optional, but honestly a game changer. The salt enhances the caramel and chocolate flavors, cuts through the sweetness, and adds a tiny crunch on top.
🍯 Step-by-Step: Making the Caramel
Your method is simple and brilliant. Here’s a deeper look at what’s going on at each stage.
1️⃣ Combine Ingredients in a Microwave-Safe Bowl
In a microwave-safe bowl, combine the butter, sugar, brown sugar, corn syrup, and sweetened condensed milk. Stir until smooth.
Use a large microwave-safe bowl because the mixture will bubble up as it heats. Stirring everything before microwaving makes sure the ingredients are evenly distributed, helping the caramel cook more uniformly.
2️⃣ Microwave in Intervals
Microwave the mixture for a total of 6 minutes, pausing every 2 minutes to stir. Continue until the caramel mixture has a smooth consistency.
Microwaving in 2-minute intervals is smart because:
- It prevents burning.
- It gives you a chance to stir, which helps everything heat evenly.
- You can monitor the color and texture.
By the end, the caramel should look thicker, smoother, and slightly darker in color. It will also be very hot, so handle carefully.
🧱 Setting the Caramel
3️⃣ Pour into a 9 x 9-inch Pan
Once the caramel is cooked, pour it into a 9 x 9-inch baking pan that has been sprayed with nonstick cooking spray. Allow the caramel to cool completely.
Spraying the pan with nonstick spray makes it easier to remove the caramel later. You can also line it with parchment paper if you like neat edges, but your method works perfectly as is.
Letting the caramel cool completely is crucial—if it’s still warm, it will be too soft to cut into clean squares.
🔪 Cutting and Preparing for Dipping
4️⃣ Cut into Squares
Once cooled, cut the caramel into squares. Arrange them on a wax-lined baking sheet and ensure they are fully set before dipping.
Once cooled and firm, you can slice the caramel into whatever size you like:
- Small bite-sized squares
- Bigger “two-bite” pieces
Arranging them on a wax-lined sheet makes dipping smoother and prevents sticking. Letting them sit for a bit after cutting also helps them firm up even more.
🍫 Melting the Chocolate
5️⃣ Melt the Chocolate with Oil
In a separate microwave-safe bowl, melt the chocolate chips and vegetable oil in 30-second intervals, stirring in between, until the mixture is smooth and fully melted.
Short bursts are key for chocolate—too long in the microwave and it burns. Stirring in between helps the remaining unmelted chips finish melting from residual heat, keeping everything silky.
The vegetable oil gives the chocolate:
- A smoother texture
- A slightly thinner consistency (easier for dipping)
- A pretty finish once set
🥢 Dipping the Caramels
6️⃣ Dip the Caramels
Dip each caramel square in the melted chocolate, then place on a baking sheet lined with wax paper. Repeat until all caramels are coated in chocolate.
You can use a fork or a dipping tool to coat each caramel fully. Let excess chocolate drip off back into the bowl before placing it on the wax paper—this helps avoid big chocolate puddles underneath.
Gently sliding the caramel off the fork with a toothpick or another fork works well.
🧂 Adding the Finishing Touch
7️⃣ Sprinkle with Sea Salt
Optionally, sprinkle coarse sea salt on top of each chocolate-coated caramel.
Add the salt before the chocolate sets, so it sticks. You don’t need much—just a few grains on each piece. It makes them taste like something from an upscale chocolate shop. ✨
❄️ Letting the Chocolate Set
8️⃣ Set and Serve
Allow the chocolate to set completely before serving or storing. Enjoy!
You can let them set at room temperature, or pop the tray into the fridge to speed things up. Once set, the chocolate should be firm to the touch, and the caramel inside should be soft and chewy.
Store them in an airtight container:
- At room temp if it’s cool and dry
- In the fridge if your kitchen is warm
They also make fantastic gift-box candies!
🍬 Variations You Can Try Later (Optional Ideas)
If you ever want to play with flavors in future batches, here are some fun twists:
- Use dark chocolate chips for a richer flavor.
- Add a tiny bit of espresso powder to the chocolate for mocha caramels.
- Mix chopped nuts into the melted chocolate for extra crunch.
- Dip only half the caramel in chocolate for a “half-dipped” look.
But your original version is a classic, well-loved combo just as it is. 🤎
Print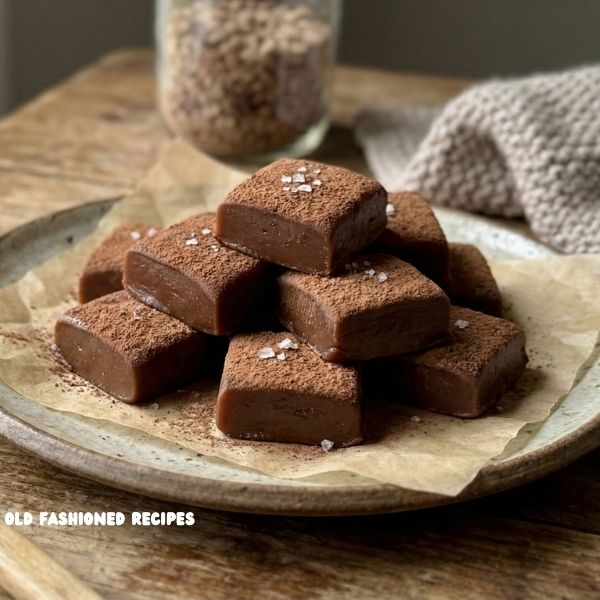
Homemade Chocolate Caramels
There’s something timeless about the combination of chocolate and caramel. Each bite is a delicious blend of creamy caramel and velvety chocolate that melts in your mouth, leaving a hint of sweetness and just a touch of salt. If you’re a fan of decadent treats and are looking to bring the joy of confectionery into your own kitchen, this recipe for homemade chocolate caramels is the perfect way to indulge. Made with just a few simple ingredients, these caramels are surprisingly easy to create, and you’ll end up with a batch that rivals anything you could buy in a store.
Ingredients
-
- ¼ cup butter
-
- ½ cup sugar
-
- ½ cup brown sugar
-
- ½ cup light corn syrup
-
- ½ cup sweetened condensed milk
-
- 3 cups milk chocolate chips
-
- 2 teaspoons vegetable oil
-
- 1 teaspoon coarse sea salt (for topping)
Instructions
-
- In a microwave-safe bowl, combine the butter, sugar, brown sugar, corn syrup, and sweetened condensed milk. Stir until smooth.
-
- Microwave the mixture for a total of 6 minutes, pausing every 2 minutes to stir. Continue until the caramel mixture has a smooth consistency.
-
- Once the caramel is cooked, pour it into a 9 x 9-inch baking pan that has been sprayed with nonstick cooking spray. Allow the caramel to cool completely.
-
- Once cooled, cut the caramel into squares. Arrange them on a wax-lined baking sheet and ensure they are fully set before dipping.
-
- In a separate microwave-safe bowl, melt the chocolate chips and vegetable oil in 30-second intervals, stirring in between, until the mixture is smooth and fully melted.
-
- Dip each caramel square in the melted chocolate, then place on a baking sheet lined with wax paper. Repeat until all caramels are coated in chocolate.
-
- Optionally, sprinkle coarse sea salt on top of each chocolate-coated caramel.
-
- Allow the chocolate to set completely before serving or storing. Enjoy!
Notes
This recipe is perfect for a fun kitchen project or creating beautiful, handmade gifts for family and friends!


Leave a Comment